–
12
–
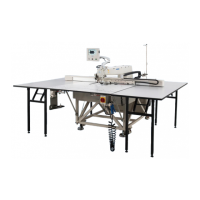
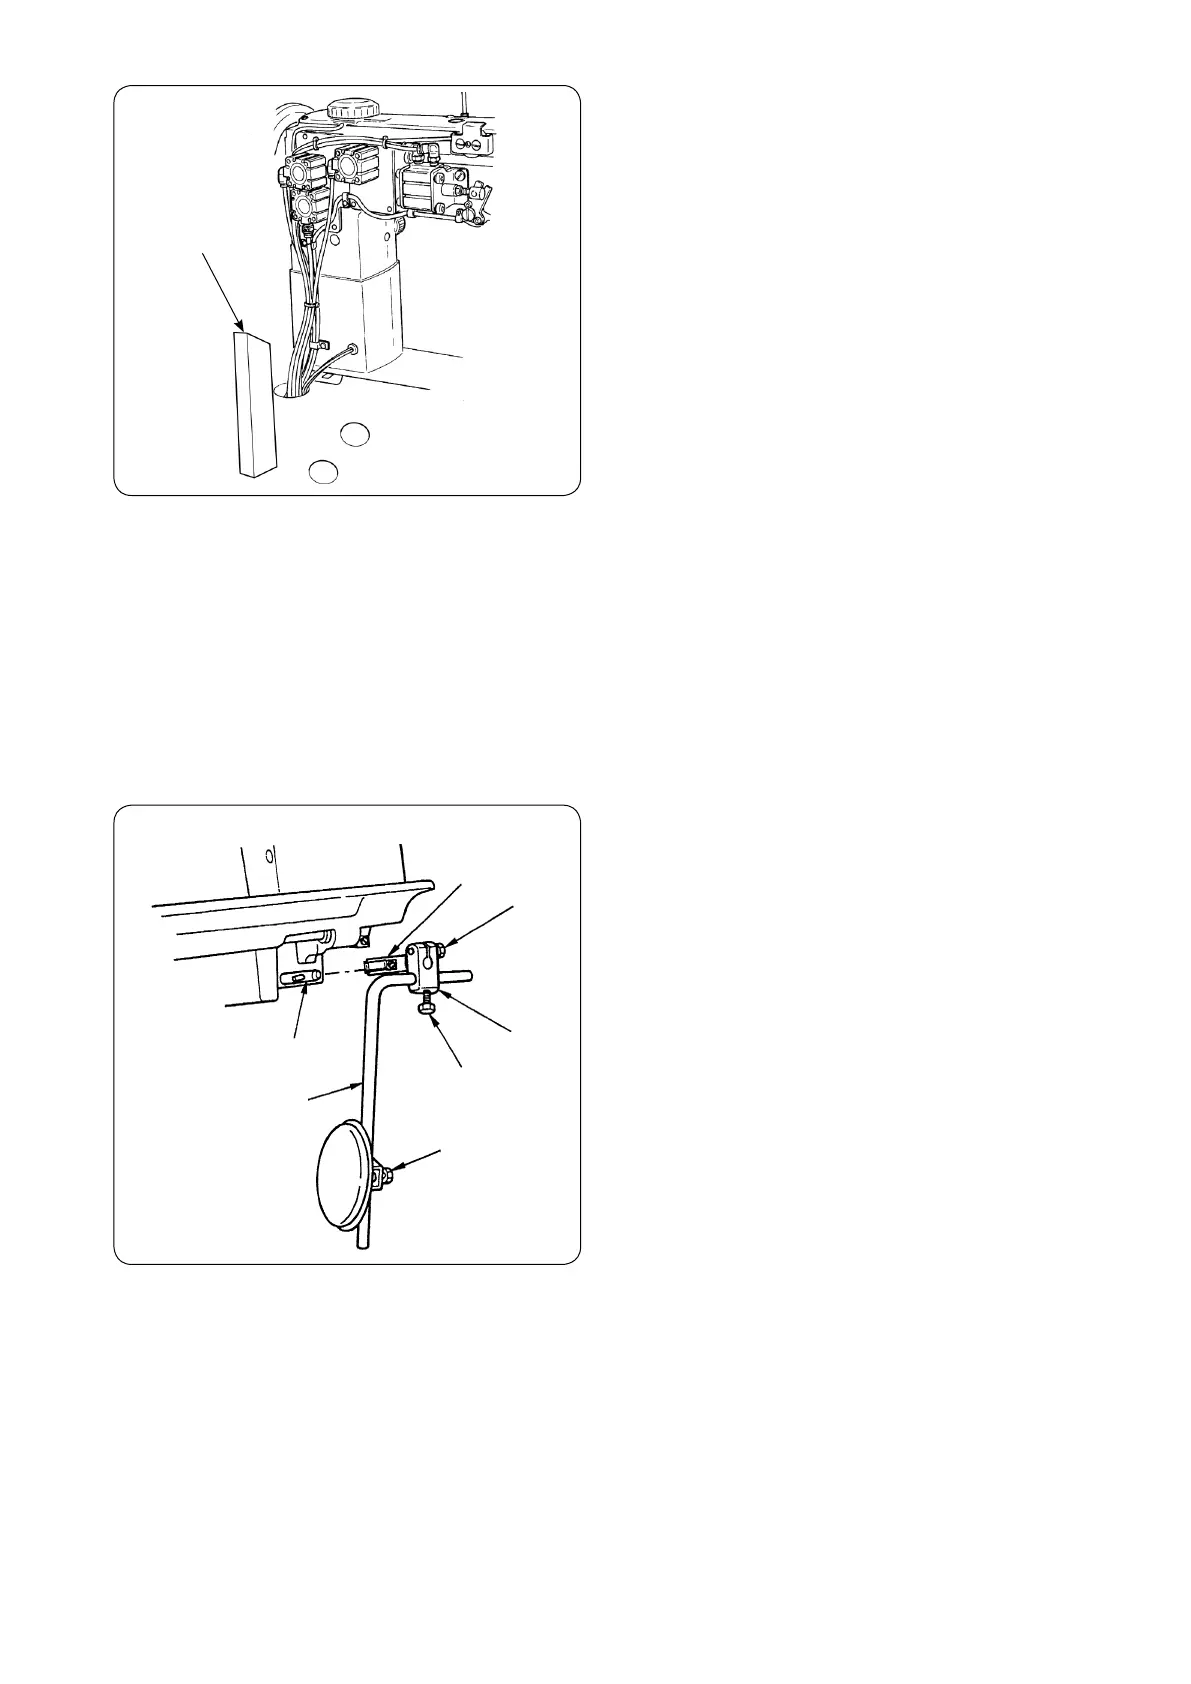
10) 頭部支え棒
1
をテーブルに最後までしっかり
取り付けてください。
10) Securely attach head support rod
1
to the table until
it goes no further.
10) Die Kopfstütze
1
bis zum Anschlag am Tisch befesti-
gen.
10) Fixer solidement la tige de support de tête
1
sur la
table en l'enfonçant complètement.
10) Fije fi rmemente la varilla de soporte
1
del cabezal a
la mesa hasta que no pueda avanzar más.
10) Attaccare sicuramente l'asta di sostegno della testa
1
al tavolo inserendola il più possibile.
Ɣ౯ϣࠖᆭӱۍ
1
ীী׀τሔ֥ࠖขഏè
1
1
2
5
4
3
6
7
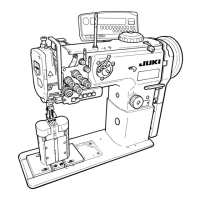
• PLC-1710, PLC-1760, PLC-1760L
1) ひざ上げレバー軸
4
の向きに合わせてひざ当
て継手
1
、ひざ上げ縦軸取付腕
2
、ひざ当て
レバー
3
を組み付けます。
2) 止めねじ
5
、
6
、
7
でパッドの向きを合わせ
ます。
1) Adjust knee pad joint
1
, knee lifter vertical shaft in-
stalling arm
2
and knee pad lever
3
to the direction of
knee lifter lever shaft
4
and assemble these compo-
nents.
2) Adjust the direction of the pad with setscrews
5
,
6
and
7
.
1) Kniepolsterverbindung
1
, Knielifter-Vertikalschaft-
Montagearm
2
und Kniepolsterhebel
3
auf die
Richtung des Knielifter-Hebelschafts
4
ausrichten und
diese Teile zusammenmontieren.
2) Die Richtung des Polsters mit den Feststellschrauben
5
,
6
und
7
einstellen.
3.ひざ上げレバーの取り付け (PLC-1710,PLC-1760,PLC-1760L)/
INSTALLING THE KNEE LIFTER LEVER (PLC-1710, PLC-1760, PLC-1760L) /
INSTALLIEREN DES KNIELIFTERHEBELS (PLC-1710, PLC-1760, PLC-1760L) /
POSE DE LA GENOUILLERE (PLC-1710, PLC-1760, PLC-1760L) /
PARA INSTALAR LA PALANCA ELEVADORA A RODILLA (PLC-1710, PLC-1760, PLC-1760L) /
INSTALLAZIONE DELLA LEVA ALZAPIEDINO A GINOCCHIO(PLC-1710, PLC-1760, PLC-1760L) /
膝动提升杆的安装(PLC-1710, PLC-1760, PLC-1760L)
1) Régler l’accouplement de genouillère
1
, le bras de montage de l’axe vertical de genouillère
2
et le levier de genouil-
lère
3
dans la direction de l’axe de levier de genouillère
4
et assembler ces pièces.
2) Régler l’orientation de la genouillère avec les vis de fi xation
5
,
6
et
7
.
1) Ajuste la unión
1
de la almohadilla de la rodilla, el brazo
2
de instalación del eje vertical del elevador de rodilla y la
palanca
3
de almohadilla de la rodilla en la dicción del eje
4
de la palanca elevadora de rodilla y ensamble estos
componentes.
2) Ajuste la dirección de la almohadilla con los tornillos
5
,
6
y
7
.
1) Regolare il giunto del paraginocchio
1
, il braccio di fi ssaggio dell’albero verticale dell’alzapiedino a ginocchio
2
e la
leva del paraginocchio
3
rispetto alla direzione dell’albero della leva alzapiedino
4
e montare questi componenti.
2) Regolare la direzione del paraginocchio con le viti di fi ssaggio
5
,
6
e
7
.
ۻ༙ഽۍᇧ
4
֬ӛས τሔ༙ࢫ
1
༙ഽቁᇧτሔ౾Ѫ
2
༙ۍ
3
è
Ⴏܬઋර
567
ןᆣ֬١སè
 Loading...