17
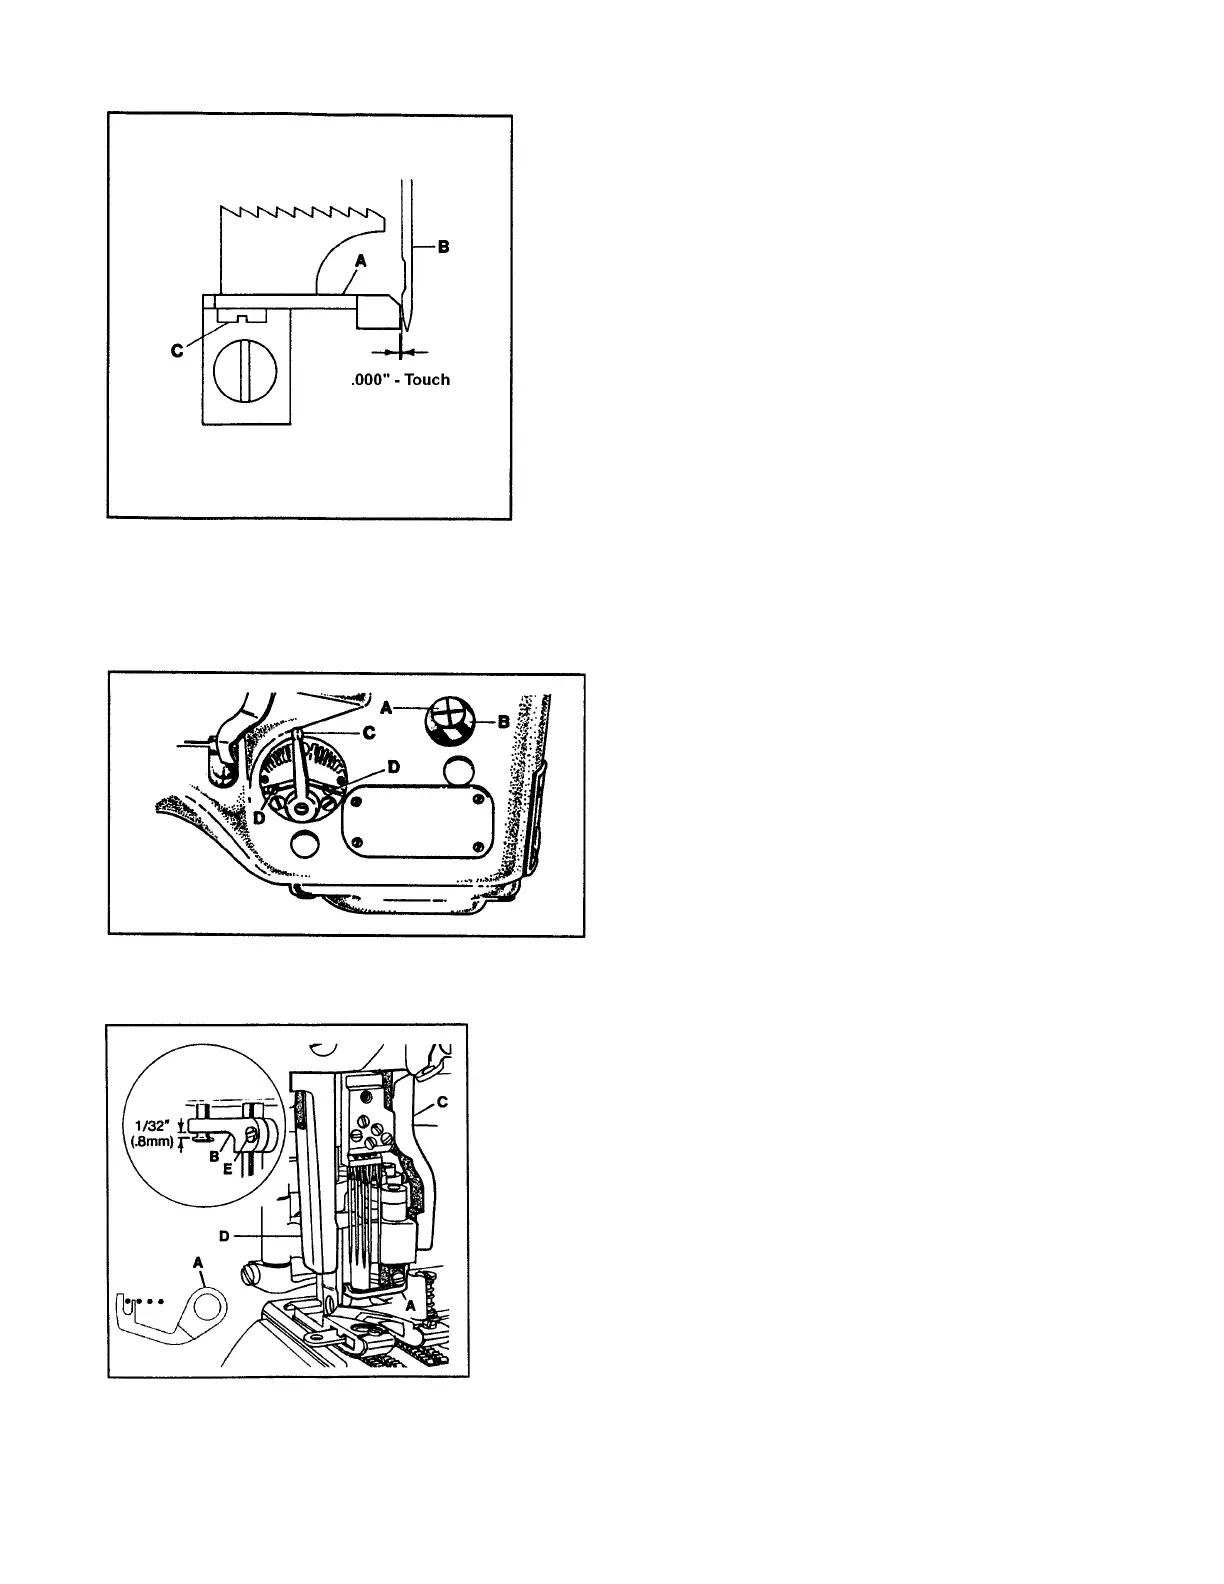
SETTING THE REAR NEEDLE GUARD
Set rear needle guard (A, Fig. 18) so it touches the first (left)
needle (B) but does not deflect. Check the guard position to
the other needles to avoid pinching. Loosen screw (C) and
reposition guard (A) as necessary. Tighten screw (C).
SETTING THE STITCH LENGTH
This machine is designed to sew 10 to 16 stitches per inch. The
normal factory setting is 12 stitches per inch. To change the
stitch length remove the plug screw located directly above
the cylinder side cover. Loosen screw (A, Fig. 19) in lever (B)
and move up to increase the stitch length or down to de-
crease the stitch length. Tighten screw (A) and replace the
plug screw.
CAUTION: If the stitch length is changed the rear needle
guard setting must be checked and readjusted
if necessary. Failure to do so may result in
needle and/or parts breakage.
CAUTION: When making stitch length adjustment do not
exceed maximum recomended stitch length
due to possible part damage.
DIFFERENTIAL FEED CONTROL
The amount of differential feed is controlled by lever
(C, Fig. 19). The adjusting plate is numbered from 1 to
9. When the lever is set from numbers 1 to 4 reverse
differential or stretching occurs. The numbers from 4
to 5 produce equal feed stitching while numbers 5 to
9 produce a gathering stitch. The two stop screws (D)
can be set to limit the movement of lever (C) or lock
the lever in one position.
SETTING THE PRESSER FOOT
Remove the presser bar regulating screw and the presser spring.
Raise the needle bar to its highest position and remove the re-
tainer. As the foot is slipped under the needles, swing the upper
knife into the opening on the right side of the foot and slide the
linkage onto the hook driving sleeve. Insert the presser bar
through the linkage and into the presser foot shank. Tighten
presser foot screw. With the presser bar inserted properly into the
presser foot, position the foot left to right so the finger of cover
thread carrier (A, Fig. 20) is between the first and second needles.
Set presser bar guide (B, Fig. 20 Inset) so foot will not move. Set
right presser foot guide (C) and left presser foot guide (D) to
maintain setting. Loosen presser bar guide screw (E Fig. 20 Inset)
and check to see that foot has vertical freedom with no right to left
play, no bind. Put the needle bar is in its lowest position, and set
1/32"(0.8mm) above head of presser bar guide stud. Tighten
presser bar guide screw (E).
FIG. 18
FIG. 19
FIG. 20
 Loading...