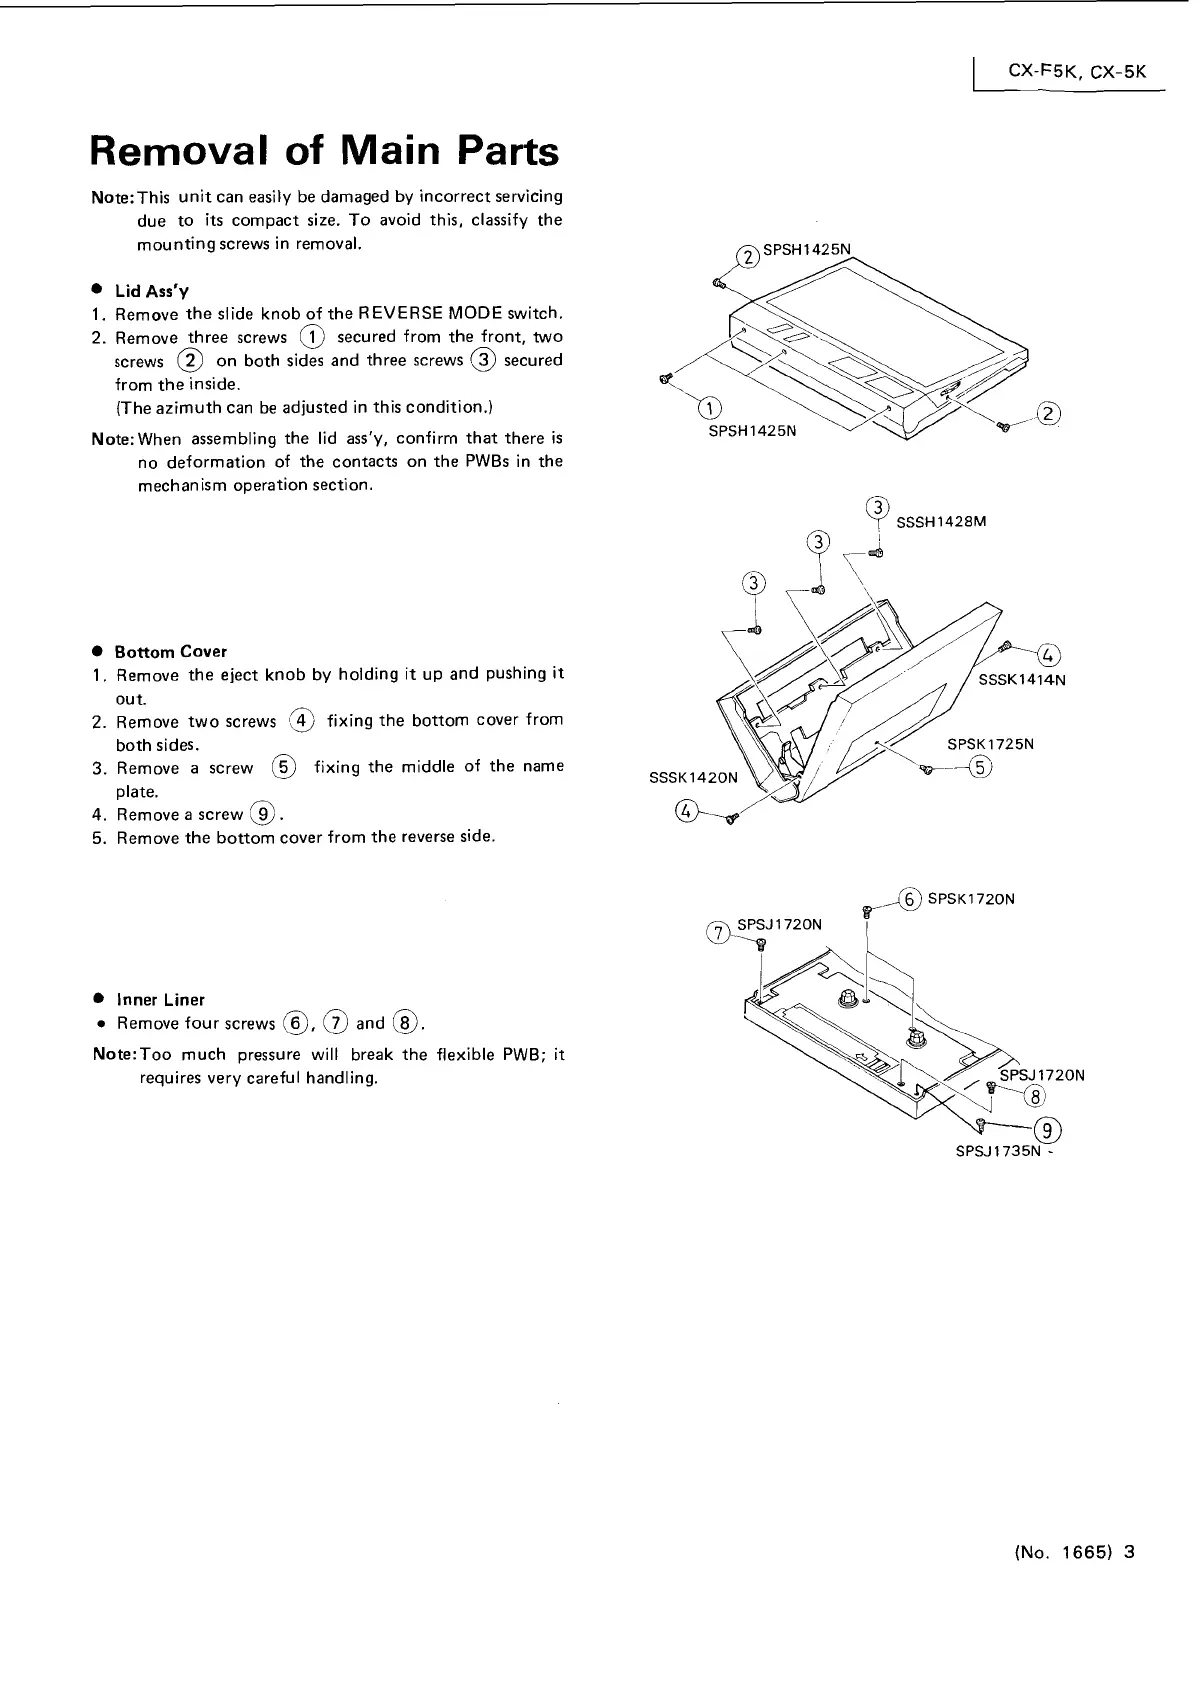
Removal of Main Parts
Note:This unit can easily be damaged by incorrect servicing
due to
its
compact size. To avoid this, classify the
mounting screws in removal.
Lid
Ass'y
1.
Remove the slide knob of the REVERSE MODE switch.
2.
Remove three screws
@
secured from the front, two
screws
@
on both sides and three screws
@
secured
from the inside.
(The azimuth can be adjusted in this condition.)
Note: When assembling the lid ass'y, confirm that there is
no deformation of the contacts on the
PWBs in the
mechanism operation section.
Bottom Cover
1.
Remove the eject knob by holding it up and pushing it
out.
2.
Remove two screws
13
fixing the bottom cover from
both sides.
3.
Remove a screw
@
fixing the middle of the name
plate.
4.
Remove a screw
@.
5.
Remove the bottom cover from the reverse side.
Inner Liner
Remove four screws
@,
@
and
@.
Note:Too much pressure will break the flexible PWB; it
requires very careful handling.
(No. 1665)
3
 Loading...