Masterpage:Right+
EN 83
Filename [DR-MV1SE_10Subsidiary.fm]
Page 83 April 21, 2004 10:36 am
SUBSIDIARY SETTINGS
7 View the Confirmation screen.
“SCAN COMPLETED” is displayed on the TV screen. Press “OK”.
8 Press SET UP to complete the setting.
● When Auto Channel Set is completed, “PLEASE WAIT” will be
displayed for about 90 seconds, since channel data is exchanged
between the DVD deck and the VHS deck. No operations will be done
during this time.
● Using the Confirmation screen, you can skip or add channel
positions, enter station names and perform other operations. Refer to
pages 83 – 84 for the procedures.
● Depending on reception conditions, the stations may not be stored in
order, and the station names may not be stored correctly.
● For information on scrambled broadcasts, refer to “When Receiving A
Scrambled Broadcast (DVD Deck Only)” (墌 pg. 84).
NOTES:
● Fine tuning is performed automatically during Auto Channel Set. If
you want to perform tuning manually, refer to “Fine-Tuning Channels
Already Stored” (墌 pg. 84).
● If you perform Auto Channel Set when the aerial cable is not
connected properly, “SCAN COMPLETED –NO SIGNAL–” appears
on the TV screen in step 7. In such a case, make sure of the aerial
connection and press ENTER; Auto Channel Set will start again.
● If no sound accompanies the picture or the audio sounds unnatural
on some channels that have been stored by Auto Set Up, the TV
system setting for those channels may be incorrect. Select the
appropriate TV system for those channels. (墌 pg. 84,
“INFORMATION”)
Manual Channel Set
Store channels that were not stored during Auto Set Up
(墌 pg. 17), Preset Download (墌 pg. 18) or Auto Channel Set
(墌 pg. 82).
1 Press SET UP to access the Main Menu screen.
2 Press we to select “INITIAL SET UP”, then press ENTER.
3 Press we to select “MANUAL CH SET”, then press ENTER.
The Confirmation screen appears.
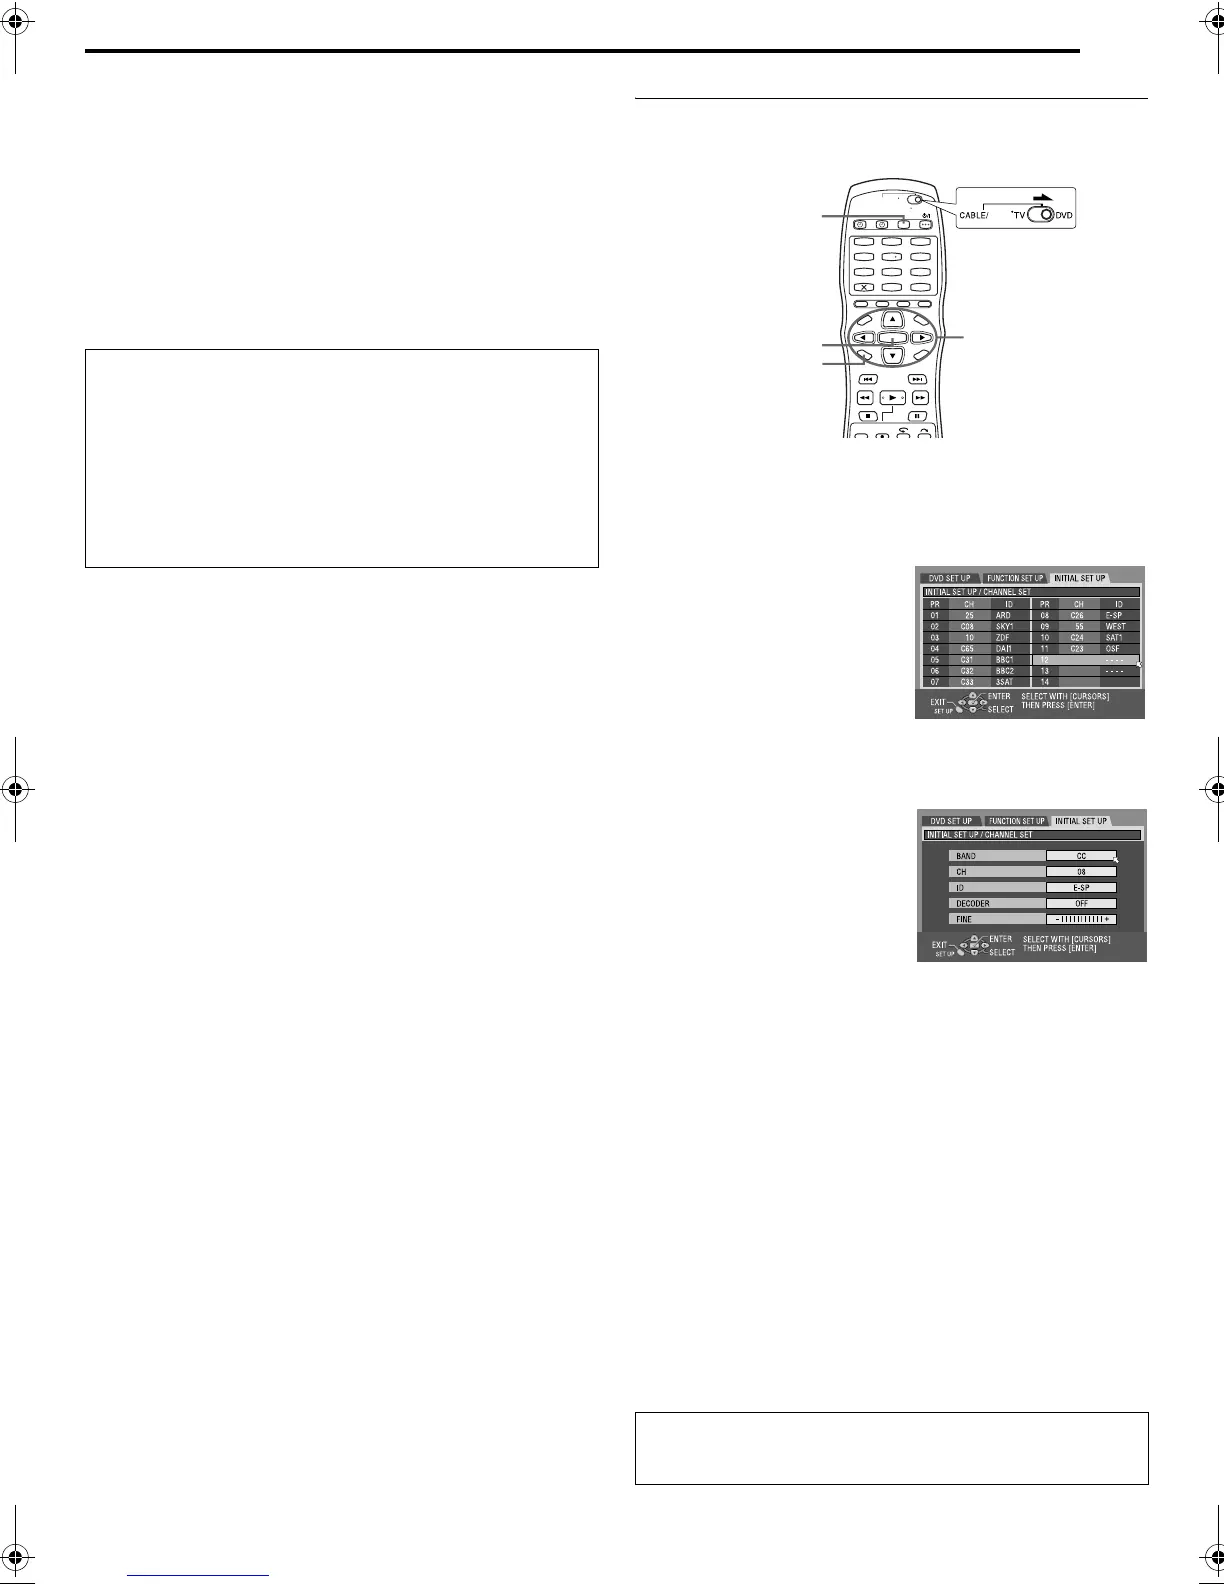
4 Press rt w e to select a
blank position in which you want to
store a channel, then press
ENTER twice. The Manual
Channel Set screen appears.
5 Press rt to select “BAND”,
then press ENTER.
6 Press rt to change the band
between CH (regular) and CC
(cable), then press ENTER.
7 Press rt to select “CH”, then
press ENTER.
8 Press rt to input the channel
number you want to store.
● To enter the registered station
name (
墌 pg. 99), press rt to
select “ID”, then press ENTER. Press rt.
● For fine tuning adjustment, press rt to select “FINE”, then press
ENTER. Press rt to perform fine-tuning.
● When storing a channel that sends scrambled broadcasts, press rt
to select “DECODER”, then press ENTER. Press rt to set
“DECODER” to “ON” (“OFF” is the default setting).
● When “L-2 SELECT” is set to “VIDEO”, “S-VIDEO”, “SAT VIDEO” or
“SAT S-VIDEO”, the “DECODER” setting cannot be changed.
(墌 pg. 72)
9 Press ENTER to enter new channel information. The
Confirmation screen appears.
● Repeat steps 4 – 9 as necessary.
10 Press SET UP to close the Confirmation screen.
● When Auto Channel Set is completed, “PLEASE WAIT” will be
displayed for about 90 seconds, since channel data is exchanged
between the DVD deck and the VHS deck. No operations will be done
during this time.
● To change positions, see “Change Station Channel Position”
(墌 pg. 84).
● If you wish to set station names other than the ones registered in your
unit, see “Set Stations (B)” (墌 pg. 84).
IMPORTANT:
● In certain reception conditions, station names may not be stored
correctly, and Auto Guide Program Number Set may not work
properly. When the Guide Programme numbers are not set
properly, the programme that you do not intended to record will be
timer-recorded by the SHOWVIEW system of the unit. When
programming the timer using the SHOWVIEW system, be sure to
check the desired channel is selected correctly. (墌 pg. 43, 54)
● Your unit memorises all receivable stations even if reception of
some of them is poor. You can delete those stations with an
unacceptable picture from the list. (墌 pg. 84, “Delete A Channel”)
TTENTION:
Guide Program numbers are not set when channels are stored
manually. (墌 pg. 82, “S
HOWVIEW
TM
System Setup”)
1
4
7
2
5
8
0
3
6
9
VCR/DVD
rtw e
ENTER
SET UP
SAT
(Example) To store in position 12.
The programme currently
received on the selected channel
position appears behind the
confirmation screen.
DR-MV1SE_10Subsidiary.fm Page 83 Wednesday, April 21, 2004 10:36 AM
 Loading...