2
Signal cord /
*
1
Extension lead /
*
1
Remote lead /
Rear ground terminal /
10 A fuse /
10 A
Antenna terminal /
*
1
Not supplied for this unit.
*
2
Firmly attach the ground wire to the metallic body or to the chassis of the car—to the place uncoated
with paint.
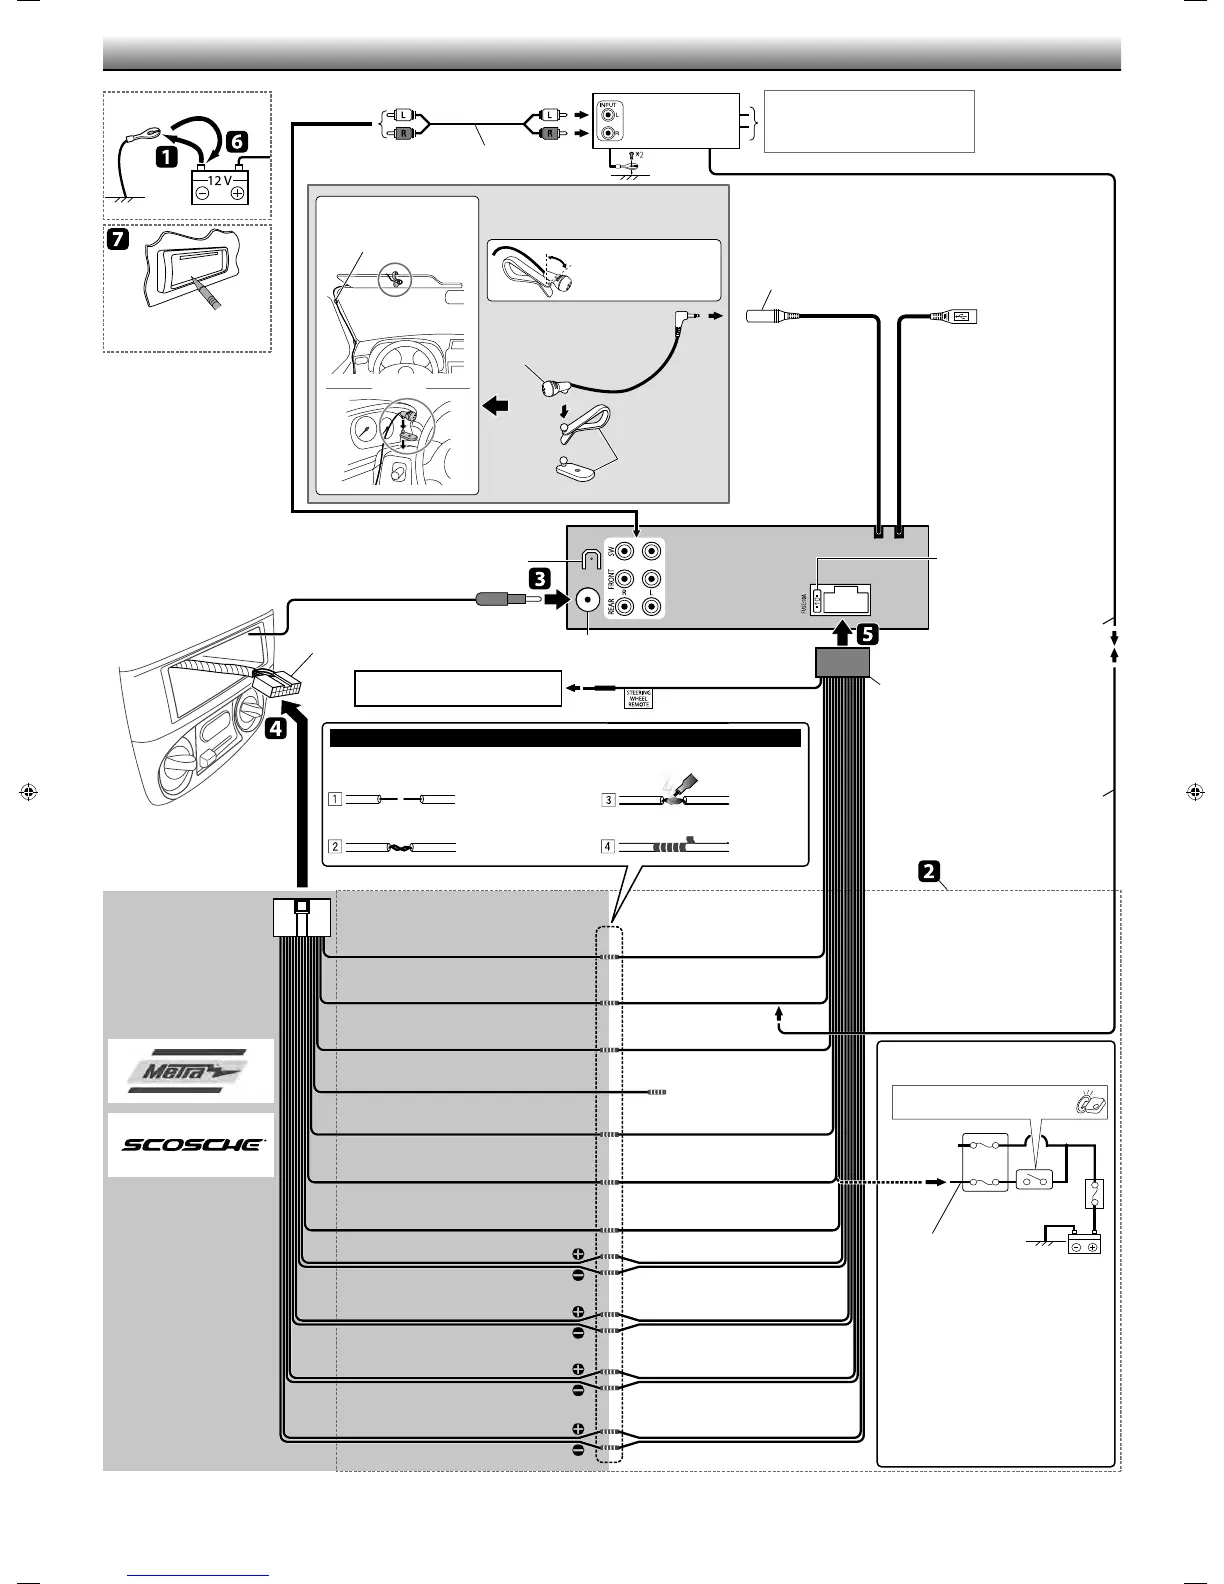
ELECTRICAL CONNECTIONS /
Reset the unit. /
JVC Amplifier /
JVC
E
Power cord /
Factory wiring harness (vehicle) /
()
SW : To subwoofer /
FRONT : To front speakers /
REAR : To rear speakers /
Remote adapter / *
1
Light blue (yellow stripe) /
(
)
MIC
(Microphone input terminal /
)
(Not used /
)
Insulate to prevent short circuit /
*
1
*
2
—
USB cable (approx. 1.2 m) /
USB ( 1.2 .)
Caution /
Join the same color leads together. /
To join the open-ends of the leads / :
Strip lead ends /
Twist ends together /
Solder /
Tape /
Vehicle-specific Wiring Harness
(separately purchased) /
(
)
For your reference /
:
Metra Electronics:
www.metraonline.com
Scosche Industries:
www.scosche.com
Recommended connection /
Amp Turn-on (200 mA max.) /
( 200 mA)
12 V Ignition Switch /
12 V
12 V Battery /
12 V
Ground /
Illumination /
Brown /
: Telephone Muting /
Automatic antenna (250 mA max.) /
( 250 mA)
Front speaker (left) /
()
Front speaker (right) / ()
Rear speaker (left) /
()
Rear speaker (right) /
()
Black /
Blue /
Yellow /
Red /
Orange (white stripe) /
(
)
Blue (white stripe) /
(
)
White /
White (black stripe) /
(
)
Gray /
Gray (black stripe) /
(
)
Green /
Green (black stripe) /
(
)
Purple /
Purple (black stripe) /
(
)
Fuse block /
Ignition switch /
If your vehicle factory wiring harness does not
have “12 V ignition switch” lead, connect the
red lead of the supplied power cord,
E
, to the
vehicle fuse block (through a separate red lead
provided with the fuse tap). /
“
12 V”
E
(
)
Power cannot be turned on? /
?
Separate red lead /
Connecting the microphone unit /
or /
or /
G
Microphone /
H
Microphone clips /
Adjust the angle /
Secure using cord cramps *
1
if
necessary / *
1
 Loading...