4
ENGLISH
Data Size: B6L (182 mm x 128 mm)
Book Size: B6L (182 mm x 128 mm)
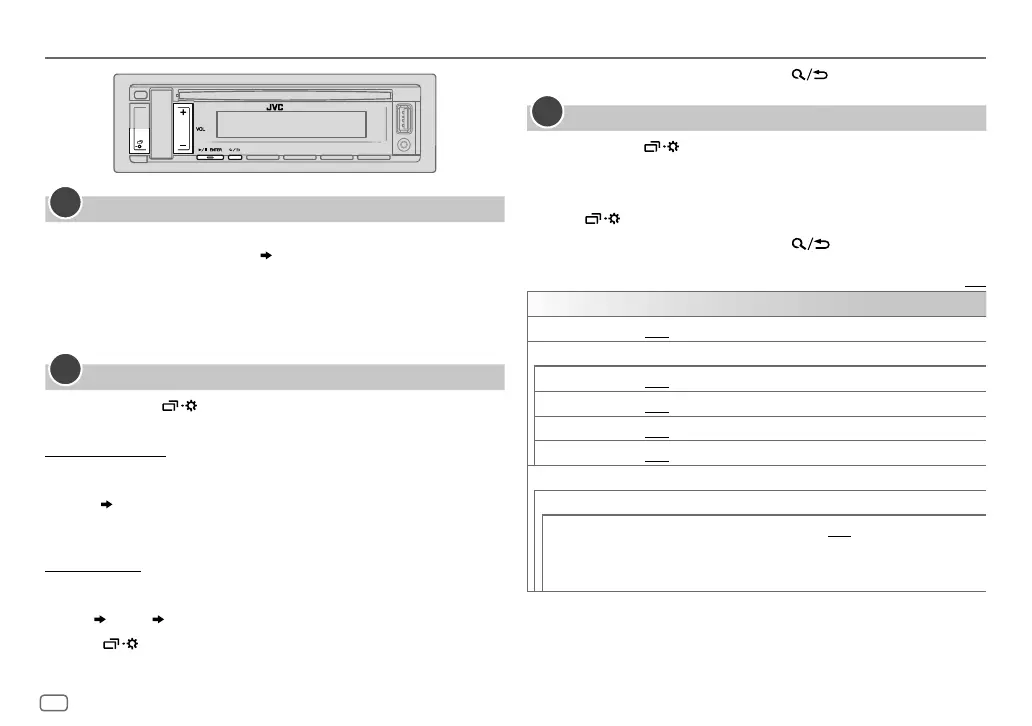
GETTING STARTED
Cancel the demonstration
When you turn on the power for the first time (or after you reset the unit),
the display shows: “CANCEL DEMO”
“PRESS ENTER”
1 Press * ENTER.
[YES]
is selected for the initial setup.
2 Press * ENTER again.
“DEMO OFF” appears.
Set the clock and date
1
Press and hold .
2 Press VOL +/– to select
[CLOCK]
, then press * ENTER.
To adjust the clock
3 Press VOL +/– to select
[CLOCKADJUST]
, then press * ENTER.
4 Press VOL +/– to make the settings, then press * ENTER.
Hour Minute
5 Press VOL +/– to select
[CLOCK FORMAT]
, then press * ENTER.
6 Press VOL +/– to select
[12H]
or
[24H]
, then press * ENTER.
To set the date
7 Press VOL +/– to select
[DATESET]
, then press * ENTER.
8 Press VOL +/– to make the settings, then press * ENTER.
Day Month Year
9 Press to exit.
1
2
To return to the previous setting item, press .
Set the basic settings
1
Press and hold .
2 Press VOL +/– to select an item (see the following table), then press
* ENTER.
3 Repeat step 2 until the desired item is selected or activated.
4 Press to exit.
To return to the previous setting item, press
.
Default: [XX]
[SYSTEM]
[KEY BEEP]
[ON]: Activates the keypress tone. ; [OFF]: Deactivates.
[SOURCE SELECT]
[AM SRC]*
[ON]: Enables AM in source selection. ; [OFF]: Disables. (Page 5)
[SW1 SRC]*
[ON]: Enables SW1 in source selection. ; [OFF]: Disables. (Page 5)
[SW2 SRC]*
[ON]: Enables SW2 in source selection. ; [OFF]: Disables. (Page 5)
[BUILT-IN AUX]*
[ON]: Enables AUX in source selection. ; [OFF]: Disables. (Page 7)
[F/W UPDATE]
[UPDATE SYSTEM]
[F/W UP xxxx]
[YES]: Starts upgrading the firmware. ; [NO]: Cancels (upgrading is not
activated).
For details on how to update the firmware, visit
<http://www.jvc.net/cs/car/>.
* Not displayed when the corresponding source is selected.
3
JS_JVC_KD_T408_M_EN_1.indd 4JS_JVC_KD_T408_M_EN_1.indd 4 6/7/2018 11:43:35 AM6/7/2018 11:43:35 AM
 Loading...