EasyManua.ls Logo

JVC LT-42E55W User Manual

JVC LT-42E55W
65 pages
To Next Page IconTo Next Page
To Previous Page IconTo Previous Page
Page #29 background image
29
5
Customising TV Settings
GB
3. A CI Information Main menu will pop up. Press the buttons to
display the module information, smart card information, language,
software download. Press the OK button to confirm.
4. Press the EXIT button to return to the previous menu. Press the EXIT
button again to exit the menu.
CI Information
Main menu
Press [OK] to select, or [EXIT] to quit
Module information
Smart card information
Language
Software Download
This screen is for illustration only.
4. Press the BACK button to return to the previous menu or press the
MENU button to return to the main menu.
5. Press the EXIT button to exit the menu.
3. Press the
buttons to select Software Update(OAD) and then press
the OK button to select On.
Software Update (USB)
Occasionally there may be a need to issue a new version of the software for your TV. This can be installed using a USB thumb
drive. To check for the availability of new software and to download the file, please call our Support Centre:
Norway: 815 56 602 Sweden: 0770 474 700 Denmark: 70 27 87 37 Finland: 020 - 500 6550
Software Update (Over Air Download) (DVB-T)
The TV auto detects the latest firmware through the DTV signal and allows you to accept or refuse the firmware upgrade service.
This function may not be available in some countries. Please follow the steps below if applicable.
1. Press the MENU button and then press the
buttons to select the
CHANNEL menu and then press the OK button.
2. Press the
buttons to select Software Update and then press the OK
button to confirm.
CHANNEL
PICTURE
SOUND
TIME
OPTION
LOCK
EXIT
EXIT
Auto Tuning
DTV Manual Tuning
ATV Manual Tuning
Signal Information
CI Information
Software Update
Channel Edit
CHANNEL
Software Update (USB)
Software Update (OAD) Off
OAD Tuning
CHANNELCHANNEL
The TV will auto detect the latest firmware through the DTV
signal when you switch the TV on or off each time.
To save energy, you should always turn the Software
Update(OAD) function back to "OFF".

Table of Contents

Question and Answer IconNeed help?

Do you have a question about the JVC LT-42E55W and is the answer not in the manual?
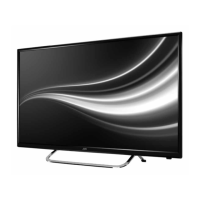
JVC LT-42E55W Specifications

General IconGeneral
Screen Size42 inches
Display TypeLED
Display TechnologyLCD
Aspect Ratio16:9
HDMI Ports3
USB Ports1
Smart TVNo
Refresh Rate60Hz
Built-in Wi-FiNo
Resolution1920 x 1080

Summary

Chapter 1 Safety Warnings

Screen Burn

A characteristic of Plasma and TV Panels that displaying the same image for a long time may cause a permanent after-image.

Earphones

Listening to loud sounds for prolonged periods of time may permanently damage your hearing.

Chapter 2 Preparation

Installing Batteries in the Remote Control

Step-by-step instructions for installing batteries into the remote control.

Remote Control Operation Range

Specifies the optimal distance and angle for operating the remote control.

Chapter 3 Connections

Connecting AV Device Using Composite Cable

Instructions for connecting an AV device using a composite cable.

Connecting Audio Receiver Using Optical Cable

Instructions for connecting an audio receiver using an optical cable for better sound quality.

Chapter 4 Initial Setup

Target Region Setting

Allows selection of the correct regional transmission for local news services.

Selecting the Input Source

Instructions on how to select the desired input source for the TV.

Chapter 5 Customising TV Settings

DTV Manual Tuning (DVB-C)

Allows manual fine tuning adjustments to channels under DTV mode for DVB-C.

ATV Manual Tuning

Allows manual fine tuning adjustments if channel reception is poor under ATV mode.

Software Update (USB)

Instructions for updating TV software using a USB thumb drive.

Software Update (Over Air Download) (DVB-T)

Allows TV to auto-detect and upgrade firmware via DTV signal.

Picture Setting

Allows you to set your preferred picture mode and adjust various picture options.

Sound Setting

Allows you to select an audio-enhancement technique and adjust sound options.

Time Settings

Allows adjustment of power on/off time, sleep timer, auto standby, OSD timer and time zone.

HDMI CEC and ARC

Enables control of CEC-enabled devices via HDMI and audio return channel functionality.

Lock Setting

Designed to prevent accidental re-tuning and children watching unsuitable programmes.

Chapter 6 Using the Features

EPG (Electronic Programme Guide)

Navigates viewing options, providing programme listings, start/end times, and detailed info.

Teletext (ATV Mode)

Provides up-to-the-minute information on news, weather, and programmes via broadcast.

Digital Teletext (DTV Mode)

Accesses special digital teletext services and specific services broadcasting digital teletext.

Chapter 7 Entertainment

Viewing Photos

Instructions for viewing photos stored on a USB device.

Listening to Music

Instructions for playing music files stored on a USB device.

Chapter 8 PVR (Personal Video Recorder)

Time Shift Function

Allows pausing live TV and recording the programme simultaneously.

Recording DTV Programme

Saves watched DTV programmes to a USB storage device for future viewing.

Timer Programming

Used to perform scheduled recording of programmes.

Chapter 9 Others Information

Maintenance

Instructions for careful and regular cleaning to prolong the life of the TV.

Hints and Tips

Contains hints and tips for best performance and troubleshooting.

Display Modes

Details screen resolutions and aspect ratios optimised for display modes.

Product Fiche and Specifications

Provides detailed technical specifications and product information for different models.

Related product manuals