1-8 (No.MB723<Rev.003>)
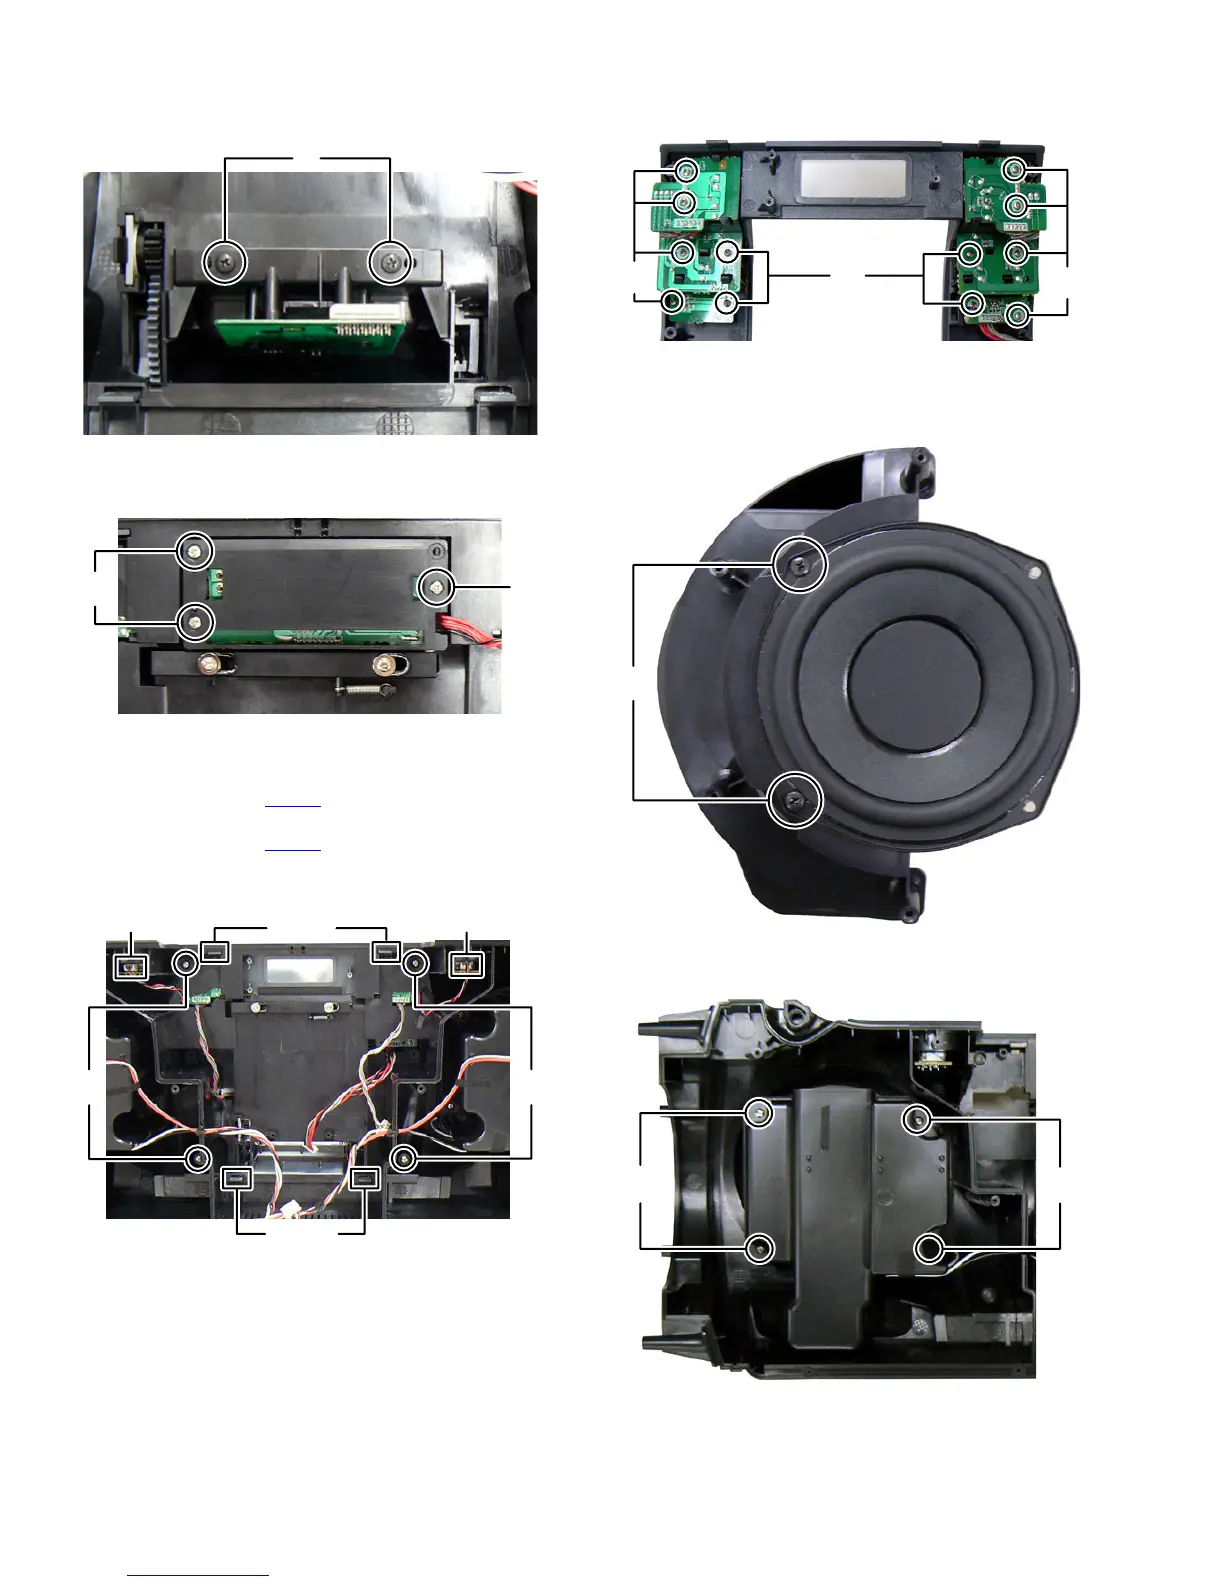
3.1.7 Removing the iPod board (See Fig.17)
(1) Remove the two screws J attaching the iPod board.
Fig.17
3.1.8 Removing the LCD board (See Fig.18)
(1) Remove the three screws K attaching the LCD board.
Fig.18
3.1.9 Removing the Front panel (See Fig.19)
(1) Disconnect the connector wire from Right key board con-
nected to connector CN407
of the Volume board.
(2) Disconnect the connector wire from Left key board con-
nected to connector CN408 of the Volume board.
(3) Remove the four screws L attaching the Front panel.
(4) Disengage four hooks a engaged Front panel.
Fig.19
3.1.10 Removing the Key board (See Fig.20)
(1) Remove the twelve screws M attaching the Key boards.
Fig.20
3.1.11 Removing the Right speakers (See Fig.21, 22, 23)
(1) Remove the two screws N attaching the Woofer, (See
Fig.21)
Fig.21
(2) Remove the four screws P attaching the Speaker cover.
(See Fig.22)
Fig.22
J
K
K
LL
CN407 CN408
hook
a
hook a
M
M
M
N
PP
 Loading...