1-6 (No.22056)
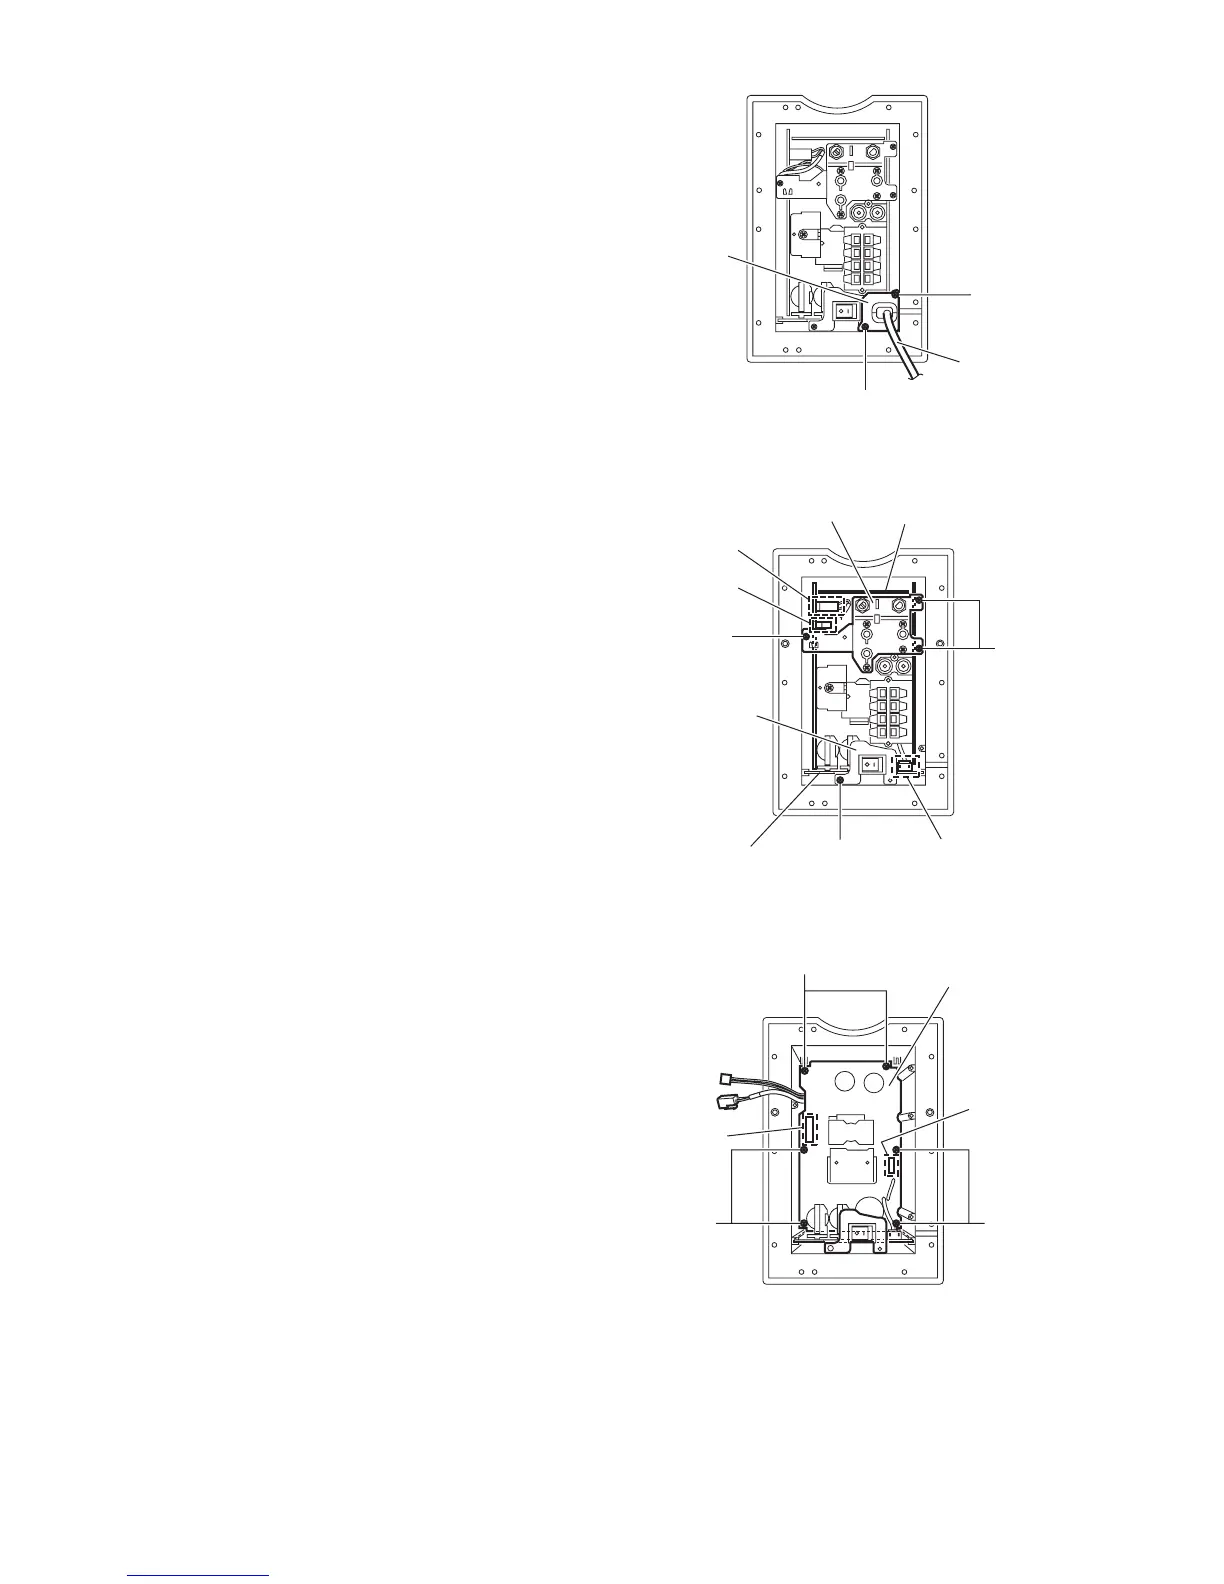
3.1.3 Removing the power cord.
(See Fig 4 and 5)
• Prior to performing the following procedures. remove the back
panel.
(1) Remove the two screw C attaching the bracket. (See Fig 4)
(2) Pull out the bracket toward you.
(3) Disconnect the power cord from the connection CN901 on
the power supply assembly.
3.1.4 Removing the amplifier board assembly.
(See Fig 5 and 6)
• Prior to performing the following procedures remove the back
panel and the power cord.
(1) Remove the screw D attaching the bracket b. (See Fig 5.)
(2) Remove the three screws E attaching the bracket c. (See
Fig 5.)
(3) Disconnect the wire from the connection CN102 and
CN103 on the amplifier board assembly. (See Fig 6.)
(4) Remove the amplifier board assembly from the connector
CN951 and Cn952 on the power supply board assembly.
(See Fig 6.)
(5) Pull out the amplifier board assembly toward you.
3.1.5 Removing the power supply board assembly.
(See Fig 6.)
• Prior to performing the following procedures remove the back
panel remove the power cord and amplifier board assembly.
(1) Remove the two screws F and four screws G attaching the
power supply board assembly.
(2) Pull out the power supply board assembly toward you.
Fig.4
Fig.5
Fig.6
racket a
Power co
C
C
board
Bracket c
racket b
Power supply
assembly board
CN901
CN503
CN102
D
E
E
Power supply
assembly boa
N951
CN95
GG
F
 Loading...