TOOLS REQUIRED
• Safety glasses
• Electric drill (variable speed)
• Awl or center punch
• 2
1
⁄8" (54 mm) hole saw pilot drill
• 1" (25 mm) hole saw pilot drill
•
1
⁄4" (7 mm) drill bit
• 1" (25 mm) wood chisel
• Hammer
• Phillips head screw driver
• Small flat blade screwdriver
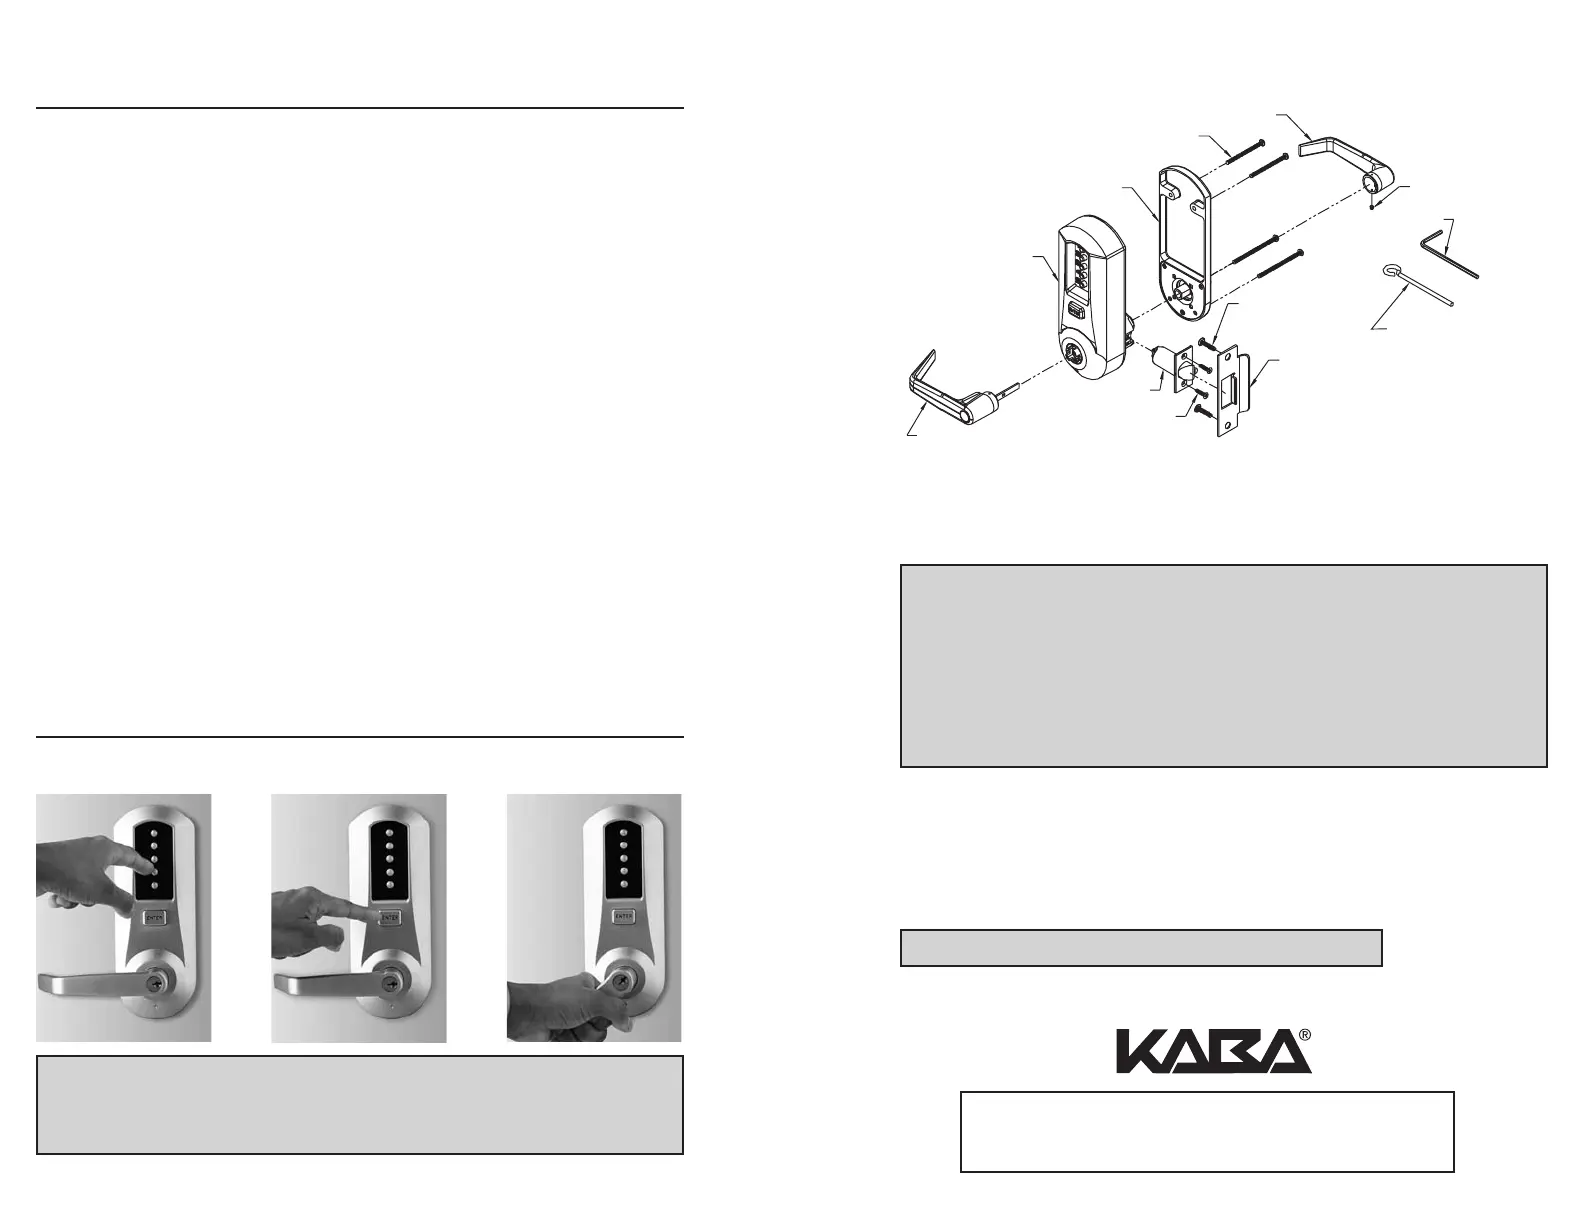
Inside Lever
Mounting Screws
Inside Unit
Assembly
Outside Unit
Assembly
Outside Lever
Assembly
3
/4" (18mm) Screws
Latch
1" (25mm) Screws
Allen Wrench
Set Screw
ASA Strike
Release/Combination
Change Tool
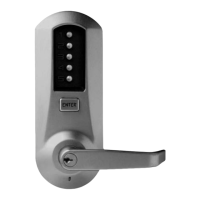
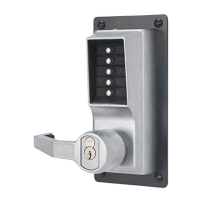
Model 5021
The Simplex 5000 (Model 5021 shown above) is a non-handed lock that
is preassembled for left-hand installations. It is field reversible.
For technical assistance please call
1-800-849-TECH (8324) or 336-725-1331
Warnings and Cautions
Important: Carefully inspect windows, doorframe, door, lights, etc. to
ensure that the recommended procedures will not cause damage. Kaba
Access Control’s warranty does not cover damages caused by
installation.
Caution: Wear safety glasses when preparing door.
TABLE OF CONTENTS
Exploded Install Parts . . . . . . . . . . . . . . . . . . . . . . . . . . . . . . . . . . . . . . . . . . . . . . . . . . . . . . . . . . .1
Tools Required . . . . . . . . . . . . . . . . . . . . . . . . . . . . . . . . . . . . . . . . . . . . . . . . . . . . . . . . . . . . . . . . . .1
A. Door Preparation . . . . . . . . . . . . . . . . . . . . . . . . . . . . . . . . . . . . . . . . . . . . . . . . . . . . . . . . . . .2
B. Lock Handing . . . . . . . . . . . . . . . . . . . . . . . . . . . . . . . . . . . . . . . . . . . . . . . . . . . . . . . . . . . . . .3
C. Door Thickness . . . . . . . . . . . . . . . . . . . . . . . . . . . . . . . . . . . . . . . . . . . . . . . . . . . . . . . . . . . . .3
D. Installing The Passage Set . . . . . . . . . . . . . . . . . . . . . . . . . . . . . . . . . . . . . . . . . . . . . . . . . . .4
E. Installing Outside Unit Assembly . . . . . . . . . . . . . . . . . . . . . . . . . . . . . . . . . . . . . . . . . . . . .5
F. Installing Inside Unit Assembly . . . . . . . . . . . . . . . . . . . . . . . . . . . . . . . . . . . . . . . . . . . . . . .5
G. Installing The Inside Lever / Knob . . . . . . . . . . . . . . . . . . . . . . . . . . . . . . . . . . . . . . . . . . . .6
H. Changing Key-In-Lever / Knob (KIL / KIK) Cylinder . . . . . . . . . . . . . . . . . . . . . . . . . . . . .7
I. Installing / Removing Outside Lever / Knob (KIL / KIK models only) . . . . . . . . . . . . . .8
J. Installing / Removing Outside Lever / Knob . . . . . . . . . . . . . . . . . . . . . . . . . . . . . . . . . . . .9
(Interchangeable / Removable Core models)
K. Testing The Operation Of The Lock . . . . . . . . . . . . . . . . . . . . . . . . . . . . . . . . . . . . . . . . . . .10
L. Installing The Strike . . . . . . . . . . . . . . . . . . . . . . . . . . . . . . . . . . . . . . . . . . . . . . . . . . . . . . . . .11
M. Changing Combinations . . . . . . . . . . . . . . . . . . . . . . . . . . . . . . . . . . . . . . . . . . . . . . . . . . . . .12
N. Installing Rubber Bumpers . . . . . . . . . . . . . . . . . . . . . . . . . . . . . . . . . . . . . . . . . . . . . . . . . .14
O. How To Reset A Lost Or Unknown Combination . . . . . . . . . . . . . . . . . . . . . . . . . . . . . . . .15
P. Trouble Shooting . . . . . . . . . . . . . . . . . . . . . . . . . . . . . . . . . . . . . . . . . . . . . . . . . . . . . . . . . . .19
Notes . . . . . . . . . . . . . . . . . . . . . . . . . . . . . . . . . . . . . . . . . . . . . . . . . . . . . . . . . . . . . . . . . . . .20
1) 2) 3)
Warning
The combination of this lock has been factory preset; 2 and 4 depressed at
the same time, then 3 and then ENTER. For your security, the combination
must be changed at time of installation.
OPERATION
1