4 5
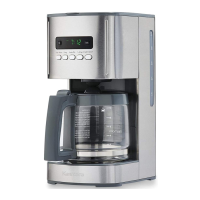
PREPARING TO USE YOUR COFFEEMAKERPARTS AND FEATURES
cover
housing
water
reservoir
window
base
digital
display
control
panel
carafe
brew
basket
charcoal
water lter
water lter
carriage
spreader
inner cover
warming plate
gold lter
Fig. 1
Before the rst use of the coeemaker wash the brew basket, the permanent gold-tone lter, the
carafe and carafe lid in either the top rack of your dishwasher, or by hand in warm, sudsy water.
The exterior of the coeemaker, the control panel area and the warming plate should only be
cleaned with a soft damp cloth.
After all parts are washed for the rst time,
pour cold water up to the 12 cup level mark in
the water reservoir. Brew it through the coee-
maker as instructed in BREWING, but do not
add coee grounds to the paper lter. When
done, turn o the coeemaker and discard the
water from the carafe.
BREWING COFFEE
1. Open the top cover (See Fig. 3).
To clean inside of the reservoir, raise the cover
and allow it to rest in the open position. Wipe
surfaces with a damp cloth (See Fig. 2), and
close cover.
NOTE - NEVER clean the warming plate unless it is completely cool.
NOTE - DO NOT use abrasive cleansers
or scouring pads when cleaning the unit.
NEVER immerse the coeemaker in water
or any liquid.
OPERATING YOUR COFFEEMAKER
The easy-to-use programmable digital controls let you know when the coee is ready, and even
keeps track of the freshness of each brewed carafe. It’s never been easier to brew the perfect cup
of coee.

 Loading...