4 | EN
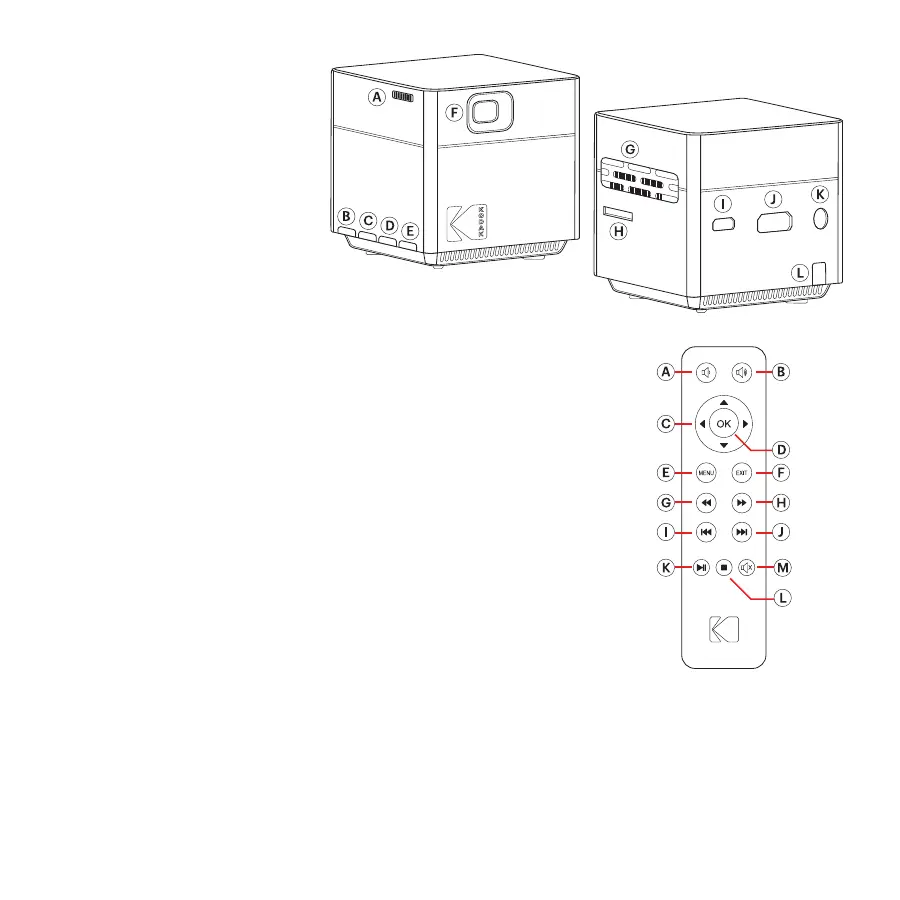
PARTS
Top View
A. Focus Wheel
B. Power Button
C. Volume – / Previous Button
D. Volume + / Next Button
E. Conirm Button
F. Lens
G. Air Vent
H. MicroSD™ Card Slot
I. DC Input
J. Mini HDMI® Input
K. Audio Output
L. Power Indicator Light
Controller
A. Volume + Button
B. Volume – Button
C. Up/Down/Left/Right Buttons
D. OK Button
E. Menu Button
F. Exit Button
G. Rewind Button
H. Fast Forward Button
I. Previous Button
J. Next Button
K. Play/Pause Button
L. Stop Button
M. Mute Button
SETUP
A. Charge the Projector
a. Connect the power cable to the power adapter.
b. Plug the power cord into an outlet or other power source.
c. Plug the power adapter into the projector’s DC input.
d. You may now use the projector.
e. While plugged in, the projector’s battery will automatically charge. It is recommended that you
allow the projector to charge for at least 4 hours before using it in battery mode for the
irst time.
 Loading...