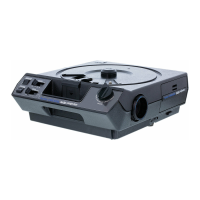
46/KODAK M-SERIES PROJECTORS
SHUTTER
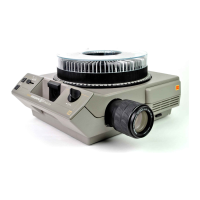
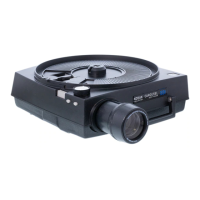
FIG. MD17 Front of projector viewed from
bottom.
REMOVING AND REPLACING THE
SHUTTER
1. Loosen the screw on the black bracket at the back of the
shutter, Fig. MD16. Fig. MD17 shows how to reach the
screw with a nut driver.
2. Using a screwdriver as shown in Fig. MD18, pull back the
shutter-drive shaft— push over the disconnected shutter-
drive shaft to your right in Fig. MD18.
NOTE: Here we're freeing the front end of the shutter-drive
shaft. The brass bearing shown in Fig. MD18 stays with the
shutter-drive shaft.
3. Lift out the shutter, Fig. MD19. Watch for the coil spring
that fits over the front end of the shutter-drive shaft.
Lubrication is the same as in the M80 projector. Use shutter
oil to lubricate the shutter-drive shaft (between the shutter-
drive shaft and the brass bearing, Fig. MD18). Also oil
lubricate the end of the shutter-drive shaft that passes
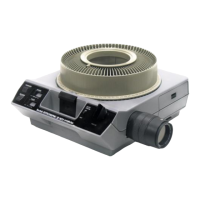
LOOSEN THIS SCREW
FIG. MD16 Bottom of projector viewed from
front.
SCREWDRIVER
FIG. MD18 Using a screwdriver to free the
shutter-drive shaft.
HIGHLIGHTED TIMING MARK ON IN-AND-OUT CAM
TIMING NOTCH ON SHUTTER
COIL SPRING
BRASS BEARING
FIG. MD19 After freeing the shutter-drive
shaft, lift out the old shutter. Send in the
shutter for the exchange rate.
FIG. MD20 Timing the shutter to the in-and-out
cam.
SHUTTER-DRIVE SHAFT
Compliments of:
www.KodakParts.com
 Loading...