11.6
Section 11
Reassembly
Install Oil Pickup
1. Install the oil pickup, O-Ring, clip, and hex flange
screw. See Figure 11-18.
NOTE: Lightly grease O-Ring and install before
pickup.
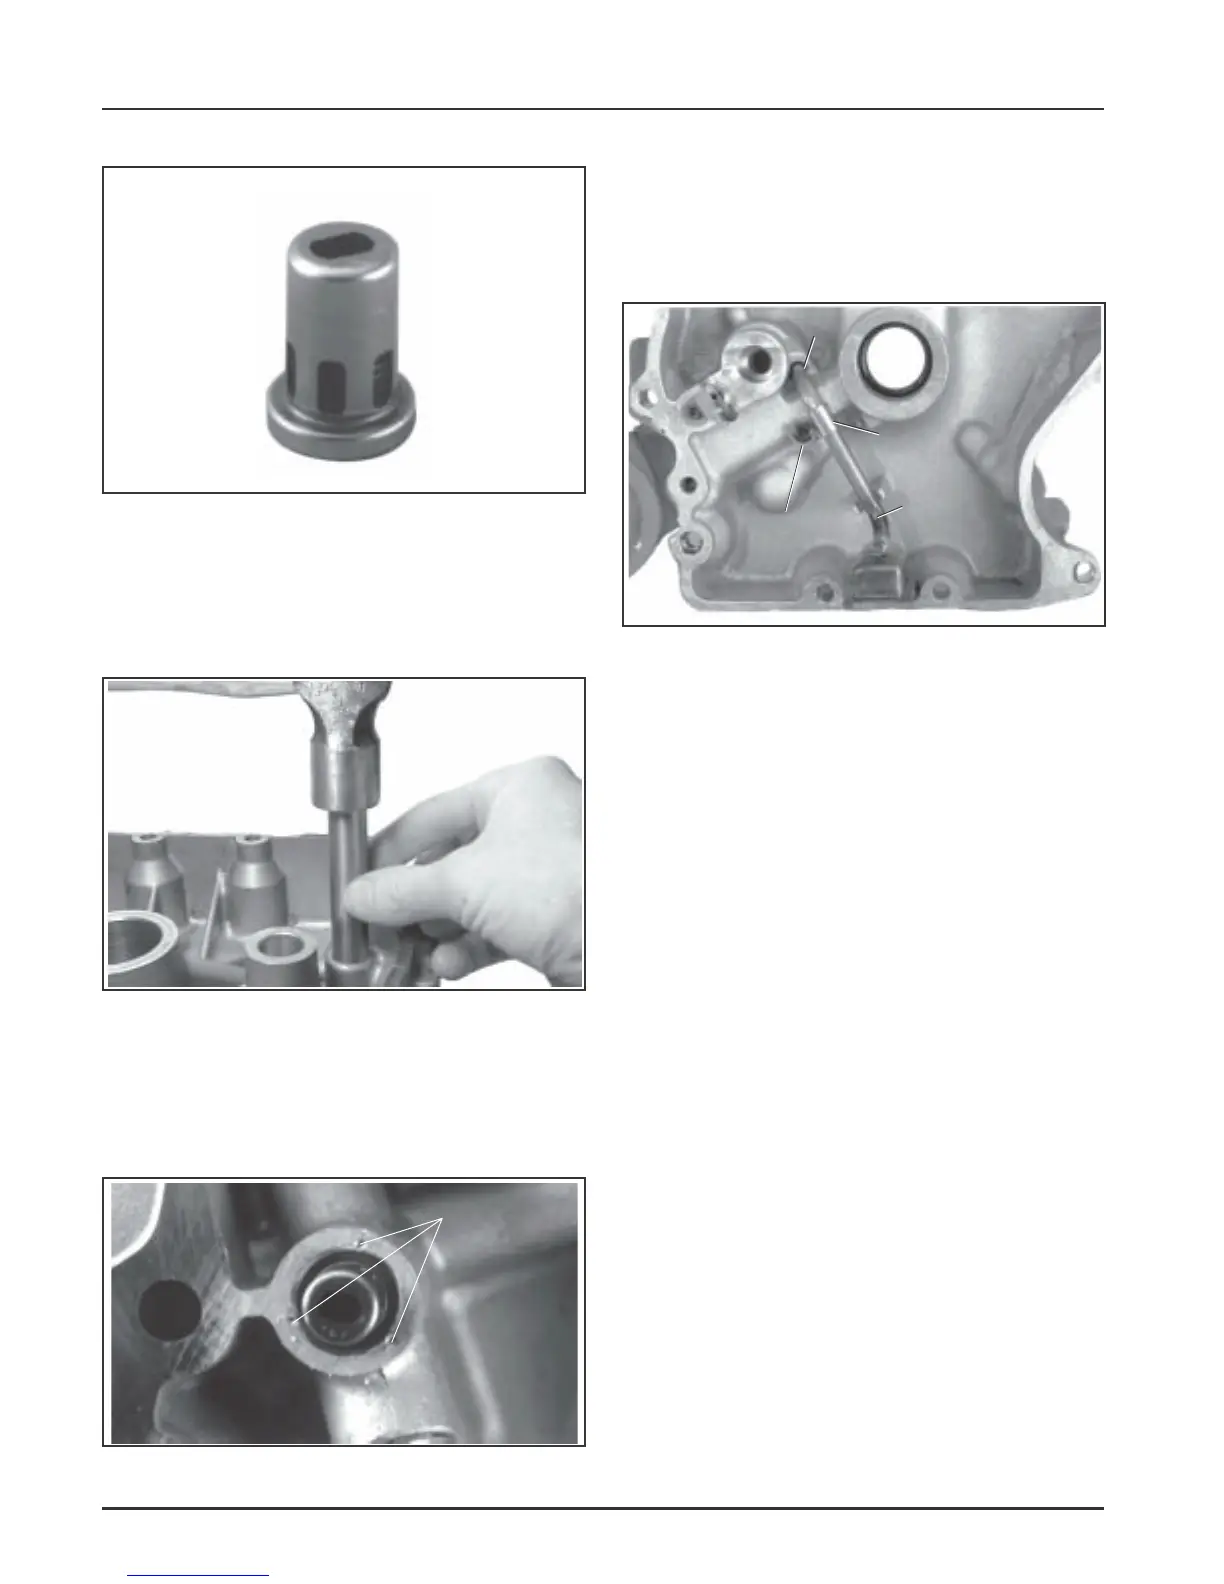
One-Piece Valve (if removed previously)
Figure 11-15. One-Piece Oil Pressure Relief Valve.
1. Use a piece of thin wall metal tubing or deep
socket with a slightly smaller O.D. than the base.
Press or tap the new relief valve into the bore of
the closure plate until it bottoms. See Figure
11-16.
Figure 11-16. Inserting New Relief Valve into Bore
of Closure Plate.
2. Stake the casting boss with a center punch in 3 or
4 locations near the inner edge to lock the relief
valve into place. See Figure 11-17. Do Not use
Loctite
®
.
Figure 11-17. Center Punch Stake Marks.
Center Punch
Stake Marks
O-Ring
Clip
Oil Pickup
Hex Flange
Screw
Figure 11-18. Installing Oil Pickup Components.
Install Closure Plate to Crankcase
RTV silicone sealant is used as a gasket between the
closure plate and crankcase. Refer to page 2.3 for a
listing of approved sealants that may be used.
NOTE: Always use fresh sealant. Using
outdated sealant can result in leakage.
Refer to Section 2 - Tools & Aids for
information on the sealant dispenser.
1. Prepare the sealing surfaces of the crankcase and
closure plate following Service Bulletin 252.
NOTE: Do not scrape the surfaces when
cleaning as this will damage the
surfaces. This could result in leaks. The
use of a gasket removing solvent is
recommended.
2. Apply a 1/16" bead of sealant to the closure plate
as shown in Figure 11-19. Do not spread with
finger.
 Loading...


