Section 7
Retractable Starter
7
7.3
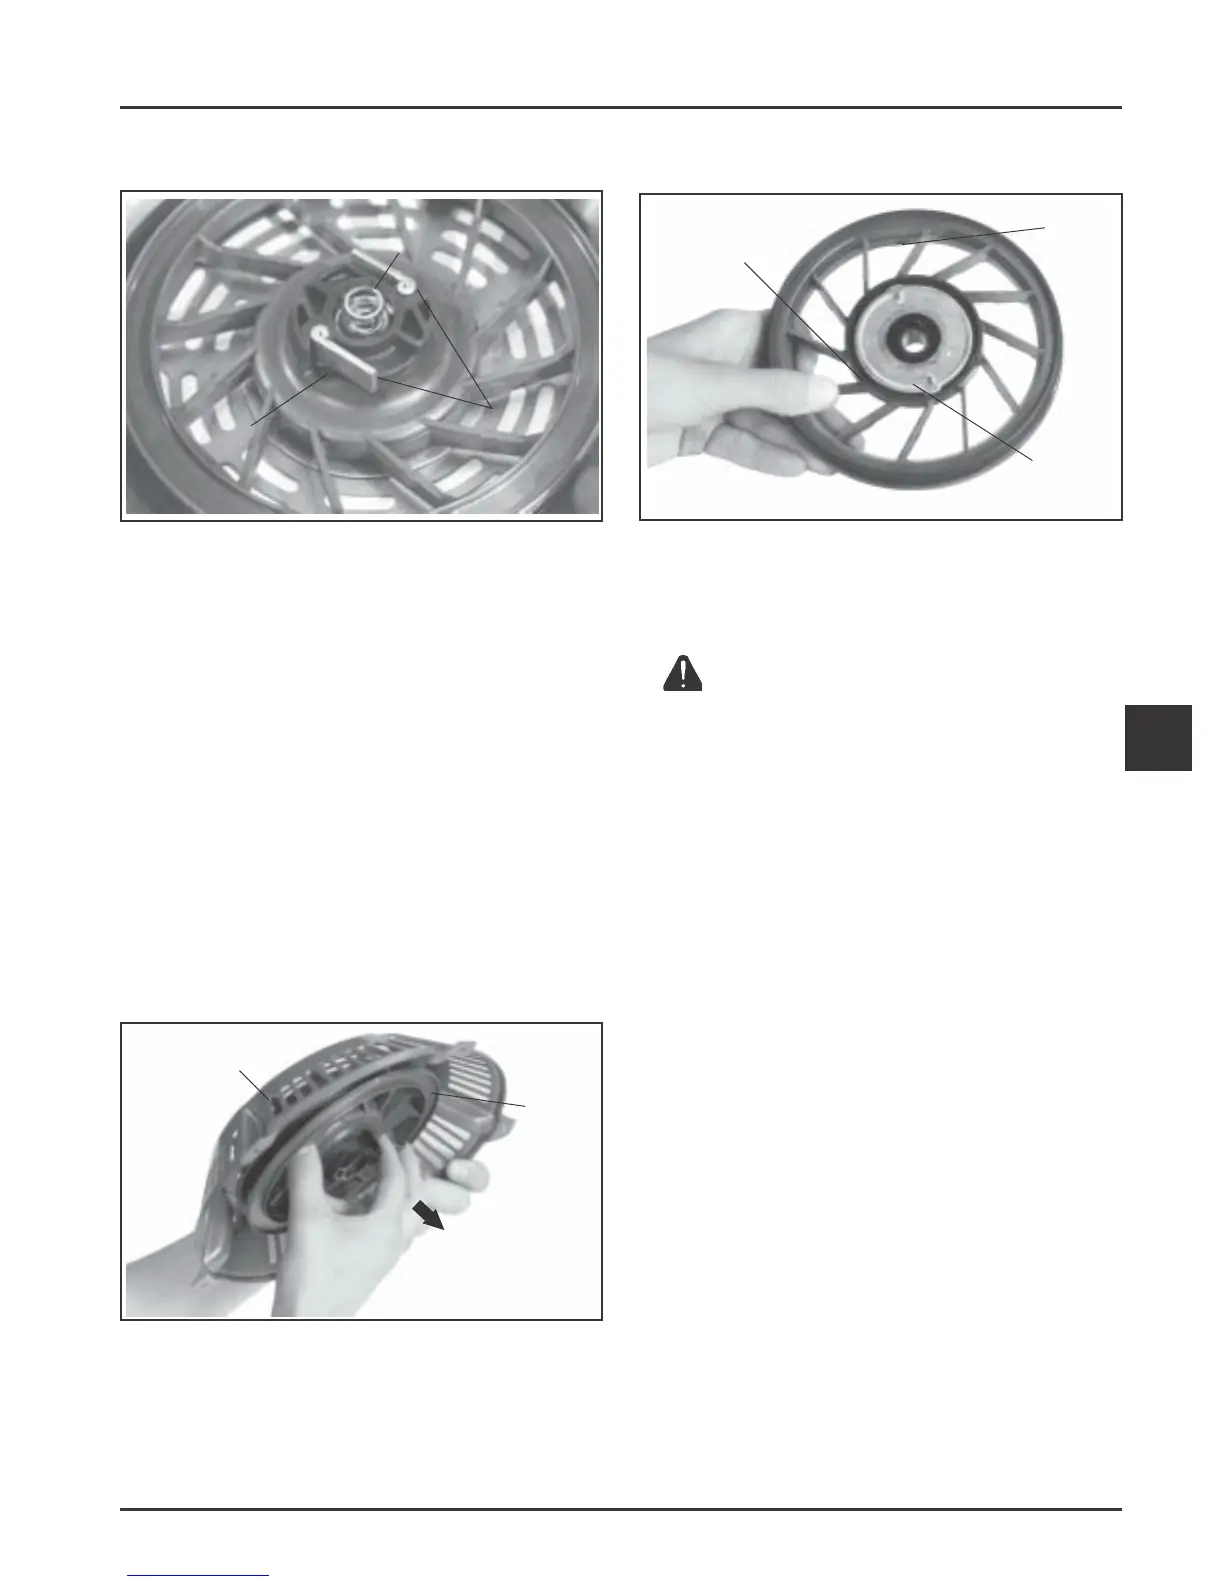
3. Remove the brake spring and brake washer. See
Figure 7-6.
Figure 7-6. Brake Spring and Washer, Pawls, and
Pawl Springs.
4. Carefully note the positions of the pawls and
pawl springs before removing them.
5. Remove the pawls and pawl springs from the
starter pulley.
6. Rotate the pulley clockwise 2 full turns. This will
ensure the spring is disengaged from the starter
housing.
7. Hold the pulley into the starter housing. Invert
the pulley/housing so the pulley is away from
your face, and away from others in the area.
8. Rotate the pulley slightly from side to side and
carefully separate the pulley from the housing.
See Figure 7-7.
Figure 7-7. Removing Pulley from Housing.
If the pulley and the housing do not separate
easily, the spring could be engaged in the starter
housing, or there is still tension on the spring.
Return the pulley to the housing and repeat step
5 before separating the pulley and housing.
Brake Spring and
Brake Washer
Pawls
Pawl
Spring
Housing
Pulley
9. Note the position of the spring and keeper
assembly in the pulley. See Figure 7-8.
Rope
Hole in
Pulley
Outer Spring
Hook
Spring &
Keeper
Figure 7-8. Position of Spring, and Keeper in
Pulley.
10. Remove the spring and keeper assembly from the
pulley as a package.
CAUTION: Spring Under Tension!
Do not remove the spring from the keeper. Severe personal
injury could result from the sudden uncoiling of the spring.
Inspection and Service
1. Carefully inspect the rope, pawls, housing, center
screw, and other components for wear or
damage.
2. Replace all worn or damaged components. Use
only genuine Kohler replacement parts as
specified in the Parts Manual. All components
shown in Figure 7-1, are available as service
parts. Do not use nonstandard parts.
3. Do not attempt to rewind a spring that has come
out of the keeper. Order and install a new spring
and keeper assembly.
4. Clean all old grease and dirt from the starter
components.
Reassembly
1. Make sure the spring and center shaft are
lubricated with grease. Place the spring and
keeper assembly inside the pulley (with spring
toward pulley). See Figure 7-8.
2. Install the pulley with spring and keeper
assembly into the starter housing. See Figure 7-9.
3. Make sure the pulley is fully seated against the
starter housing. Do not wind the pulley and
recoil spring at this time.
 Loading...


