10.8
Section 10
Internal Components
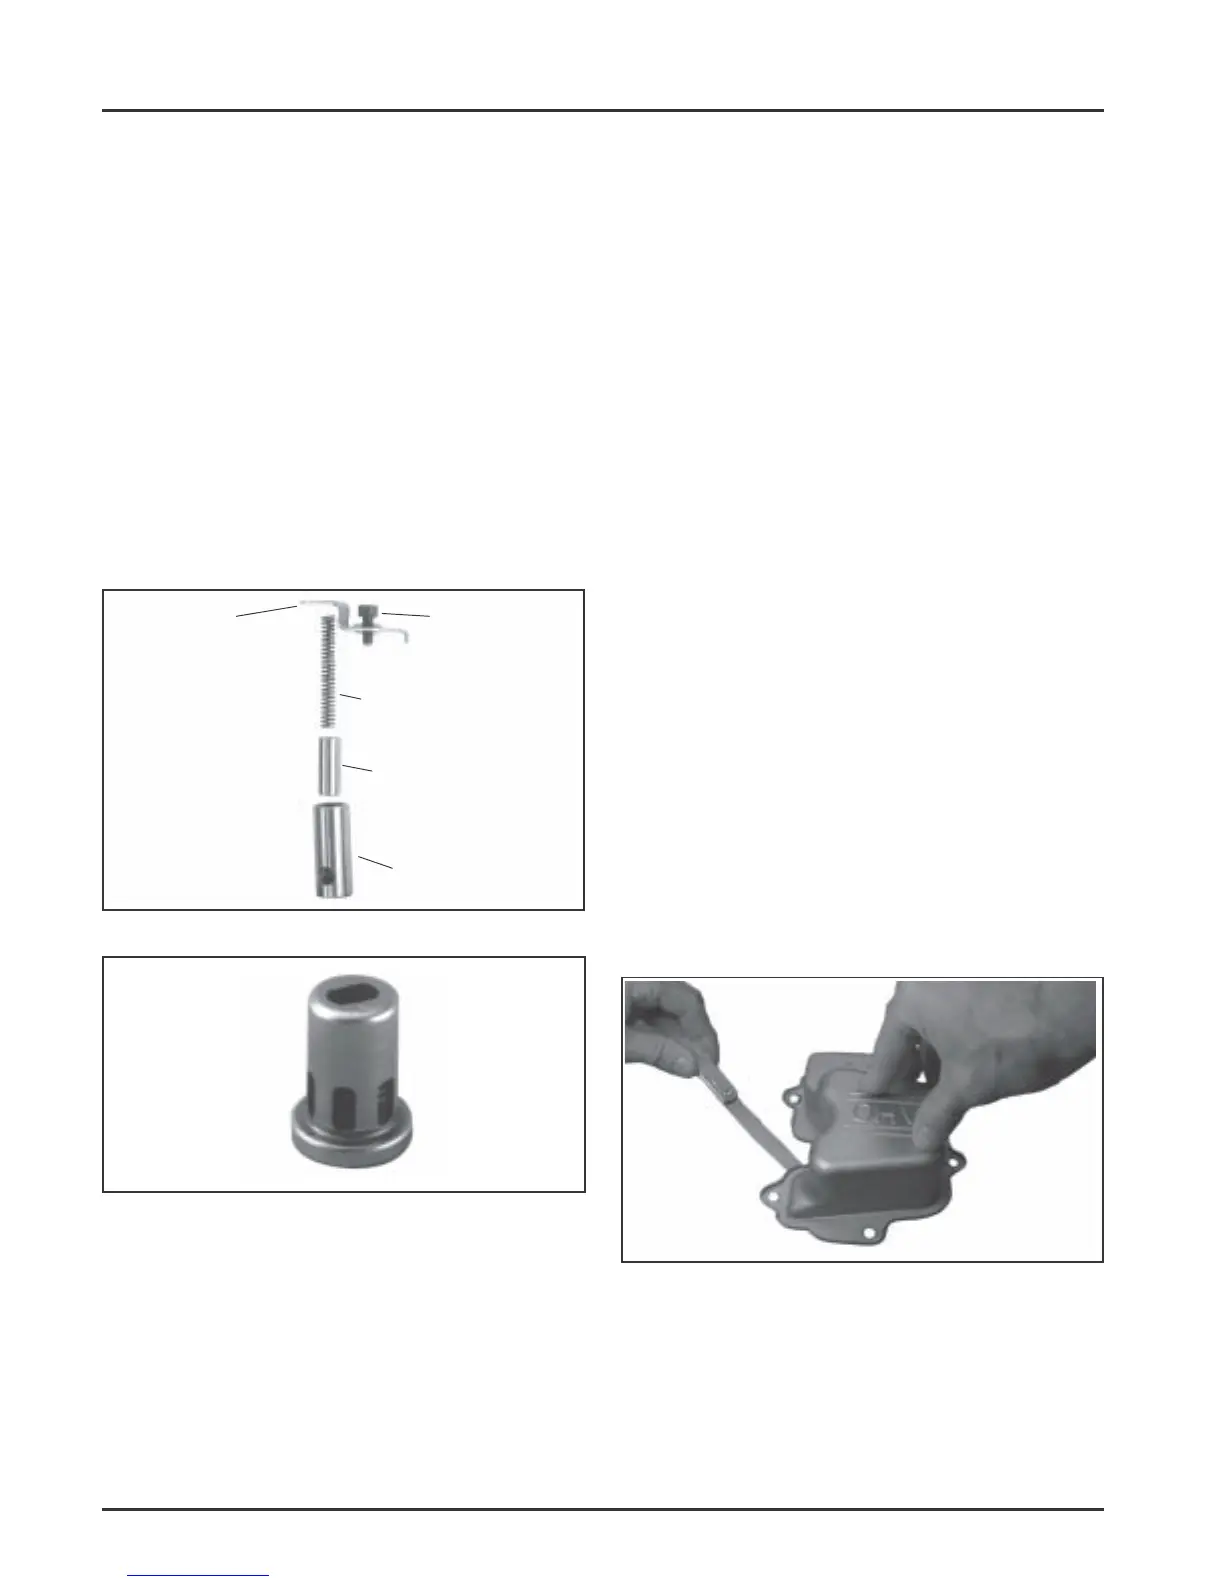
Relief Valve
Bracket
Hex Socket
Screw
Spring
Piston
Valve Body
Oil Pump
Inspection and Service
Pump can be checked/replaced without removing
closure plate.
Oil Pressure Relief Valve
If an original style (five-piece) oil pressure relief valve
is used (see Figure 10-9), check that piston and body
are free of nicks or burrs. Check the spring for any
wear or distortion. The free length of the spring
should be approximately 0.992 in. Replace the spring
if worn, out of specification, or damaged/distorted.
If the later style (one-piece) oil pressure relief valve
(see Figure 10-10) is used (staked to the closure plate),
check to see that the internal spring-loaded piston is
free. Remove the valve only if it needs to be replaced.
Figure 10-10. One-Piece Oil Pressure Relief Valve.
Governor Gear
Inspection
Inspect the governor gear teeth. Look for any evidence
of worn, chipped, or cracked teeth. If one or more of
these problems is noted, replace the governor gear.
The governor gear must be replaced once it is
removed from the engine.
Figure 10-9. Five-Piece Oil Pressure Relief Valve.
Hydraulic Lifters
Inspection
Check the base surface of the hydraulic lifters for
wear or damage. If the lifters need to be replaced,
apply a liberal coating of Kohler lubricant (see Section
2) to the base of each new lifter before it is installed.
Bleeding the Lifters
To prevent a possible bent push rod or broken rocker
arm, it is important to bleed any excess oil out of the
lifters before they are installed.
1. Cut a 50-75 mm (2-3 in.) piece from the end of an
old push rod and chuck it in a drill press.
2. Lay a rag or shop towel on the table of the drill
press and place the lifter, open end up, on the
towel.
3. Lower the chucked push rod until it contacts the
plunger in the lifter. Slowly pump the plunger
two or three times to force the oil out of the feed
hole in the side of the lifter.
Stamped Steel Valve Cover
If the engine has stamped steel valve cover, the sealing
surface must be checked for flatness prior to
reinstallation. Hold the valve cover down firmly
against a flat, level surface or piece of glass, and check
around the entire perimeter that a 0.012 in. (0.30 mm)
feeler gauge cannot be inserted anywhere. See Figure
10-11. If the gauge goes in anywhere, the cover needs
to be replaced.
Figure 10-11. Checking with Feeler Gauge.
 Loading...


