Lubrication System
3124 690 07 Rev. H KohlerEngines.com
This engine uses a full pressure lubrication system
which delivers oil under pressure to crankshaft,
camshaft, connecting rod bearing surfaces, and
hydraulic valve lifters.
A high-efciency gerotor oil pump maintains high oil ow
and oil pressure, even at low speeds and high operating
temperatures. A pressure relief valve limits maximum
pressure of system. Oil pan must be removed to service
oil pickup, pressure relief valve, and oil pump.
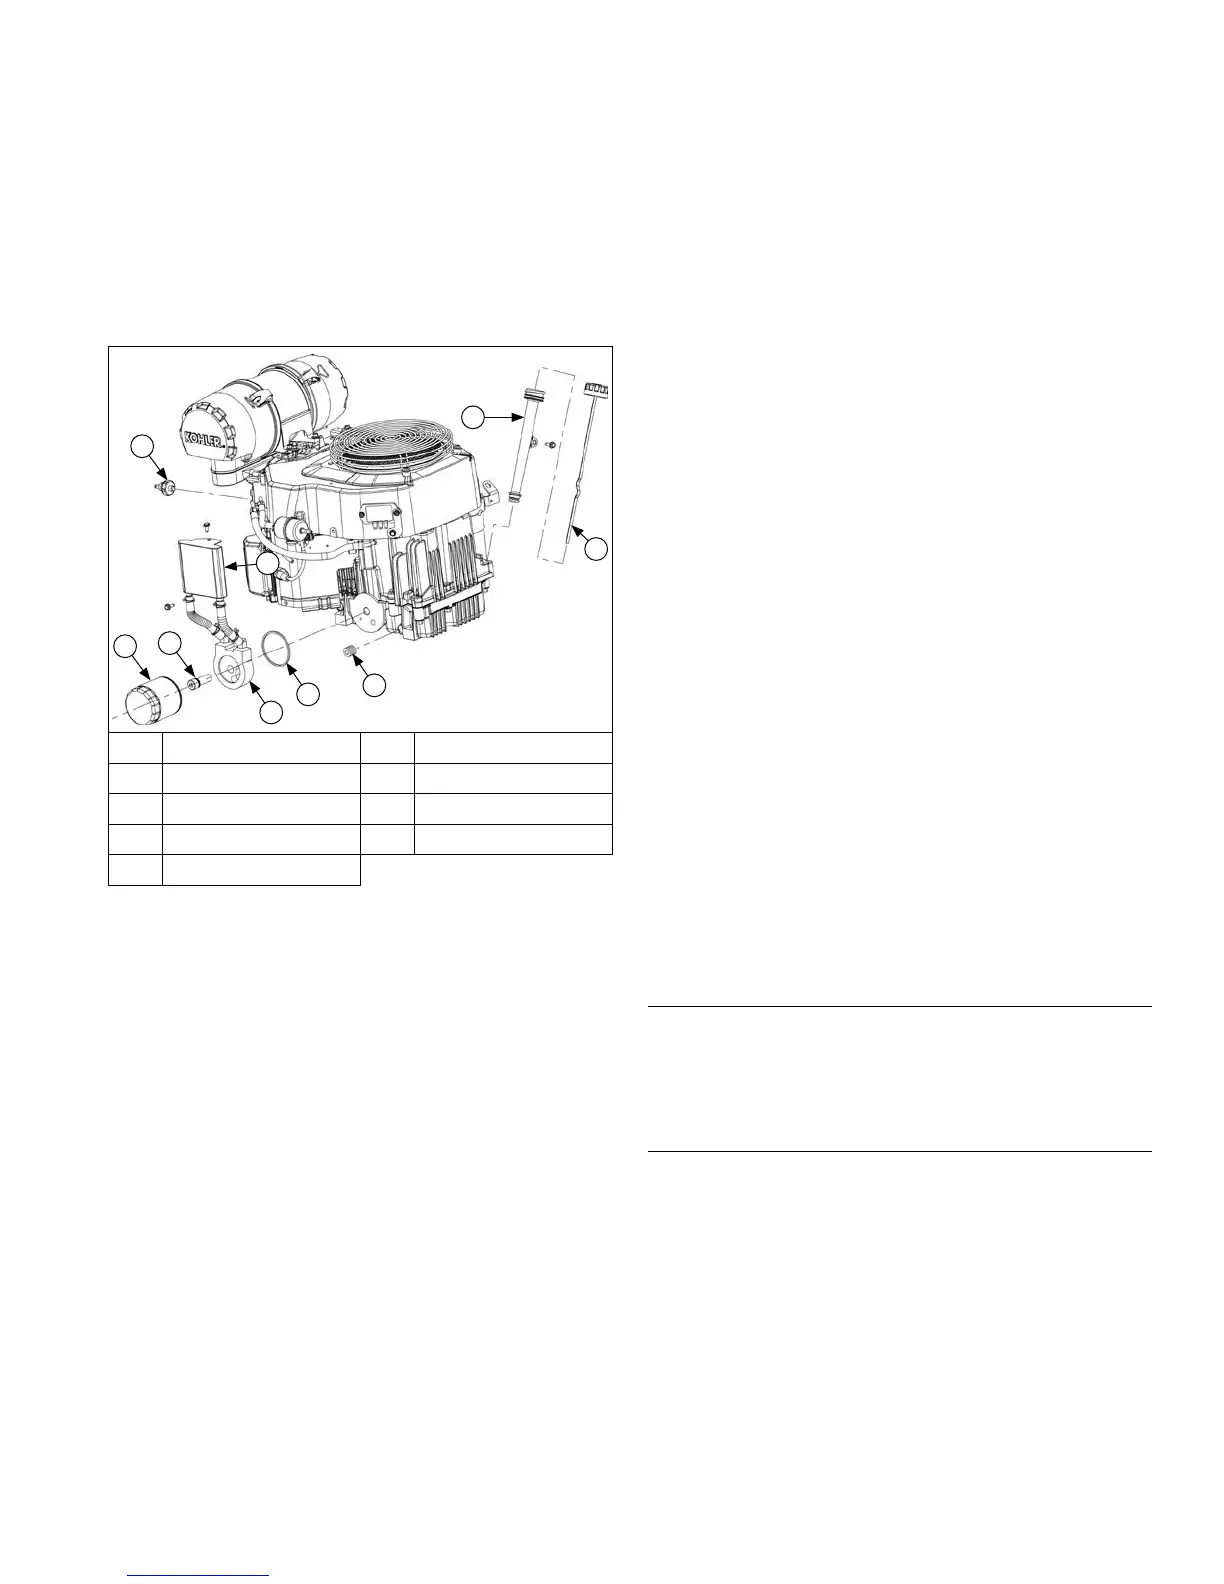
Lubrication Components
B
D
E
C
I
F
G
H
A
A Oil Fill/Dipstick B Oil Fill Tube
C Back Side D Oil Filter
E Nipple F Oil Cooler
G O-ring H Oil Drain Plug
I Oil Sentry™
OIL RECOMMENDATIONS
Refer to Maintenance.
CHECK OIL LEVEL
NOTE: To prevent extensive engine wear or damage,
never run engine with oil level below or above
operating range indicator on dipstick.
Ensure engine is cool. Clean oil ll/dipstick areas of any
debris.
1. Remove dipstick; wipe oil off.
2. Reinsert dipstick into tube; rest cap on tube, do not
thread cap onto tube.
3. Remove dipstick; check oil level. Level should be at
top of indicator on dipstick.
4. If oil is low on indicator, add oil up to top of indicator
mark.
5. Reinstall dipstick and tighten securely.
CHANGE OIL AND FILTER
Change oil while engine is warm.
1. Clean area around oil ll cap/dipstick, drain plug/oil
drain valve.
a. Remove drain plug and oil ll cap/dipstick. Allow
oil to drain completely.
or
b. Open oil drain valve cap; if needed, attach a
length of 1/2 in. I.D. hose to direct oil into
appropriate container; twist valve drain body
counterclockwise and pull. Remove dipstick.
Allow oil to drain completely.
2. Clean area around oil lter. Place a container under
lter to catch any oil and remove lter. Wipe off
mounting surface.
a. Reinstall drain plug. Torque to 13.6 N·m
(10 ft. lb.).
or
b. Close oil drain valve body, remove hose (if used),
and replace cap.
3. Place new lter in shallow pan with open end up. Fill
with new oil until oil reaches bottom of threads. Allow
2 minutes for oil to be absorbed by lter material.
4. Apply a thin lm of clean oil to rubber gasket on new
lter.
5. Refer to instructions on oil lter for proper
installation.
6. Fill crankcase with new oil. Level should be at top of
indicator on dipstick.
7. Reinstall oil ll cap/dipstick and tighten securely.
8. Start engine; check for oil leaks. Stop engine; correct
leaks. Recheck oil level.
9. Dispose of used oil and lter in accordance with
local ordinances.
OIL COOLER (if equipped)
Blower Housing Mounted Oil Cooler
1. Clean ns with a brush or compressed air.
2. Remove screws securing oil cooler and tilt to clean
back side.
3. Reinstall oil cooler.
Crankcase Mounted Oil Cooler
Clean ns with a brush or compressed air.
OIL SENTRY
™
(if equipped)
This switch is designed to prevent engine from starting
in a low oil or no oil condition. Oil Sentry
™
may not shut
down a running engine before damage occurs. In some
applications this switch may activate a warning signal.
Read your equipment manuals for more information.
Oil Sentry
™
pressure switch is installed in breather cover.
On engines not equipped with Oil Sentry
™
installation
hole is sealed with a 1/8-27 N.P.T.F. pipe plug.
 Loading...