4.3
Section 4
Air Cleaner and Air Intake System
4
2. Do not wash the paper element or use
pressurized air, as this will damage the element.
Replace a dirty, bent, or damaged element with
a genuine Kohler element. Handle new elements
carefully; do not use if the sealing surfaces are
bent or damaged.
3. When servicing the air cleaner, check the air
cleaner base. Make sure it is secured and not bent
or damaged. Check the air cleaner cover/housing
for damage or improper fi t. Replace all bent or
damaged air cleaner components.
4. Slide the precleaner and paper element onto the
air cleaner base. See Figure 4-1.
5. Position the air cleaner cover.
a. For Normal Operation conditions, see Figure
4-3.
b. For Cold Weather Operation conditions, see
Figure 4-4.
NOTE: Running the engine in the Cold Weather
Operation position of the air cleaner
cover under normal conditions can
damage the engine.
6. Reinstall and secure the air cleaner cover. Align
the air cleaner cover latches with the tabs on the
base. Place the latches under the tabs and li up
on the bails. See Figure 4-5.
Low-Profi le Air Cleaner
General
The low-profi le air cleaner contains an oiled-foam
element.
The low-profi le air cleaner is shown in Figure 4-6. The
system is CARB/EPA certifi ed and the components
should not be altered or modifi ed in any way.
Figure 4-6. Low-Profi le Air Cleaner.
Service
Check the air cleaner daily or before starting the
engine. Check for a buildup of dirt and debris around
the air cleaner system. Keep this area clean. Also
check for loose or damaged components. Replace all
damaged air cleaner components.
NOTE: Operating the engine with loose or
damaged air cleaner components could
allow unfi ltered air into the engine causing
premature wear and failure.
Every 100 hours of operation, wash the foam air
cleaner element (more o en under extremely dusty, or
dirty conditions). Every 300 hours of operation (more
o en under extremely dusty or dirty conditions),
replace the foam element.
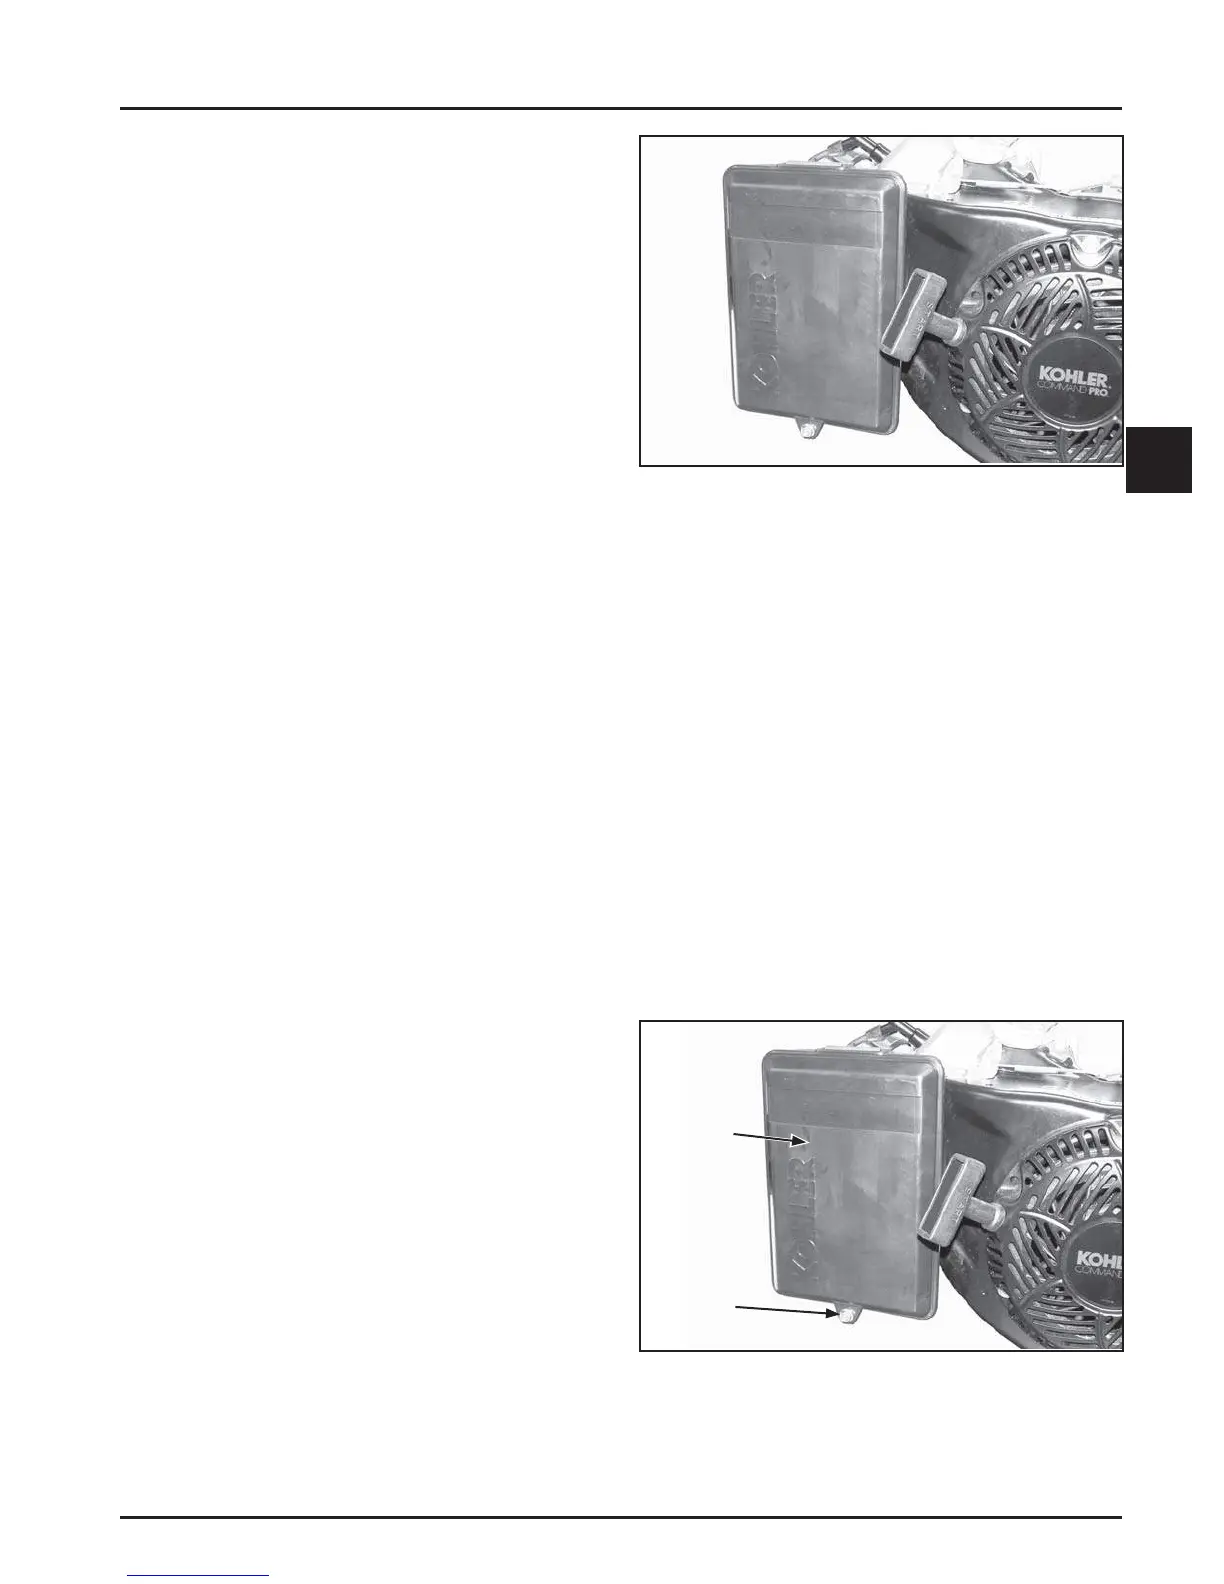
1. Remove the screw at the bo om of the air cleaner
cover, and remove the cover. See Figure 4-7.
Figure 4-7. Remove Screw and Cover.
2. Remove the foam element from the air cleaner
base. See Figure 4-8.
Remove
Cover
Remove
Screw
 Loading...