THREE-POINT HITCH & DRAWBAR32
3 -POINT HITCH
BAttaching and detaching implements
To avoid personal injury:
A Be sure to stop the engine and remove the key.
A Do not stand between tractor and implement
unless parking brake is applied.
A Before attaching or detaching implement,
locate the tractor and implement on a firm, flat
and level surface.
A Whenever an implement or other attachment is
connected to the tractor 3-point hitch, slowly
move the 3-point hitch through the full range of
operation and check for interference, binding
or PTO separation before operating the
machine.
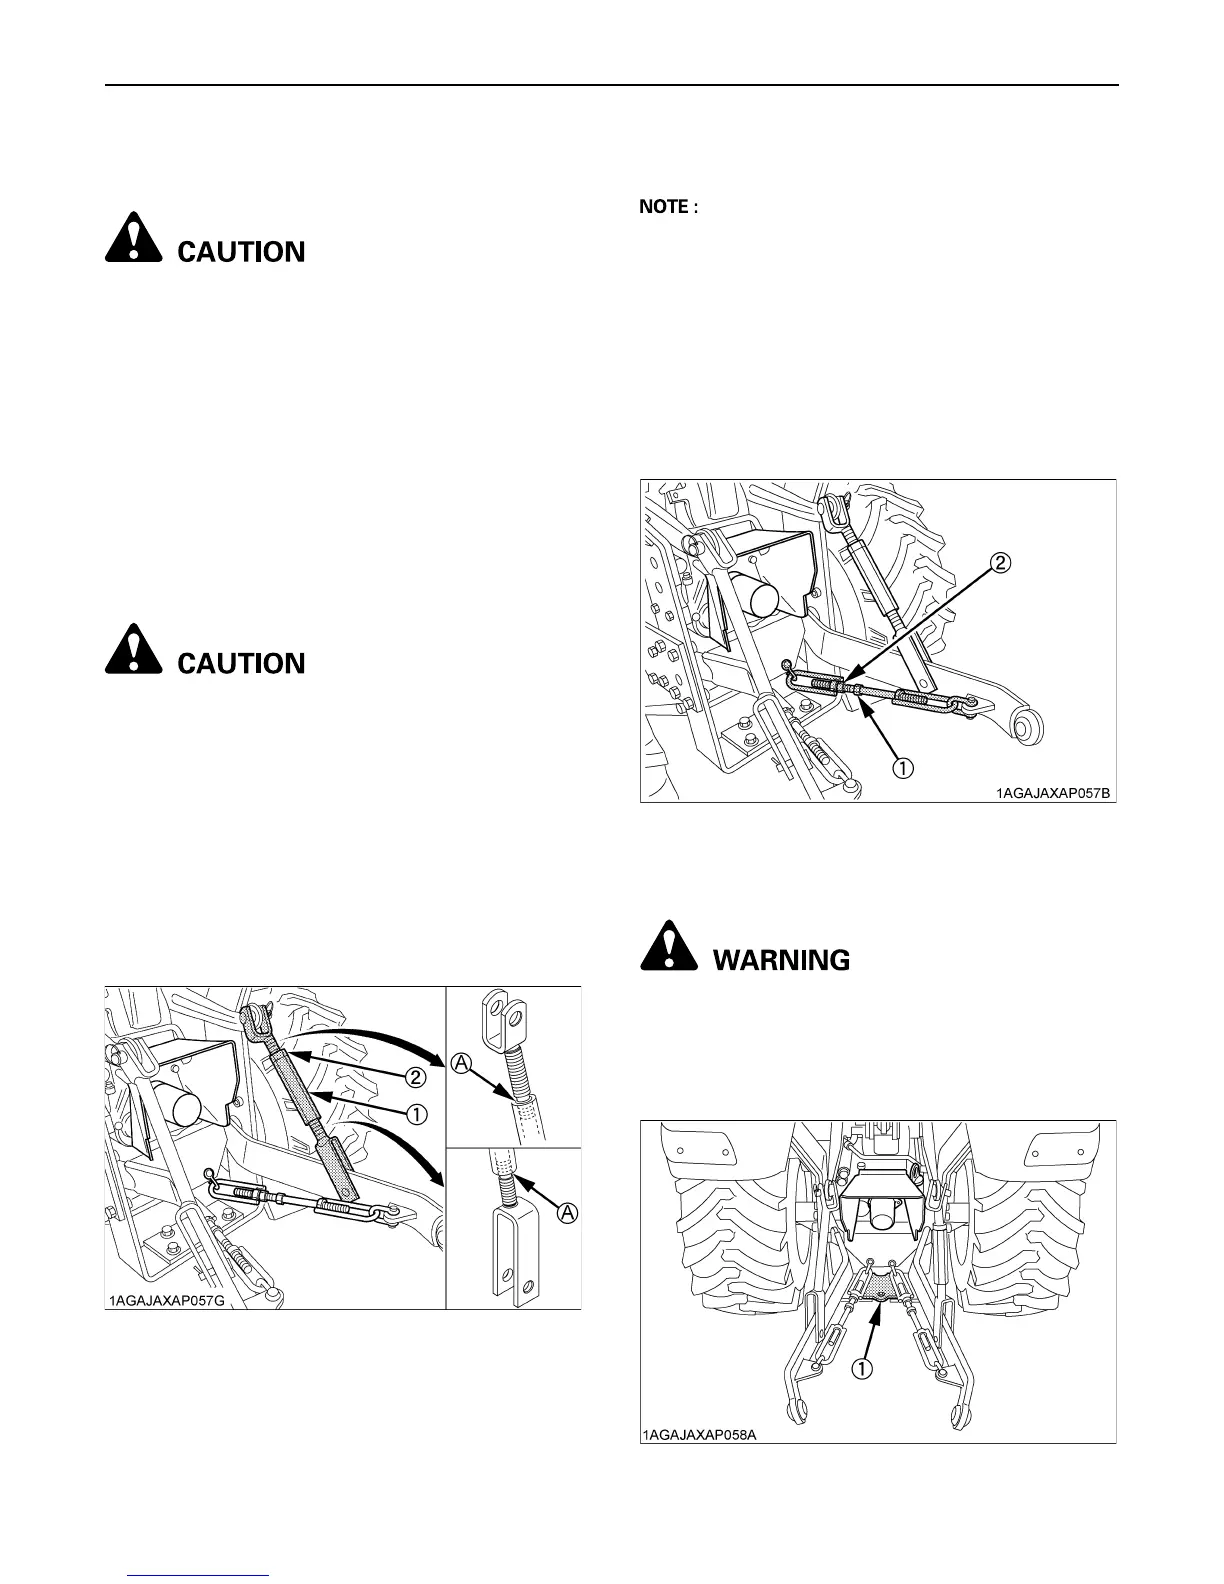
BLifting Rod (Right)
To avoid personal injury from separation:
A Do not extend lift rod beyond the groove on the
threaded rod or it may separate. See the
illustration that is on the safety label part
K2581-6555-1.
Level a 3-point mounted implement from side to side by
turning the adjusting turnbuckle to shorten or lengthen the
adjustable lifting rod with the implement on the ground.
After adjustment, tighten the lock nut securely.
Do not extend lift rod beyond the groove on the threaded
rod when extending it.
BTop Link
1. Adjust the angle of the implement to the desired
position by shortening or lengthening the top link.
2. The proper length of the top link varies according to
the type of implement being used.
A When not using the top link, make it the shortest length
and fix it to the top link holder.
BCheck Chains
Make sure that the check chains are installed in the
figures below.
Adjust the turnbuckle to control horizontal sway of the
implement.
After adjustment, retighten the lock nut.
HITCH
To avoid personal injury:
A Never pull from the top link, the rear axle or any
point above the hitch. Doing so could cause the
tractor to tip over rearward causing personal
injury or death.
(1) Adjusting turnbuckle
(2) Lock nut
(A) Groove
(1) Turnbuckle
(2) Lock nut
(1) Hitch
 Loading...