5 5
5 5
5
JJ
JJ
J
Disconnect the audio generator and short the input (pin 1,2,3 of XLR socket
shorted) the output signal (noise) must be less than 1mV.
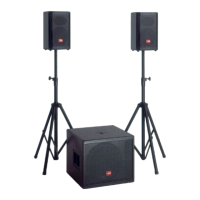
AV15A Amplified LoudspeakerAV15A Amplified Loudspeaker
AV15A Amplified LoudspeakerAV15A Amplified Loudspeaker
AV15A Amplified Loudspeaker
The following adjustment and notes are relative to this model only.
TECHNICAL SPECIFICATIONSTECHNICAL SPECIFICATIONS
TECHNICAL SPECIFICATIONSTECHNICAL SPECIFICATIONS
TECHNICAL SPECIFICATIONS
Dimensions: (WxHxD) 500x706x490mm
Weight: 26Kg
Power Requirements: (230Vac±10% 50Hz) 370VA
(115Vac±10% 50/60Hz) 370VA
Output Power*: (4Ω) 350W
Max. Undistorted Out*: (4Ω) 105Vpp
Sensitivity: (1W/1m) 99dB
SPL
Max SPL: (continuous) 124dB
SPL
(peak) 127dB
SPL
Frequency Response (amplifier+speaker) 60Hz÷20kHz
(only amplifier -3dB) 10Hz÷60kHz
Input Sensitivity: (0dB) 0.775V
RMS
Input Impedance: (balanced) 30KΩ
(unbalanced) 15KΩ
Voltage Gain: 33±1dB
IMD: (SMPTE 60Hz/7KHz 4:1) <0.1%
THD: (THD+N) <0.1%
S/N Ratio: (unweighted) >100dB
*Note: measured with the limiter deactivated.
SetupSetup
SetupSetup
Setup
➭ Connect the Variac between the mains and the amplifier and set it at zero
voltage.
➭ Turn full clockwise the LEVEL potentiometer.
➭ Connect the audio generator to the channel R input and set it to 150Hz
775mV
RMS
(0dB) sinusoidal signal.
➭ Place the temperature sensor between heatsink and the PTC (R59).
➭ The procedures that follow must be executed subsequently in the order
specified.
Supply CheckSupply Check
Supply CheckSupply Check
Supply Check
➭ Remove the transformer secondary fuses (located on SUPPLY board), set
the Variac to the nominal mains voltage, check with the Multimeter the AC
supply voltages:
F1-F2=102±2Vac
F3-F4=60±1.5Vac.
➭ Re-set the Variac at zero voltage, turn off the amplifier and put the fuses back
on its holders.
➭ Connect the oscilloscope probe CH1 to the channel output, before RL1, set
it to 20V/div. 1mS/div.
➭ Set up the Variac slowly monitoring the Outputs with the oscilloscope CH1
connected, it should display the sinusoidal input signal amplified with no
distortions, if a distortion occur check the AMPLIFIER board as suggested in
the ADVICES section.
➭ If the protection trips, turn off the amplifier, wait some minutes and disconnect
the supplies from the amplifier module (CN2, CN3 on AMPLIFIER board),
continue to check the supplies.
➭ Finally verify the DC supplies on SUPPLY board:
CN2 pin 5 (+Vcc2) =+71±2Vdc
CN3 pin 1 (+Vcc1) =+42±1.5Vdc
CN3 pin 5-6 (-Vcc1) =-42±1.5Vdc
CN3 pin 4 (-Vcc2) =-71±2Vdc
CN2 pin 3 =+15±1Vdc
CN2 pin 2 =-15±1Vdc
➭ If one or more voltages don’t correspond, check the rectifiers, capacitors and
transformers disconnecting them from circuitry, refer to schematics.
Channels CheckChannels Check
Channels CheckChannels Check
Channels Check
➭ Verify, with the Multimeter, the insulation between the heatsink and the
transistors collectors.
➭ Verify, with the Multimeter, the PTC resistor value (R59), it must be between
50Ω and 200Ω.
➭
SETUP:SETUP:
SETUP:SETUP:
SETUP:
Connect the CH1 scope GND clip to CN2 pin 6 (SGND terminal).
Connect the CH1 probe tip to CN3 pin 2 or 3 (PWR out).
Connect the CH2 probe tip to D20 anode and set its sensitivity at 5V/div.
Set the LEVEL potentiometer full clockwise.
The load resistor is disconnected.
➭
INITIAL TEST:INITIAL TEST:
INITIAL TEST:INITIAL TEST:
INITIAL TEST:
Increase slowly the Variac. The channel output signals must be symmetrical
respect the GND without visible distortion and oscillation as shown in
Fig.1
Trace A
(
Trace B
shown the amplifier 2nd stage input). If there is a distortion
read the section ADVICES.
➭
HIGH RAIL CHECK:HIGH RAIL CHECK:
HIGH RAIL CHECK:HIGH RAIL CHECK:
HIGH RAIL CHECK:
Connect the CH2 probe tip to D25 cathode and set its sensitivity at 20V/div.
When the output signal (Positive half-wave) is less than 34Vp the voltage on
D25 cathode must remain constant at 40V, when the output signal exceeds
40Vp the voltage must follow the output signal with 6V offset (see
Fig.2 Trace
B
), to check the negative high rail connect the probe to D26 anode (see
Fig.2
Trace C
).
➭ Connect the 4Ω 500W load on the output and repeat the INITIAL and HIGH
RAIL checks.
➭
GAIN ADJUSTMENT:GAIN ADJUSTMENT:
GAIN ADJUSTMENT:GAIN ADJUSTMENT:
GAIN ADJUSTMENT:
Set the generator level at -10dB (0,245V
RMS
), adjust the trimmer VR2 on
INPUTS board to obtain an output level of 19Vp (13.4V
RMS
).
➭ Re-set the generator level at 0dB (0,775V
RMS
),
➭
SIGN/COMP SENSOR CHECK:SIGN/COMP SENSOR CHECK:
SIGN/COMP SENSOR CHECK:SIGN/COMP SENSOR CHECK:
SIGN/COMP SENSOR CHECK:
Set the LEVEL pot to minimum, set the scope timebase at 1V/div. 1mS/div.,
then increase the level and check the SIGNAL/COMP led activity: it must turn
on (green light) when the amplifier output is higher than 1Vp.
Set the scope at 20V/div. and increase the level, check the led: it must change
from green to red colour when the amplifier output signal is 50±2Vp,
increasing the input level the output signal must keep the same level, this is
due to the limiter-compression circuitry (IC2, DL1, IC1).
➭
BIAS ADJUSTMENT:BIAS ADJUSTMENT:
BIAS ADJUSTMENT:BIAS ADJUSTMENT:
BIAS ADJUSTMENT:
With the load connected wait until the temperature reach 50°c.
Set the generator level at zero, connect the Multimeter across
the resistors
R60, then adjust VR1 trimmer to read 15±0.5mVdc.
➭
BANDWIDTH CHECK:BANDWIDTH CHECK:
BANDWIDTH CHECK:BANDWIDTH CHECK:
BANDWIDTH CHECK:
Switch alternatively the generator frequency to 100Hz and 10kHz, no level
changes must be detectable respect 1kHz.
➭
OFFSET SENSOR CHECK:OFFSET SENSOR CHECK:
OFFSET SENSOR CHECK:OFFSET SENSOR CHECK:
OFFSET SENSOR CHECK:
Set the Variac to zero voltage output, disconnect resistive load from the
amplifier output, connect temporarily (by means of a suitable conductor wire)
CN2 pin 3 (+15Vdc) to R72 side RL1, the protection circuitry (TR14,15,16)
detect the DC voltage and open the output relay (RL1) within 3 seconds
approx.
Remove the connection, wait until the relay switch on and after some seconds
repeat the check with -15Vdc (available on CN2 pin 2), the protection circuitry
must open the relay again.
➭
SIGNAL TO NOISE RATIO CHECK:SIGNAL TO NOISE RATIO CHECK:
SIGNAL TO NOISE RATIO CHECK:SIGNAL TO NOISE RATIO CHECK:
SIGNAL TO NOISE RATIO CHECK:
Disconnect the audio generator and short the input (pin 1,2,3 of XLR socket
shorted) the output signal (noise) must be less than 1mV.
AV15SA Amplified SubwooferAV15SA Amplified Subwoofer
AV15SA Amplified SubwooferAV15SA Amplified Subwoofer
AV15SA Amplified Subwoofer
The following adjustment and notes are relative to this model only.
TECHNICAL SPECIFICATIONSTECHNICAL SPECIFICATIONS
TECHNICAL SPECIFICATIONSTECHNICAL SPECIFICATIONS
TECHNICAL SPECIFICATIONS
Dimensions: (WxHxD) 500x706x490mm
Weight: 24,5Kg
Power Requirements: (230Vac±10% 50Hz) 370VA
(115Vac±10% 50/60Hz) 370VA
Output Power*: (4Ω) 350W
Max. Undistorted Out*: (4Ω) 105Vpp
Sensitivity: (1W/1m) 97dB
SPL
Max SPL: (continuous) 122dB
SPL
(peak) 125dB
SPL
Frequency Response (filter+amplifier+speaker) 50Hz÷320Hz
(only amplifier -3dB) 10Hz÷60KHz
Input Sensitivity: (0dB) 0.775V
RMS
Input Impedance: (balanced) 30KΩ
(unbalanced) 15KΩ
Voltage Gain: (@150Hz) 33±1dB
IMD: (SMPTE 60Hz/7KHz 4:1) <0.1%
THD: (THD+N) <0.1%
S/N Ratio: (unweighted) >100dB
SetupSetup
SetupSetup
Setup
➭ Connect the Variac between the mains and the amplifier and set it at zero
voltage.
➭ Turn full clockwise the LEVEL and X-OVER potentiometers.
➭ Connect the audio generator to the channel R input and set it to 150Hz
775mV
RMS
(0dB) sinusoidal signal.
➭ Place the temperature sensor between heatsink and the PTC (R59).
➭ The procedures that follow must be executed subsequently in the order
specified.
 Loading...