7
4. Installation, connections and
transport (fig. 1&3)
HERCULES is a three-way tri-amplified system made
of a SATELLITE and a SUB-WOOFER, which includes
in the same product loudspeakers, signal processors
and power amplifiers.
The amplification module, hosted inside the sub-woofer
cabinet, includes THREE different power amplifiers,
one for each of the system’s loudspeakers (1” driver,
12” midrange and 15” woofer). A 24dB per octave
crossover network for the frequency separation, an EQ
CIRCUIT for the system compensation and three
different ANTI-CLIPPING circuits for the loudspeaker
protection are also included.
1. Installation
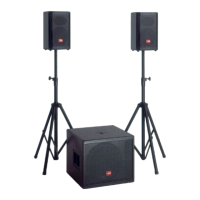
The best position for the sub-woofers is on the floor,
because the low frequency response is enhanced by
the floor reflections. It’s not necessary to place the sub-
woofers in a given position, because the low
frequencies don’t have directivity and therefore they are
evenly diffused whether the subs stay in a central
position or on both sides of the stage. Since the
HERCULES SUBS are fitted with a speaker stand
adapter, each satellite can be installed directly on top
of the relative sub using the LEM SC-31 telescopic
stand.
2. Connections
All the HERCULES system’s amplifiers are housed into
the sub-woofer’s power module. From this module the
needed power is transferred thru a proper cable to the
satellite’s loudspeakers.
Make use of BALANCED signal cables for the
connection of the sub-woofer to the mixer. Both 1/4”
JACK and M-XLR connectors can be used.
For the connection of the satellite to the sub-
woofer, make certain to always use only the
SPEAKON 4-wire power cable included in the
Hercules Sat package (see fig. no. 5 - CONNECTION
CABLES). This cable allows to connect the 1” driver
and the 12” midrange speaker to the two 150 watts
power amplifiers dedicated to the satellite.
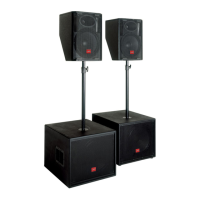
The STANDARD SETUP of the HERCULES system
includes TWO SATELLITES and TWO SUB-
WOOFERS (see fig. no. 3 - CONNECTIONS -
STANDARD SETUP). Each sub-woofer’s input is
connected to the mixer’s output and the sub-woofer’s
power output is connected to the relative satellite.
In this configuration the SELECT button must be UP
and the suggested setting for the satellite VOLUME
control is -6dB. However this setting can be modified
according to kind of application and to the environment
where the system is used: turn it clockwise if you want
to increase the satellite level or counterclockwise if you
want to reduce it.
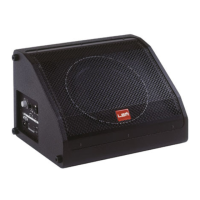
Due to the satellite’s very high efficiency, for larger
applications also TWO SATELLITES and FOUR SUB-
WOOFERS can be used (DOUBLE SETUP, see fig. no.
4 - CONNECTIONS - STANDARD SETUP). In this
case, the two amplifiers left unused in the additional
sub-woofers, thanks to the dedicated MONITOR input
on the module panel, can feed two additional satellites
to be used as stage monitors. To do that, you only need
to act on the SELECT switch, to connect the MONITOR
inputs of the two additional sub-woofers to the mixer
monitor output and to connect the sub’s power output
to the HERCULES SAT used as stage monitors
In this configuration the SELECT button must be
DOWN and the suggested setting for the satellite
VOLUME control is MAX. Also in this case, if the
satellite volume is too high it can be reduced turning
the knob counterclockwise.
3. Transport
HERCULES SUB has four wheels on the bottom side
and a housing for the satellite on the front panel. Once
the sub is on the wheels, the satellite can be placed
on top of it and the system can be easily transported
also by one people.
 Loading...