Page 96 - IOM / ROOFTOP BALTIC Series - 0704 - E
unit : - -unit : - -
unit : - -unit : - -
unit : - -
Service terminalService terminal
Service terminalService terminal
Service terminal
Wait to connectWait to connect
Wait to connectWait to connect
Wait to connect
Display addressDisplay address
Display addressDisplay address
Display address
Setting………………: 32Setting………………: 32
Setting………………: 32Setting………………: 32
Setting………………: 32
I/O Board address:--I/O Board address:--
I/O Board address:--I/O Board address:--
I/O Board address:--
######################################
######################################
###################
SelftestSelftest
SelftestSelftest
Selftest
Please waitPlease wait
Please waitPlease wait
Please wait
######################################
######################################
###################
Display addressDisplay address
Display addressDisplay address
Display address
changedchanged
changedchanged
changed
Display addressDisplay address
Display addressDisplay address
Display address
Setting………………: 00Setting………………: 00
Setting………………: 00Setting………………: 00
Setting………………: 00
I/O Board address:--I/O Board address:--
I/O Board address:--I/O Board address:--
I/O Board address:--
unit : - -unit : - -
unit : - -unit : - -
unit : - -
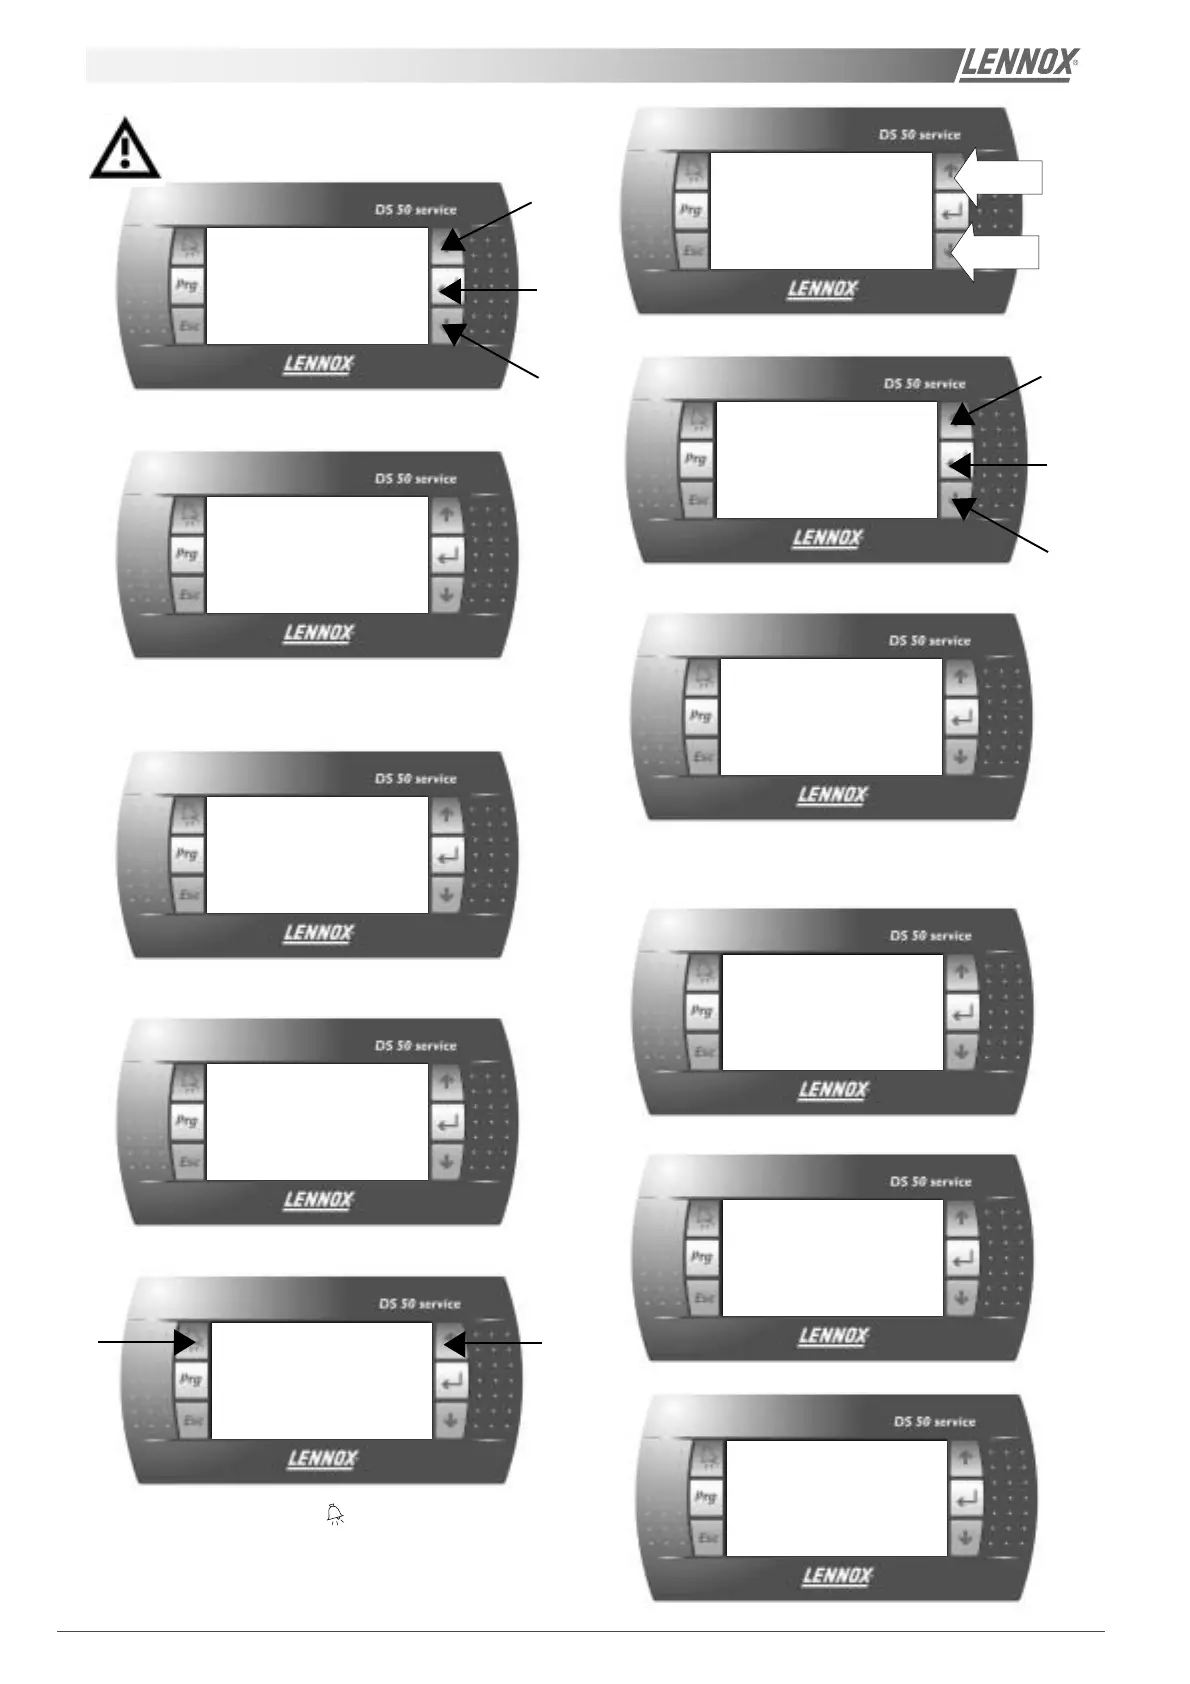
BM50 addressing
Mandatory operation if the units are
connected with each other
(Master/Slave link).
Press at the same time during a few seconds
Then you will see the screen as below.
Display addressDisplay address
Display addressDisplay address
Display address
Setting………………: 32Setting………………: 32
Setting………………: 32Setting………………: 32
Setting………………: 32
I/O Board address:--I/O Board address:--
I/O Board address:--I/O Board address:--
I/O Board address:--
Press the key until the cursor moves to the field
"Display address setting"
Use the key to select the required value
(usually "00") and confirm by pressing .
If the address has been changed it will display the screen shown
as below.
Switch off the unit and then switch on.
Wait for a few seconds
During this message, press &
at the same time during a few
seconds until the new screen appears.
Use the key to select the required value for pLAN address (for
example "2") and confirm by pressing .
Display addressDisplay address
Display addressDisplay address
Display address
Setting………………: 00Setting………………: 00
Setting………………: 00Setting………………: 00
Setting………………: 00
I/O Board address:--I/O Board address:--
I/O Board address:--I/O Board address:--
I/O Board address:--
Press the key until the cursor moves to the field "Display address
setting"
Use the key to select the required value (usually "32") and
confirm by pressing .
Press at the same time during a few seconds
Then you will see the screen as below.
Then you just have to indicate the number of the unit.
pLAN address : 1pLAN address : 1
pLAN address : 1pLAN address : 1
pLAN address : 1
UP: increaseUP: increase
UP: increaseUP: increase
UP: increase
DOWN: decreaseDOWN: decrease
DOWN: decreaseDOWN: decrease
DOWN: decrease
ENTER: save & exitENTER: save & exit
ENTER: save & exitENTER: save & exit
ENTER: save & exit
Increase
Decrease
Switch off the unit and then switch on.
Disconnect the DS50 from the unit and then reconnect it.
 Loading...