Page 30
E–Horizontal Left–Hand
Discharge Application
NOTE-For horizontal applications, a secondary drain pan
is recommended. Refer to local codes.
1– Discard drip shields, if applicable. The shields are
used for downflow applications only.
2– Pull coil assembly from unit. Pull off the horizontal
drain pan.
3– Remove drain plugs from back drain holes on hori-
zontal drain pan and re–install them on front holes.
4– Rotate drain pan 180 front to back and install it on
the opposite side of coil.
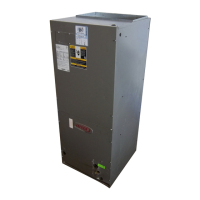
5– Remove screws from top cap. Remove horizontal
drip shield screw located in the center of the back
coil end seal. See figure 18.
6– Rotate horizontal drip shield 180 front to back.
7– Remove plastic plug from left hole on coil front
end seal and re–install plug in back hole. Re–install
horizontal drip shield screw in front coil end seal.
Drip shield should drain downward into horizontal
drain pan inside coil.
8– Rotate top cap 180 front to back and align with
unused screw holes. Holes must align with front
and back coil end plates. Note that top cap has a
45 bend on one side and 90 bend on the other. The
90 bend must be on the same side as the horizontal
drain pan. See figures 18 and 19.
NOTE-Use extreme care when re-installing screws into
coil end plate engaging holes. Coil damage could result by
misalignment.
3
4
5
5
2
6
7
8
8
90
BEND
9
CABINET
SUPPORT
COIL SHOWN IN UP-FLOW POSITION
FOR EASY CONVERSION
90 BEND
8
BACK COIL END
SEAL
8
8
TOP CAP
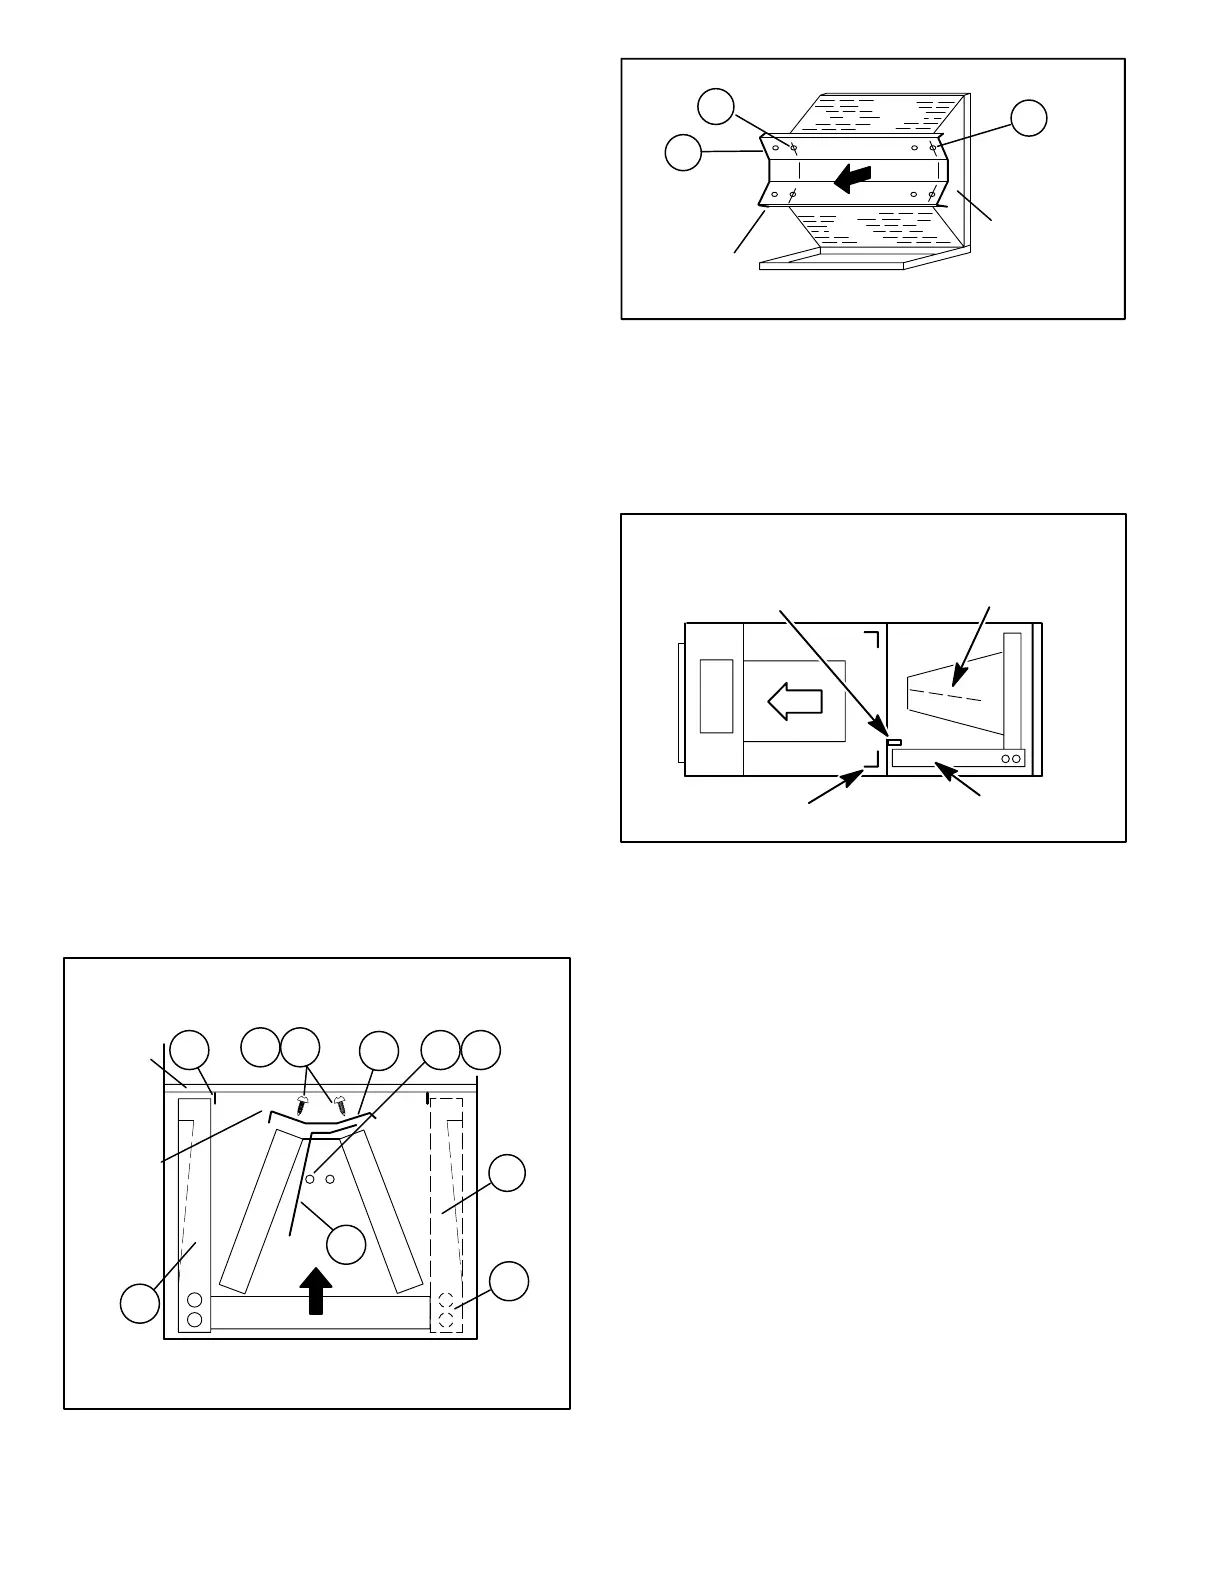
9– From the upflow position, replace coil assembly.
Then flip cabinet 90 to the left and set into place.
Replace coil assembly. Secure coil in place by
bending down tab on cabinet support rail. See
figures 18 and 20.
FIGURE 20
LEFT–HAND DISCHARGE CONFIGURATION
HORIZONTAL
DRIP SHIELD
HORIZONTAL
DRAIN PAN
SECURING TAB ON CABINET
SUPPORT RAIL
DOWNFLOW RAIL
NOTE-For horizontal applications in
, remove the downflow rail closest to the drain pan.
To remove rail, remove screw from rail at back of unit and at
cabinet support rail. Remove downflow rail then replace
screws. Also, seal around the exiting drain pipe, liquid and
suction lines to prevent infiltration of humid air.
11– Flip access door. Knock out the portion of door for
the drain pipes and attach to the cabinet with screw
provided. Replace access door on the unit.
12– Set unit so it is sloped towards the drain pan (1/4”
[6mm]). Connect return and supply air plenums as
required using sheet metal screws.
13– If hanging the unit, it must be supported along the
entire length of the cabinet. If using chain or strap,
use a piece of angle iron or sheet metal attached to
the unit (either above or below) so that the full length
of the cabinet is supported. Use securing screws no
longer than 1/2” (13mm) to avoid damage to coil or
filter. See figure 17. Connect return and supply air
plenums as required using sheet metal screws.
 Loading...