14
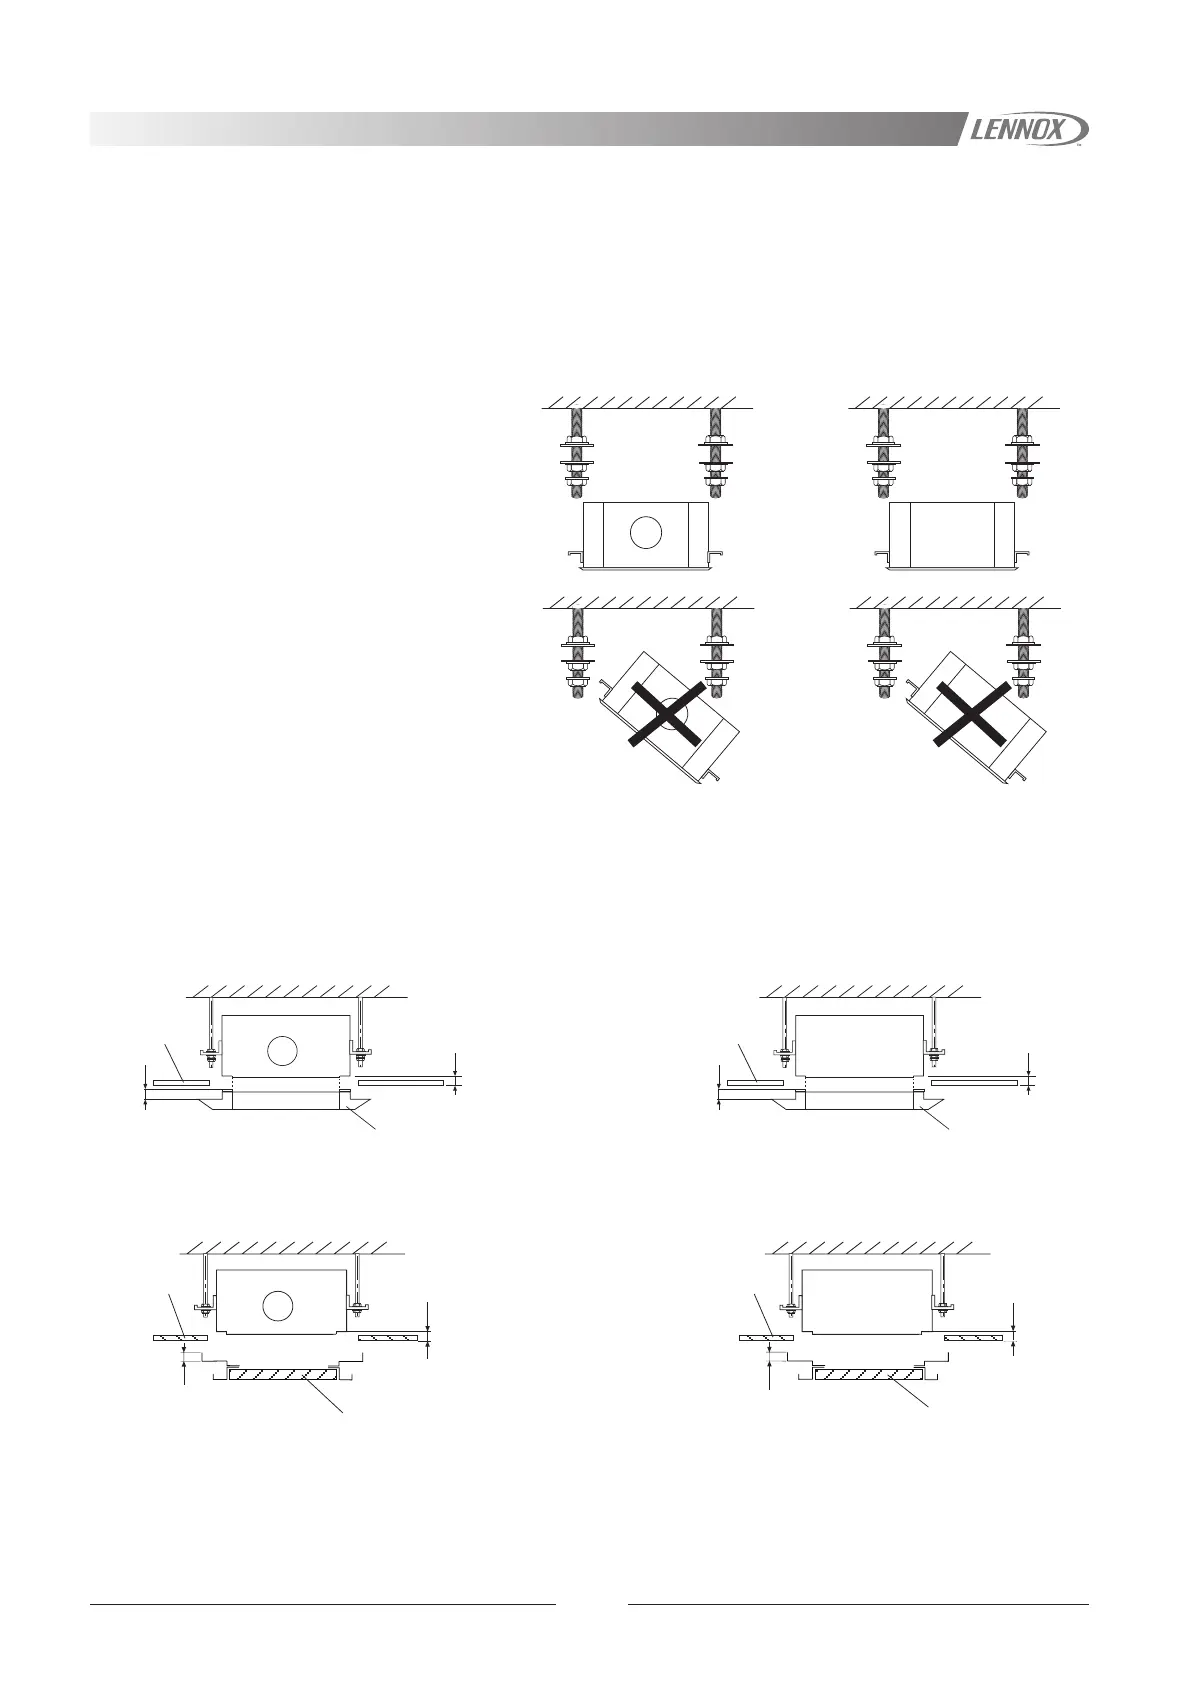
Metallic diffuser panel
25
25
False
ceiling
Metallic diffuser panel
25
25
False
ceiling
25
25
Plastic diffuser panel
False
ceiling
25
25
Plastic diffuser panel
False
ceiling
MODEL 600x600 MODEL 600x1200
MODEL 600x600 MODEL 600x1200
PLASTIC DIFFUSER
METALLIC DIFFUSER
UNIT INSTALLATION
8. The cassette brackets hook over the washer.
Tighten the cassette with the lower nuts.
7. When lifting the cassette into position care should be taken not to lift the unit by the drip tray, water connection
or drain tube; these elements could be damaged. The cassette should be lifted by the hanging brackets. The hanging
brackets should be insulated with the supplied insulation.
9. Check to ensure the unit is level. The drain
will then automatically be lower than the rest of
the drip tray.
10. Tighten the nuts on the suspended rods to ensure a distance of 25 mm between the bottom face of the body
of the unit and false ceiling.
6. For Models 600x600, to facilitate the connections of water pipes and the drain tube, is advisable to disassemble
the supporting bracket situated on this corner. Once the installation is completed, the bracket must be reassembled.
 Loading...