14
set to Auto, Dry or Off.
10. Follow steps 2 through 9 to setup the next
event. Each event ends at the start time of
the next event.
NOTE - Use the Back/Turbo button to return to
the previous step during event setup.
Activate and Deactivate Timed Operation
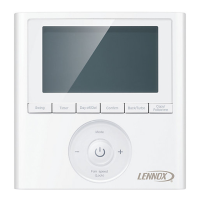
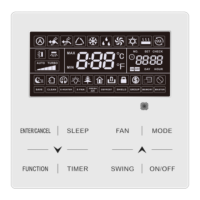
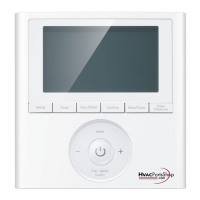
1. Press the Timer button to activate timed op-
eration.
2. Press the Power button to deactivate timed
operation.
Setup Days Off
Setup a day, or multiple days, within the sched-
uled week for which the indoor unit will not oper-
ate. When the day arrives, the unit will be pow-
ered off and will not operate until the next day’s
rst event. Once the set day has passed, the
Day Off setting is automatically removed.
1. Press the Timer button.
2. Press the Conrm button.
3. Use the + and - buttons to select the day of
the week.
4. Press the Day off/Del button.
5. Press the Back/Turbo button.
6. Follow steps 3 and 4 for every day off required.
Copy a Schedule to a New Day
All events for the scheduled day will be copied.
1. Press the Timer button until Week is high-
lighted.
2. Press the Conrm button.
3. Use the + and - buttons to select the day to
copy from.
4. Press the Copy/Follow Me button. The letters
“CY” will be displayed on the screen.
5. Use the + and - buttons to select the day to
copy to.
6. Press the Copy/Follow Me button to conrm.
7. Press the Back/Turbo button to return to the
weekly timer.
8. Follow steps 3 through 7 to copy a schedule
for additional days.
Edit a Scheduled Event
1. Press the Timer button until Week is high-
lighted.
2. Press the Conrm button.
3. Use the + and - buttons to select the day of
the week.
4. Press the Conrm button.
5. Use the + and - buttons to select the event to
edit. The display will show the event’s start
time, mode, set point and fan speed.
6. Use the + and - buttons to change the start
time of the event.
7. Press the Conrm button to conrm the start
time and move to the operation mode selec-
tion.
8. Use the + and - buttons to change the opera-
tion mode for the event.
9. Press the Conrm button to conrm the op-
eration mode and move to the set point se-
lection.
10. Use the + and - buttons to change the set
point for the event.
 Loading...
