c.Slidetheopticaldiskdrivebayback,thenpushitinandreattachittothechassiswiththe
screws.
Step11.Reattachthefrontbezel,computercover.
Replacingtheharddiskdrive
Note:Forthisprocedure,ithelpstolaythecomputerat.
Toreplacetheharddiskdrive:
Step1.Removeanymedia(disks,CDs,DVDs,ormemorycards)fromthedrives,shutdowntheoperating
system,andturnoffthecomputerandallattacheddevices.
Step2.Unplugallpowercordsfromelectricaloutlets.
Step3.Disconnectallcablesattachedtothecomputer.Thisincludespowercords,input/output(I/O)
cables,andanyothercablesthatareconnectedtothecomputer.Referto“Leftandrightview”
and“Rearview”forhelpwithlocatingthevariousconnectors.
Step4.Removethecomputercover.Referto“Removingthecomputercover”.
Step5.Removethefrontbezel.Referto“Removingthefrontbezel”.
Step6.Removetheopticaldiskdrivebay.Referto“Replacinganopticaldrive”.
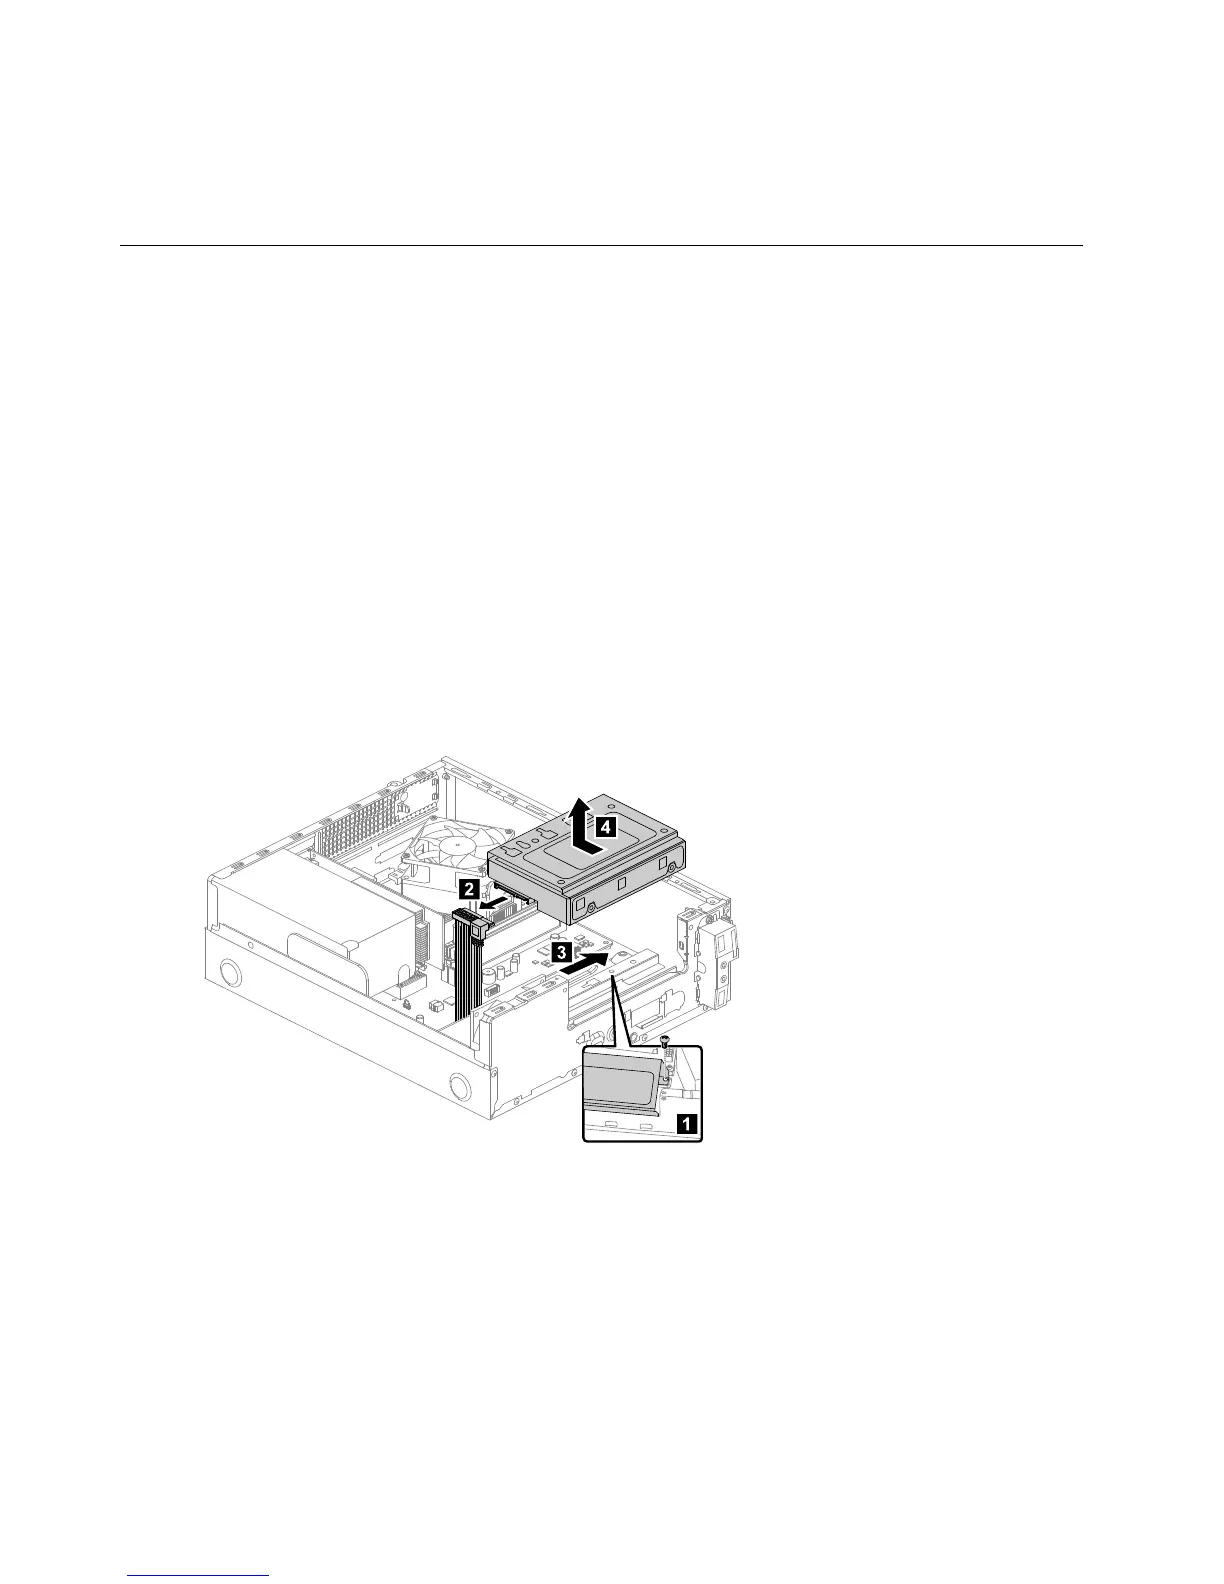
Step7.Removethescrewthatsecurestheharddiskdrivebaytothechassis.
Step8.Slideouttheharddiskdrivebay,thenliftitup.Disconnectthedataandpowercablesfrom
theharddiskdrive.


 To Next Page