26
MultiSITE CRC 1 Controller
Due to our policy of continuous product innovation, some specifications may change without notification.
©LG Electronics U.S.A., Inc., Englewood Cliffs, NJ. All rights reserved. “LG” is a registered trademark of LG Corp.
ACCESSORIES INSTALLATION
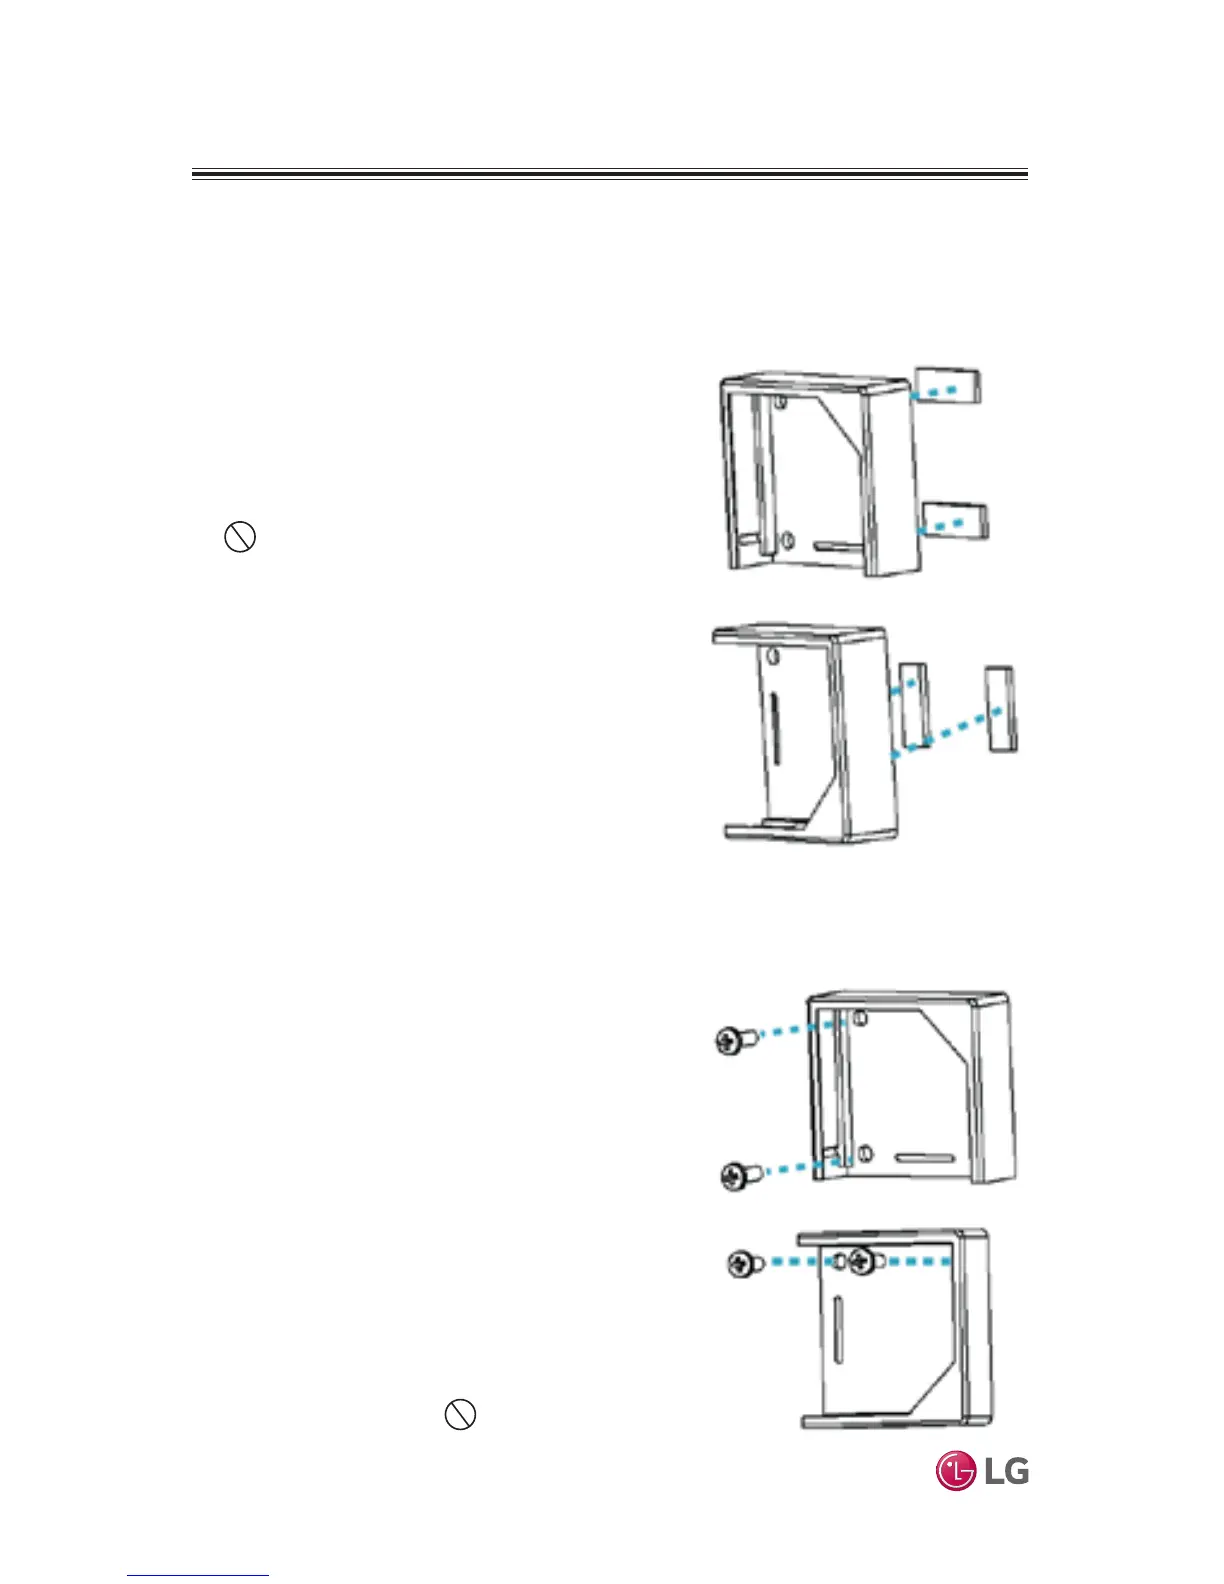
2. Position the sensor housing on the two sided tape and
press firmly to secure in place.
3. Ensure the sensor is paired. If necessary, refer to
“ZigBee Pro Quick Setup” on page 28.
4. Slide the sensor into the housing.
To install with screws:
1. Secure the sensor housing to the desired loca-
tion with two screws (Figure 30). Ensure screws
are tight and sensor does not move easily.
Do not torque screws.
2. Ensure the sensor is paired. If necessary, refer
to “ZigBee Pro Quick Setup” on page 28.
3. Slide the sensor into the housing.
Install Magnet
Use either screws or two sided tape to install the
magnet. The sensor housing and the magnet must
align properly. The sensor and magnet must be
within 0.75 inches of each other. Be sure to install
the parts in the correct orientation.
If installing with tape, the magnet’s screw tab can be
removed by snapping the tab along the scored line
(Figure 31). To install with tape:
1. Refer to Figure 26 for relative positioning of
sensor and magnet.
2. Affix 2-sided tape to desired location. Ensure
tape is flush with surface and securely affixed to
surface.
3. Position the magnet on the two sided tape and
press firmly to secure in place.
To install with screws:
1. Refer to Figure 26 for relative positioning of
sensor and magnet.
2. Secure the magnet to the desired location with
two screws. Ensure screws are tight and magnet
does not move easily.
Do not torque screws.
Figure 29: Install Sensor
with Tape
Figure 30: Install Sensor
with Screws

 Loading...