15INSTALLATION
ENGLISH
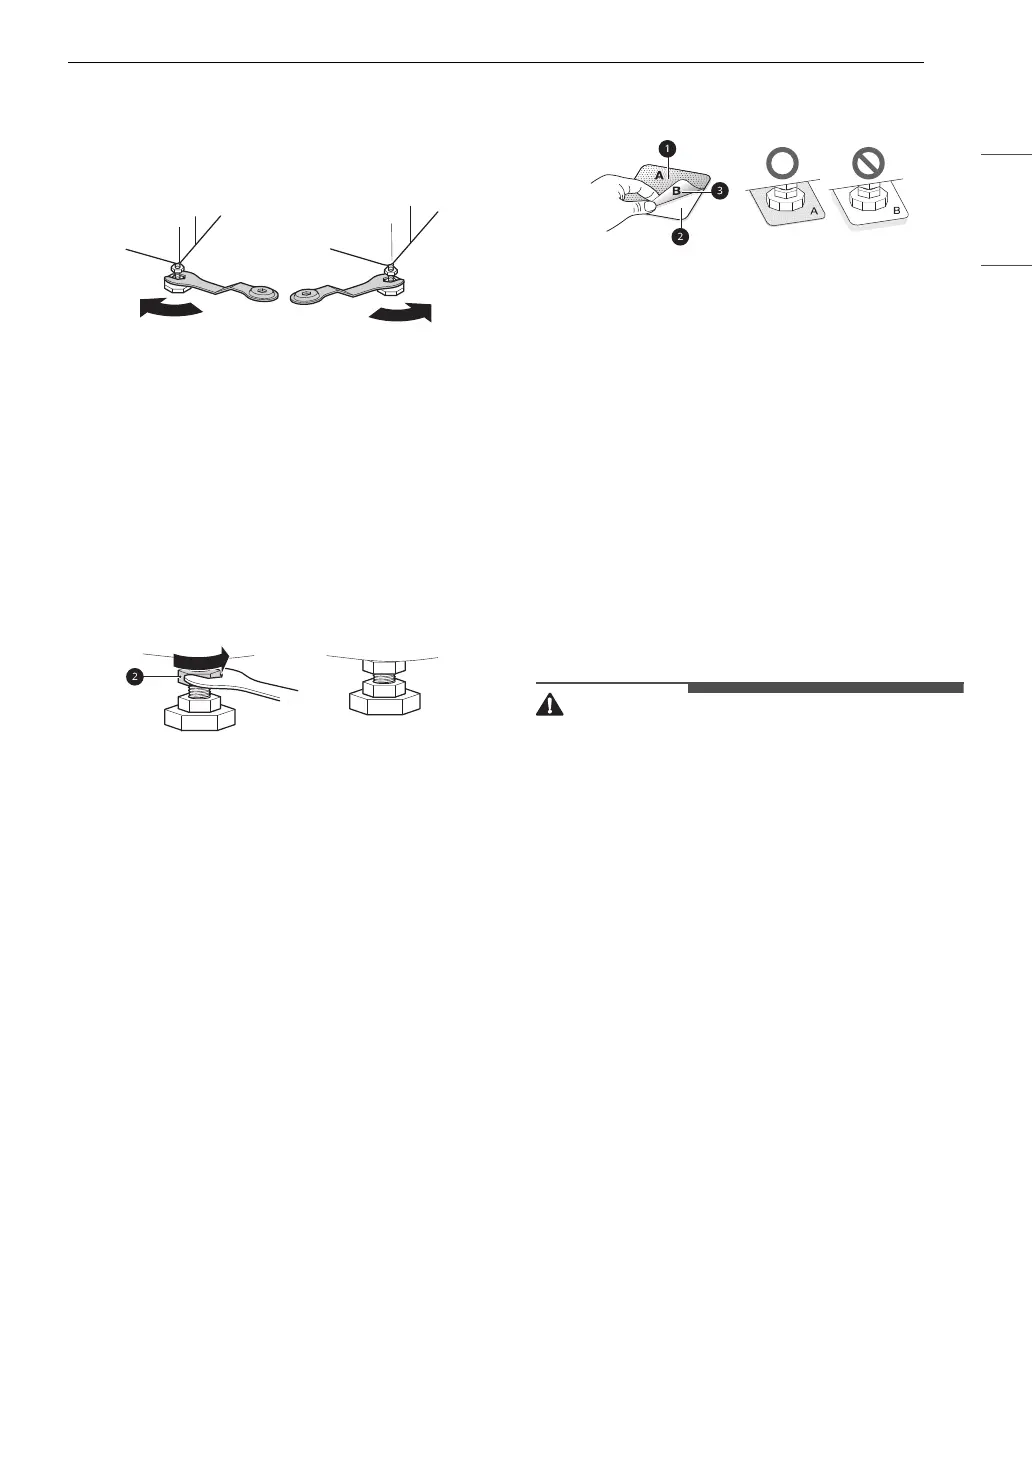
2 Adjust the leveling feet.
• Turn all 4 leveling feet in one direction to
raise the washer or the other direction to
lower it.
3 Check the level again.
• Push or rock the top edges of the washer
gently to make sure the washer does not
rock. If the washer rocks, readjust the
leveling feet.
4 Tighten the locknuts b
• Turn the locknuts counterclockwise and
tighten them when the washer is level.
Using Non-Skid Pads
If you install the washer on a slippery surface, it
may move because of excessive vibration.
Incorrect leveling may cause malfunction through
noise and vibration. If this occurs, install the non-
skid pads under the leveling feet and adjust the
level.
1 Clean the floor to attach the non-skid pads.
• Use a dry rag to remove and clean foreign
objects or moisture. If moisture remains,
the non-skid pads may slip.
2 Adjust the level after placing the washer in the
installation area.
3 Place the adhesive side c of the non-skid pad
on the floor.
• It is most effective to install the non-skid
pads under the front leveling feet. If it is
hard to place the pads under the front
leveling feet, place them under the back
leveling feet.
a This side up
b Remove backing
4 Recheck the washer’s levelness.
• Push or rock the top edges of the washer
gently to make sure the washer does not
rock. If the washer rocks, level the washer
again.
Final Installation Check
Connecting to the Power Supply
Plug the washer into a 120 VAC, 60 Hz grounded 3-
prong outlet.
• Do not use a worn or damaged power cord or
power plug. Replace or repair it immediately.
Failure to do so may result in death, fire, electric
shock, or malfunction.
• Do not modify the power cord and plug provided
with the appliance. Do not damage it when
installing or moving the appliance. Doing so may
result in death, fire, electric shock, or
malfunction.
• Make sure that the appliance is grounded.
• Connect this appliance to a grounded outlet
conforming to the rating prior to use. Failure to
do so may result in fire, electric shock, or
malfunction.
• Do not damage or cut off the ground prong of
the power cord. Doing so may cause death, fire,
electric shock, or product malfunction.
• Improper connection of the equipment
grounding conductor can result in risk of electric
shock. Check with a qualified electrician or
service technician if you are in doubt as to
whether the appliance is properly grounded. If
the plug does not fit the outlet, have a proper
outlet installed by a qualified electrician.
• The appliance and outlet must be positioned so
that the plug is easily accessible.

 Loading...