Quick Start Guide
HDMI-3D-OPT-RX150RA
Further information
The document is valid with the following rmware version: 2.0.0
The product brief and further information are available at www.lightware.eu.
See the Downloads section on the website of the product.
Contact us
sales@lightware.eu
+36 1 255 3800
support@lightware.eu
+36 1 255 3810
Lightware Visual Engineering LLC.
Peterdy 15, Budapest H-1071, Hungary
Doc. ver.: 2.1
19200062
Projector
RS-232
OPTM
Power
Power adaptor
HDMI-3D-OPT-RX150RA
receiver
HDMI Audio
amplifier
Audio
USB
USB
POWER
HDCP
RS-232
FUNC.
USB
CONT.
HDMI
SIGNAL
LASER
HOTPLUG
EMULATE
USB LINK
FIBER LINK
HDMI
Digital audio
RS-232
USB
OPT
HDMI / DVI-D
Analog audio
RS-232
USB
RS-232
+ Local USB
POWER
HDCP
RS-232
FUNC.
USB
CONT.
HDMI
SIGNAL
LASER
HOTPLUG
EMULATE
USB LINK
FIBER LINK
Safety and
Warranty
Info
Quick
Start
Guide
5
1 4 6
2 3
7
8
9 q w
HDCP
HDMI
SIGNAL
LASER
HOTPLUG
EMULATE
USB LINK
FIBER LINK
Important Safety Instructions
Please read and keep the information in the attached safety instructions supplied with the
product before you start using the device.
The receiver is a Class 3R laser product. Caution! Invisible Class 3R laser radiation!
Avoid exposure to the beam!
Introduction
Thank You for choosing Lightware HDMI-3D-OPT-RX150RA receiver. The product provides
extension of uncompressed Full-HD video and audio with optional HDCP encryption plus
USB HID over one multimode ber up to 2500 m. The unit offers a digital and an analog
audio output, bi-directional RS-232 pass-through, HDCP compliance and works the most of
standard AV resolutions.
The interface’s 9 Gbps bandwidth is capable of transmitting 1080p (@120Hz) video signals,
video up to 4K pixel resolution (4K x 2K @30Hz), as well as video with full support of content
protection (HDCP). HDMI-3D-OPT-RX150RA offers dual audio outputs: a digital S/PDIF audio
and a symmetrical analog output with PHOENIX connectors.
Intelligent HID Emulation is provided for two devices with full transparency. The special HID
devices including keyboard and mouse - are emulated by the extender and transparently
transferred to the computer with the result that no drivers are required for the proper
functionality, it’s as easy as Plug & Play.
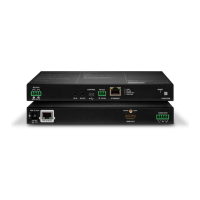
Rear View
Front View
1
USB KVM ports
USB KVM ports for HID-compatible devices (preferably
keyboard and mouse).
2
Power LED The LED indicates the power status of the device. It lights
when the receiver is powered.
3
USB control port USB interface for LDC connection, and firmware upgrade
purpose.
4
Function button Factory default settings can be called by pressing the
button.
5
Status LEDs The LEDs give immediate feedback about actual state of
the device.
6
RS-232 port D-sub connector for RS-232 serial port.
7
5V DC input Local power in; connect the output of the supplied 5V DC
power adaptor.
8
SC ber input Connect a multi-mode single ber optical cable between
the receiver and the transmitter.
9
S/PDIF output S/PDIF connector for digital audio output signal.
q
Analog audio
output
5-pole Phoenix connector for balanced analog audio output
signal.
w
HDMI output HDMI connector for DVI video or HDMI video and audio.
Status LEDs
HDCP
ON: video input signal is encrypted with HDCP.
OFF: video input signal is not encrypted with HDCP.
HDMI
ON: the input and output signal type is HDMI.
BLINKING: the input signal type is HDMI but the output signal is DVI.
OFF: the input signal type is DVI.
SIGNAL
ON: a valid video clock signal is present on the ber input port of the receiver.
LASER
ON: the laser signal of a connected transmitter is detected on the ber input port.
HOTPLUG
ON: a powered sink device is connected to the HDMI OUT port and sends hotplug signal.
EMULATE
ON: composite mode is active in the USB KVM crosspoint.
OFF: no mode is active or transparent mode is active in the USB KVM crosspoint.
USB LINK
ON: USB KVM signal is detected on the ber input port.
FIBER LINK
ON: a powered transmitter is connected to the receiver and they can communicate over
the ber optical cable.
Connecting Steps
Box Contents
Receiver unit 5V DC adaptor with
interchangeable plugs
Phoenix Combicon 5-pole
connector
Safety and warranty info,
Quick Start Guide
Mounting
To mount the receiver Lightware supplies optional accessories for different usage. There
are three kinds of mounting kits with similar xing method. The receiver has two mounting
holes with inner thread on the bottom side. Fasten the device by the screws enclosed to the
accessory.
Locking DC Plug
Twist 90° clockwise to lock.
The Under-desk and Under-desk double mounting kit makes it easy to mount a single device
on any at surface, e.g. furniture. 1U high rack shelf provides mounting holes for fastening two
half-rack or four quarter-rack sized units. Pocket-sized devices can also be fastened on the
shelf. To order mounting accessories please contact sales@lightware.eu.
Using different (e.g. longer) screws may cause damage to the device.
The receiver is quarter-rack sized.
Under-desk double mounting kit
1U high rack shelf
Connect the receiver and the compatible transmitter or matrix output board
using a multimode single ber optical cable.
Connect the sink device (e.g. projector) to the HDMI output port of the receiver
by a HDMI cable.
Optionally for RS-232 control: connect a controller/controlled device (e.g.
projector) to the RS-232 port.
Optionally connect a digital audio device (e.g. an audio amplier) to the
S/PDIF audio output port.
Optionally connect an analog audio device (e.g. active speakers) to the 5-pole
Phoenix audio output port.
Optionally for USB HID extension: connect at least one USB HID device (e.g.
keyboard and/or mouse) to the receiver. (Also connect the controlled device (e.g.
PC) to the transmitter.)
Optionally for USB control: connect the receiver to the controller device (e.g.
laptop) by a USB mini B-type cable.
Connect the power adaptor to the DC input on the receiver rst, then to the
AC power socket.
Only HID-compliant devices are supported by the extenders. Non-HID devices (USB sticks,
webcams, etc) will not be working with the receiver. USB HUB devices are also not supported.
Under-desk mounting kit
Optical Extender Concept
HDMI-3D-OPT-RX150RA receiver has a multi-mode single ber input interface which is able to
receive different type of signals at the same time. The device accepts digital video and digital/
analog audio, RS-232, and USB KVM signals over a single ber cable. The device is able to de-
embed the audio signal to the analog (5-pole Phoenix) and the digital (S/PDIF) ports and transmit
it to the audio sink devices. The unit can be controlled from the USB interface (USB mini B-type)
and built with a bidirectional RS-232 port (D-sub). The device also has USB KVM function.
Compatible Devices
The receiver is compatible with the following transmitters and output boards:
HDMI-3D-OPT series transmitters;
UMX-OPT-TX150R transmitter;
HDMI-OPT series transmitters;
MX modular frames with MX-DVI-OPT-OB and MX-HDMI-OPT-OB cards
USB KVM Function
HDMI-3D-OPT-RX150RA receiver supports HID-compliant (Human
Interface Device) devices to transmit USB signal between the source
and sink devices. The transmitter connects to the controlled device (e.g.
PC) and the controlling devices (e.g. computer mouse, keyboard, touch
panel) are connected to the receiver. USB KVM function can be used in two different modes:
Transparent and Composite mode. The related settings are available in the Lightware
Device Controller (LDC) software.
Transparent mode Composite mode
Device support Supports all HID-compliant
devices.
Supports the following HID-
compliant devices: computer
mouse, keyboard built with
up to 107 keys with or without
specic multimedia keys.
Driver software Driver for all connected USB
devices has to be installed on
the controlled computer.
No driver is needed for the
connected devices.
Software Control – Using Lightware Device Controller (LDC)
The device can be controlled from a computer through the USB or RS-232
ports using Lightware Device Controller. Please download the application
from www.lightware.eu, install on a Windows PC or a Mac OS X and connect
to the device.