Rev: 05.23.2017 Page 16 Ground Control 3.0 Service Manual
Controller Replacement
1. Disconnect all jack harnesses from the connectors on the controller.
2. Remove the power and ground harness from the controller.
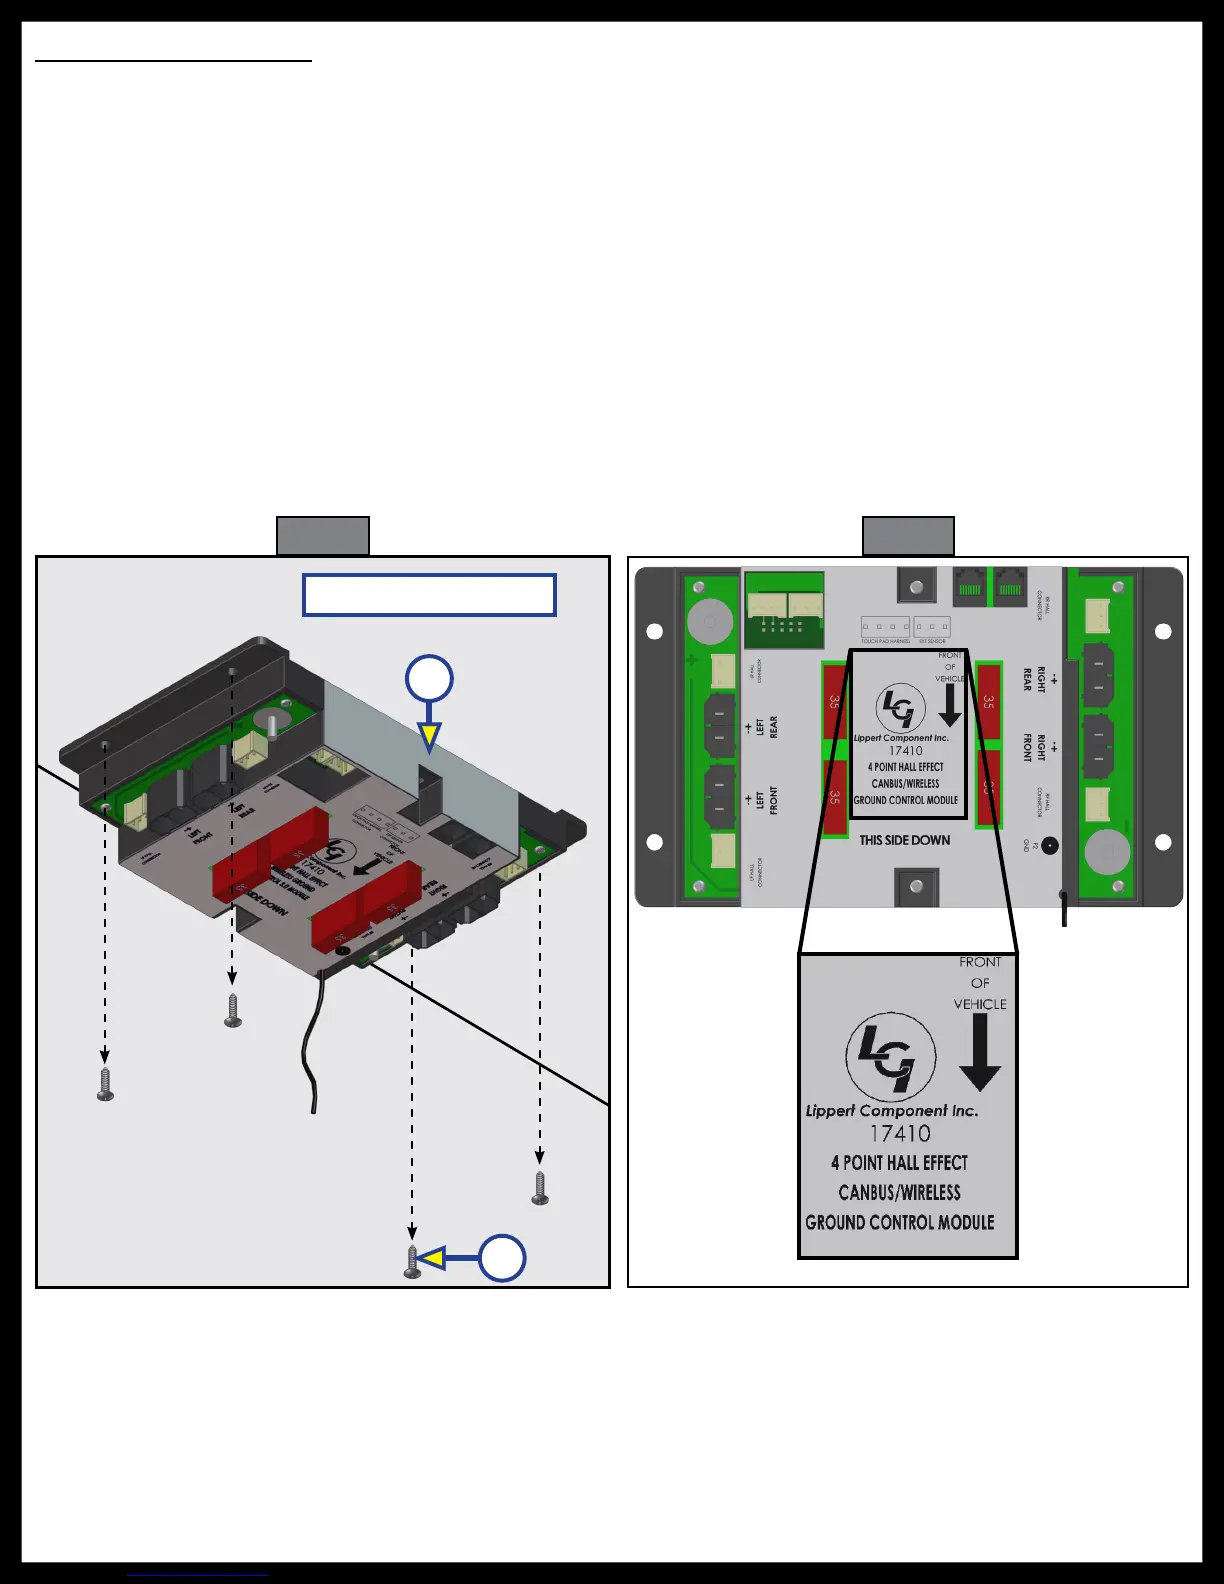
3. Remove the controller (Fig. 25A) from the ceiling of the compartment.
4. Using four #8 x 1” wood screws (Fig. 25B), attach the replacement controller (Fig. 25A) to the ceiling of
the compartment, in the same position as the removed controller.
5. The controller should be positioned directly in the center of the trailer with the arrow on the label of
the controller facing the front of the trailer (Fig. 26).
6. Some 6 point controllers do not have orientation arrows for the front of the trailer. When installing
those controllers, ensure that the port labeled "LEFT FRONT" is pointing to the left-hand front of the
trailer. This will ensure proper orientation and function of the controller.
7. Attach the power and ground harness to the corresponding posts on the replacement controller and
then connect them to the correct posts on the house battery.
8. Connect all jack harnesses to the appropriate connectors on the replacement controller.
Fig. 26
Compartment Ceiling
Fig. 25
A
B
 Loading...