«~
Getting
started
with
Logitech
· Alert·
700e
Logitech
Add-On Camera
2 Plug in Your Camera
When
prompted
to
connect
your
camer
a:
1)
Unscrew
the
hatch
from
the
back
of
the
camera and lift.
1
a)
Plug
the
yellow
cable
connector
into
the
port
1
b)
Screw
the
hatch
firmly
in place.
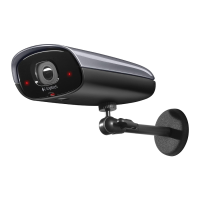
1 Logitech
Outdoor
Camera
2
Camera
power
supp
ly
4
Mounting
accessories
5 microSD"' card
adapter
3 Power
supply
cable (yellow tips)
6
Sys
t
em
Requirements Guide
2)
Unscrew
the
hatch
from
the
power
supply.
2a)
Plug
the
yell
ow
cable
into
the
power
supply
port.
2b) Screw
the
hatch
firmly
in place.
2c)
Mount
the
powe
r supply
unit
to
the
wall.
2d) Plug
the
power
connector
in
to
the
plug
slider
and
plug
the
power
supply i
nto
an
outlet.
2c
~=·
ld--=·
CD
Legal Warning
Certain uses
of
security camera
products
and
audio
devices, such
as
employee monitoring, surreptitious
viewing and recording
of
images
and/or
audio, or the
use,
publication
or
distribution
of
image and/or audio
recordings, are prohibited
or
restricted
by
country, state and
local
l
aws.
Be
sure
to
comply
with
the
laws in
your countr
y,
state, and locality when
using Logitech
Alert products and
services.
• Shortly after
connecting,
your
camera
wi
ll appear in Alert
Commander
software.
You
can
now
move
the
camera
to
its desired location.
Wall/Ceiling
Mounting
Instructions
The wall
mount
allows you
to
easily fasten
your
camera
to
a wall, post,
overhang,
or
other
su
rface.
1) Start
by
pre-drilling
holes
into
the
base surface and
then
fastening
the
mouting
base
with
the
in
cluded
screws.
.....
;::;;;;.
--
.....
;:::;;
----
----~-----
2)
Assemble t
he
moun
tin
g arm
and
attach
it
to
the
base.
3)
Attach
the
camera
to
the
mounting
arm.
or
RECOMMENDATION:
Mount
the
Outdoor
Camera
under
an
eave
or
other
overhang
so
that
it
is
not
exposed
to
direct
sunli
ght
CD
1
Run
Logitech Alert Commander
Be
fore you begin
the
installation, r
ead
all
in
st
ruction
s.
Q) Log
it
ech Alert Master System required.
1)
Be
sure
that
Logitech Alert
Commander
sotware
is
ru
nning
on
the
PC
before
beginning
in
stall
ation
of
camera.
Power Supply Install Note
The power supply unit
is
weatherproof and can be installed outdoors.
Use
these tips
to
ensure reliable power supply usage. Make sure the
outdoor
outlet
is
weatherproof. Do
NOT
place on
the
ground.
1)
Do
NOT
plug
the
power supply
into
a surge protector
or
power strip
as
they
interfere
with
the cameras. Surge protectors are
built
-in
to
the power supply and
protect
the
cameras.
2)
Do
NOT
plug
the
power supply into
the
wall
so
that
it
lays horizontally or flat.
3)
Do
NOT
mount
the power supply upside down. Keep
the
cable connector
port
on
the
bottom.
~-A
4)
©©1
0 r
®OJ ®-o]
4)
Avoid direct sunlight.
4
C)
Q)
CAUTION:
If
leh in sunlight, surface may be
hot
to
the touch.