8
REMOVING PACKAGING AND SET UP
• Remove packing box, foam, and bottom cardboard piece.
• Open the washer door and remove all the accessories in the drum.
• DO NOT use the washer on the foam packaging base.
• Carefully lay the machine down.
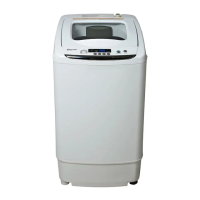
• Slide the noise proof plate into place over the opening in the bottom and attach with the mounting screw.
• The washer should be installed on a stable surface close enough to the water supply, drain, and electrical
outlet to ensure that the hoses and power cord reach.
WARNING: Improper connection of the power cord can result in a risk of electric shock. Check with a qualified
electrician or serviceman if you are in doubt as to whether the appliance is properly grounded. DO NOT modify
the provided plug with the appliance – even if it will not fit into the outlet. Have a qualified technician install the
proper wall outlet for you.
INSTALLATION INSTRUCTIONS
Noise Proof Plate
Mounting Screw
Figure 4
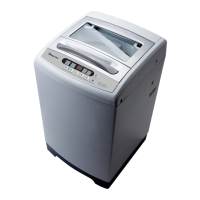
PLACEMENT OF UPPER WATER DRAIN HOSE
• The height of the drain hose (a) should be ~34” to 40”.
• The diameter of the drain pipe (b) should not be
less than 1.20”, with a flow capacity of at least 10.5
gallons (40 L) per minute.
• Before using the washer, the drain hose should be
properly secured to drain pipe or sink.
NOTE: The water will overflow when the height of the
drain hose is less than 34".
Figure 5
Figure 7
Figure 6
a
b
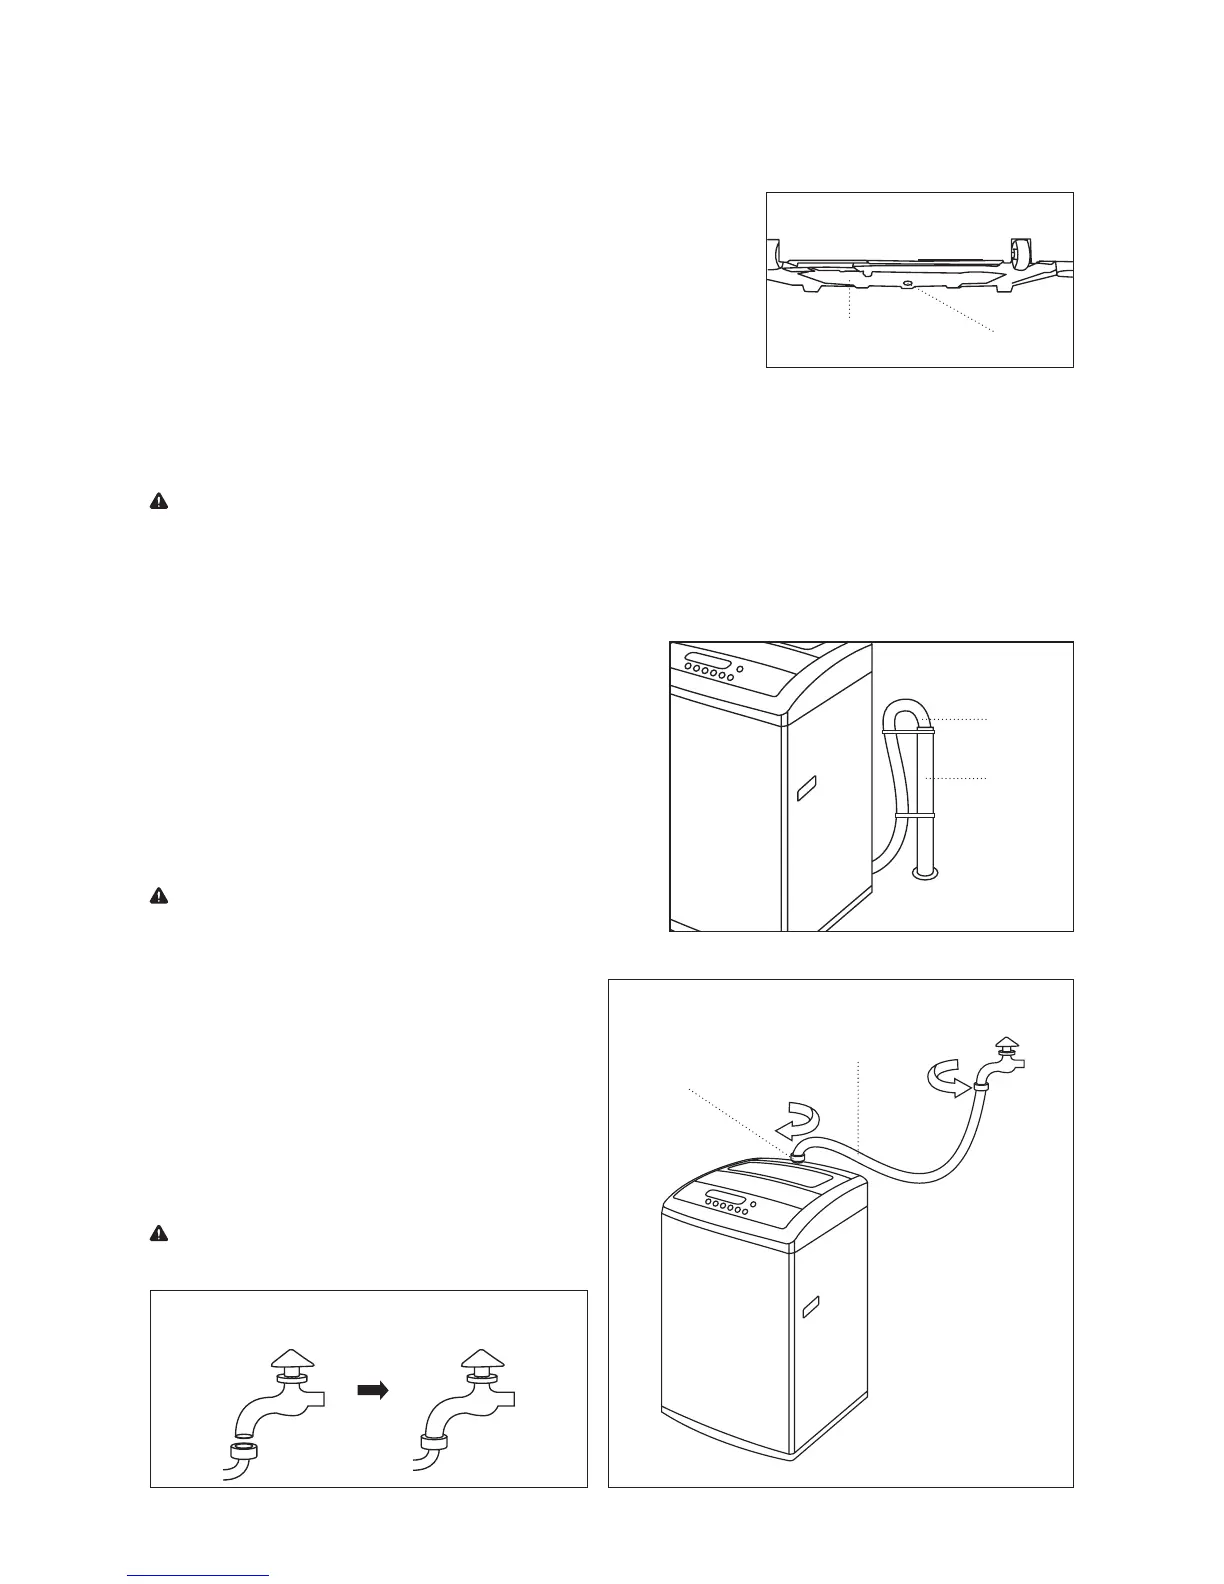
ATTACHING THE WATER INLET HOSE
• Connect the water inlet hose screw to the tap.
• Tightly screw the other end of the hose to the
water inlet valve using the plastic seal inside.
• Apply force evenly on the clamping nut while
tightening and avoid twisting the water inlet
valve to prevent leakage at the joint.
NOTE: When only using one water inlet hose, it
must be connected to the cold water inlet.
Water Inlet Hose
Clamping Nut
 Loading...