6
FUNCTIONAL
DESCRIPTION
CAUTION:
• Always be sure that the tool is switched off and unplugged before
adjusting or checking function on the tool.
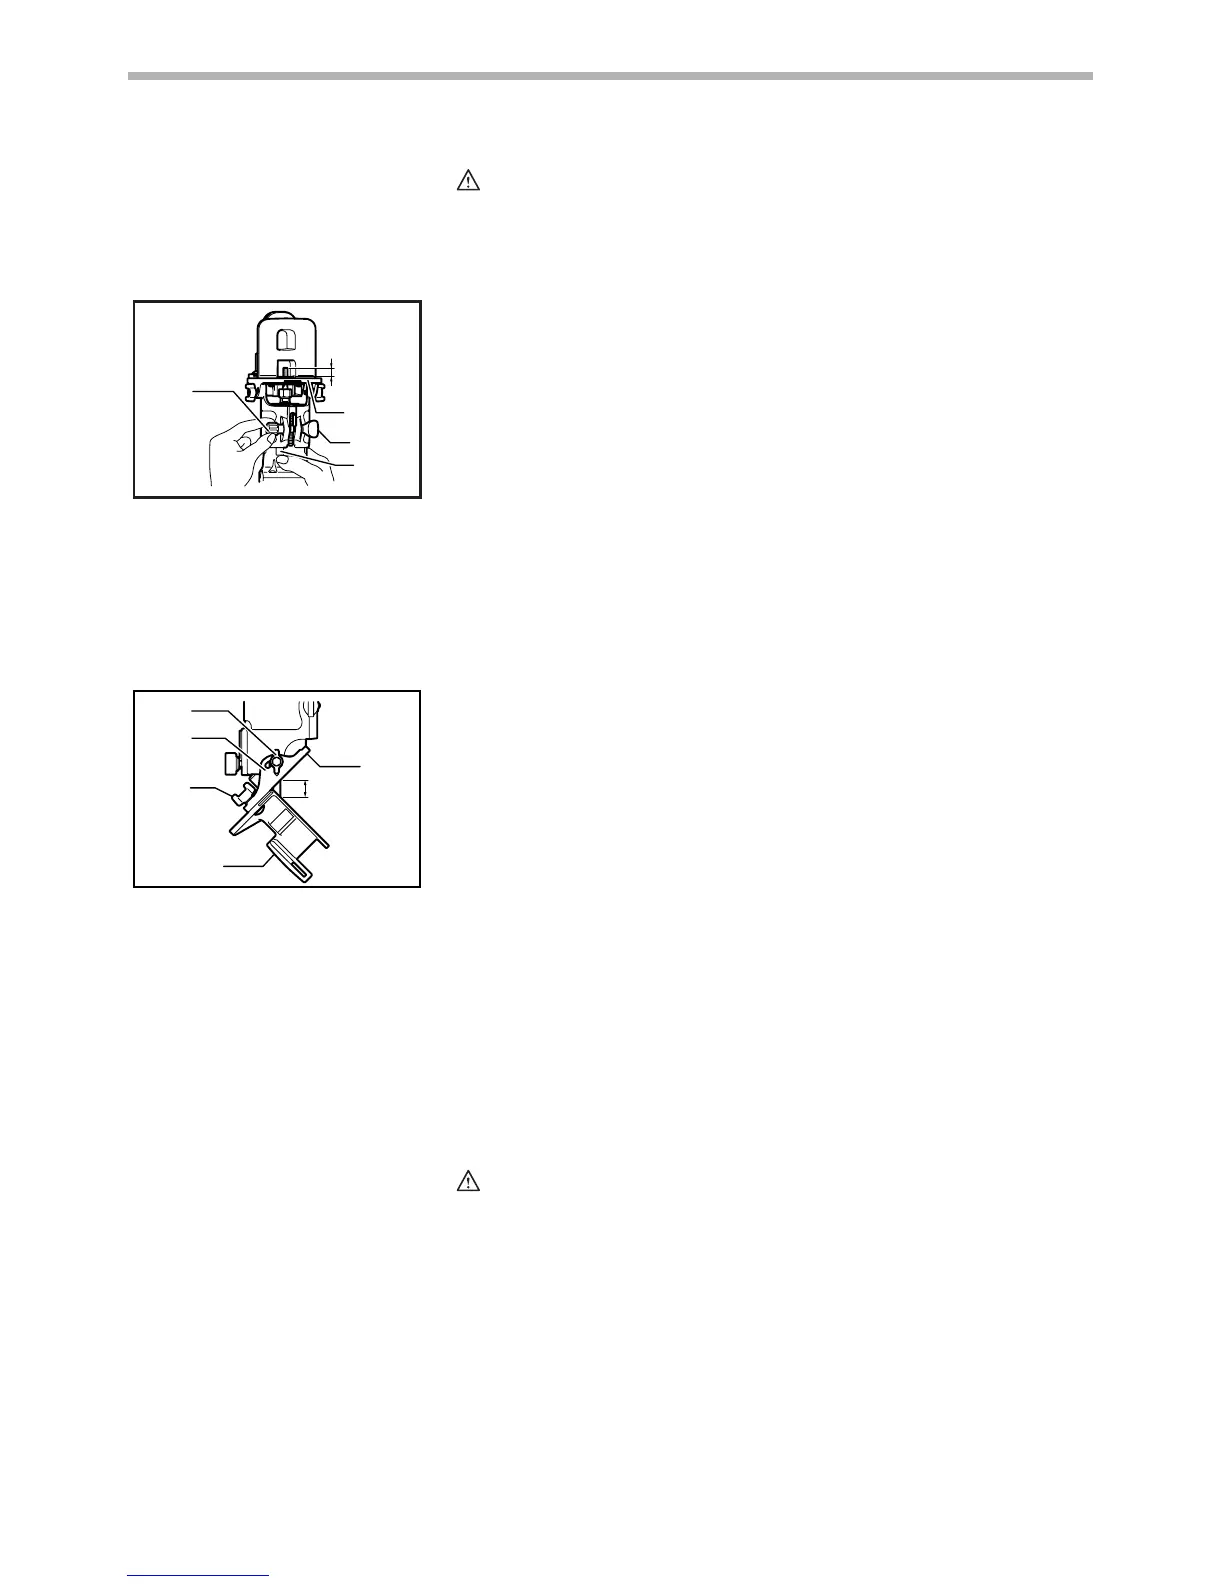
Adjusting bit protrusion
To adjust the bit protrusion, loosen the clamping nut and move the tool base up
or down as desired by turning the adjusting screw. After adjusting, tighten the
clamping nut firmly to secure the tool base.
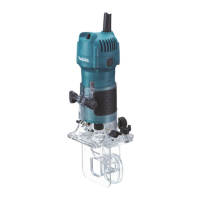
Adjusting angle of tool base
Loosen the wing bolts and adjust the angle of the tool base (5° per graduation)
to obtain the desired cutting angle.
Adjusting amount of chamfering
To adjust the amount of chamfering, loosen the wing nuts and adjust the trim-
mer shoe.
CAUTION:
• With the tool unplugged and switch in the “OFF” position, rotate the collet
nut on the tool several times to be sure that the bit turns freely and does
not contact the base or trimmer shoe in any way.
1. Bit protrusion
2. Base
3. Clamping nut
4. Scale
5. Adjusting screw
1
2
3
4
5
006631
1. Wing bolt
2. Graduation
3. Wing nut
4. Trimmer shoe
5. Amount of chamfering
6. Base
1
2
3
4
5
6
006632