12 ENGLISH
6.
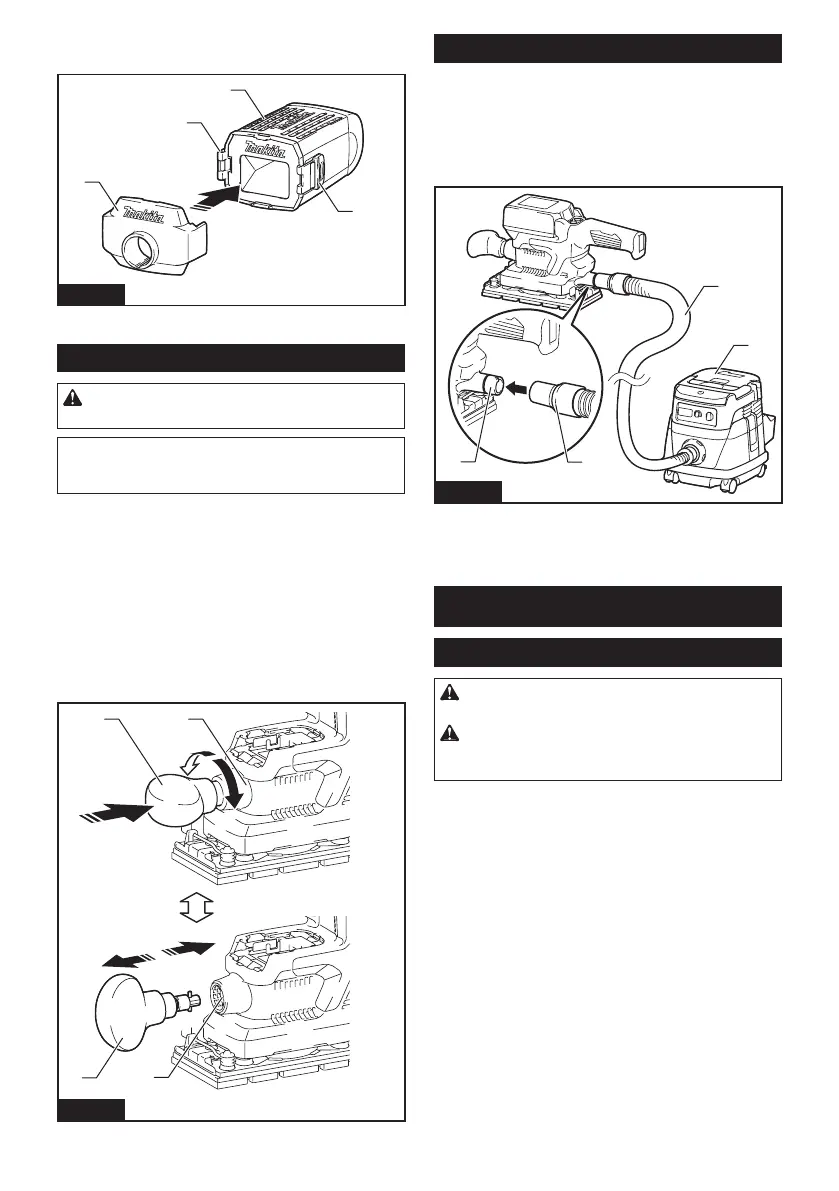
Snap the dust nozzle into place while pressing and
holding the locking latches on both sides of the dust box.
1
2
3
3
Fig.19
► 1. Dust nozzle 2. Dust box 3. Locking latch
Removing and installing front grip
CAUTION: After reassembly, pull the front
grip to check if it is securely attached together.
NOTICE:
Make sure to push the front grip fully into the
slot end and keep it positioned where it is while rotating
the front grip. Failure to do so may cause damage to the tool.
By removing the detachable front grip, sanding operation in tight,
conned and hard-to-reach areas can be performed eectively.
Uninstallation
Push and hold the front grip rmly towards the motor
housing and rotate it 90 degrees to either the left or
right. Then pull it apart from the tool.
Installation
Insert the end of the front grip into the slot on the motor hous-
ing, aligning the outlines of the grip end with those of the slot.
Push and hold the front grip rmly towards the housing and
rotate it 90 degrees with its gripping surface facing upwards.
1
2
34
Fig.20
►
1. Front grip 2. Slot 3. Motor housing 4. Gripping surface
Connecting with vacuum cleaner
Optional accessory
When you wish to perform clean sanding operation,
connect a Makita vacuum cleaner to your tool. Use
either an optional horse 28 mm or a combination of front
cus 22 and hose provided with the cleaner to establish
a connection.
1
2
3
4
Fig.21
► 1. Dust spout 2. Front cus 3. Hose 4. Vacuum
cleaner
OPERATION
Sanding operation
CAUTION: Never run the tool without the
abrasive paper. You may seriously damage the pad.
CAUTION: Never force the tool. Excessive
pressure may decrease the sanding eciency, dam-
age the abrasive paper and/or shorten tool life.
Sanding open areas
1. Hold the tool rmly with your both hands, one
hand on the handle and the other on the front grip.
2. Turn the tool on and wait until it attains full speed.
3. Gently place the tool on the workpiece surface.
 Loading...