11 ENGLISH
123
4
5
5
►1. Hex bolt 2.Outerange(black)3. Abrasive cut-
owheel/diamondwheel4.Innerange(silver)
5.Arrow(rotationdirectionofthewheel)
To install the wheel, follow the removal procedure in
reverse.
BE SURE TO TIGHTEN THE HEX BOLT SECURELY.
CAUTION: Always install the wheel so that
the arrow on it points in the same direction as
the arrow on the wheel guard. Otherwise the wheel
rotatesinreverse,itmaycausepersonalinjury.
CAUTION: Only use the wheel that are
marked with a speed equal or higher than the
speed marked on the tool.
NOTE:Ifaninnerangeisremovedbychance,
installtheinnerangesothattallerprotrusionfaces
thetoolsideasshowninthegure.
1
2
3
4
5
►1. Hex bolt 2.Outerange(black)3. Abrasive cut-
owheel/diamondwheel4.Innerange(silver)
5.Protrusion(taller)
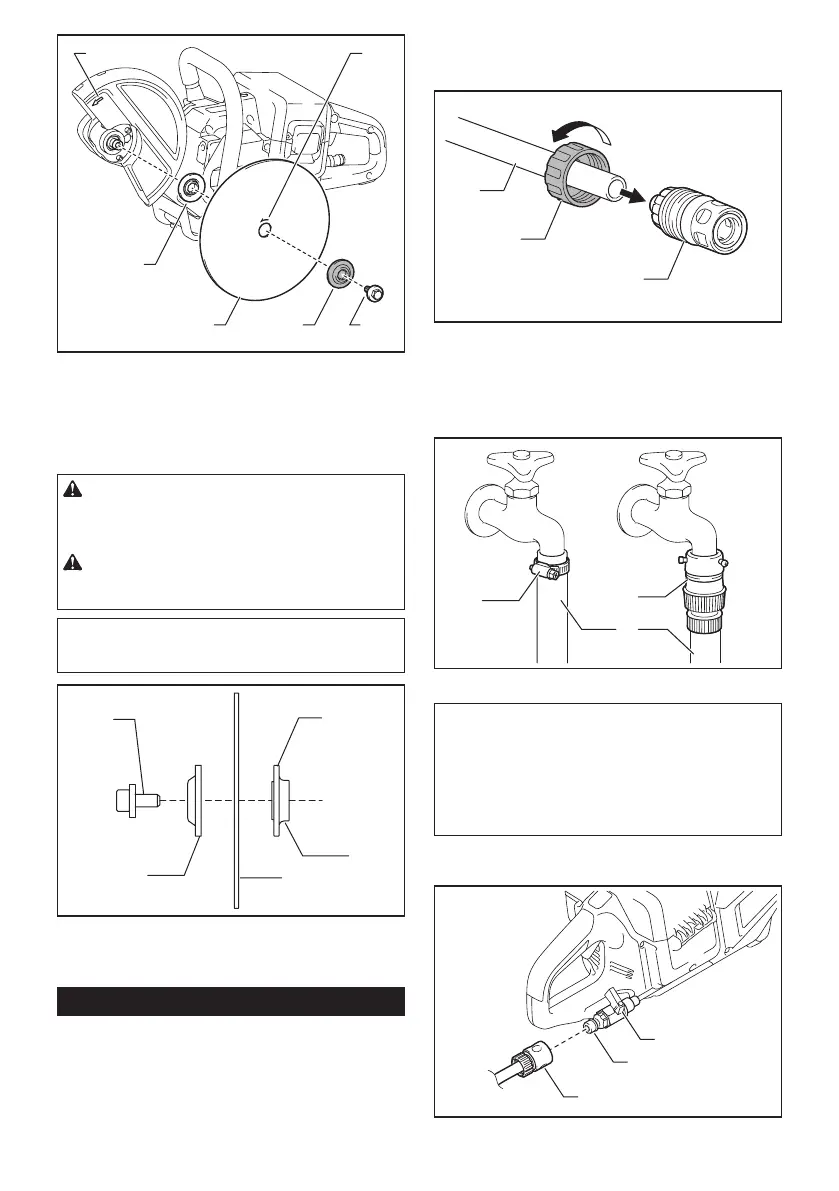
Connecting to water supply
1. Prepare a water hose.
2. Remove the nut on the coupling sleeve and pass
the water hose through the nut. Insert the end of the
hose into the coupling sleeve and then tighten the nut.
1
2
3
►1. Water hose 2. Nut of the coupling sleeve
3. Coupling sleeve
3. Connectthewaterhosetothewatersupply.
Whenconnectingtoawaterfaucet,useasuitabletting
suchashosebandorwatertapjoint.
1
2
3
►1. Hose band 2.Watertapjoint3. Water hose
NOTE:Thettingdependsontheshapeofthefaucet
towhichyouconnect.Prepareasuitablecommercial-
ly-boughttting.
NOTE:
Ifyouuseawatertapjoint,prepareanothercou-
pling sleeve and attach it to the other end of the hose.
NOTE: When using a water pump, follow the instruc-
tionsofyourwaterpumptoconnectthewaterhose.
4. Push the coupling sleeve into the water inlet until it
locks with a click.
1
2
3
►1. Coupling sleeve 2. Water inlet 3. Cock

 Loading...