10 ENGLISH
4. Todrivethenextnail,releaseyourngerfromthe
switch trigger once, and then repeat the step 2 and 3
above.
1
2
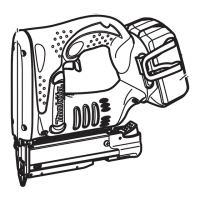
►1. Switch trigger 2. Contact element
You can also drive the nails when dragging the tool to
the next area with the contact element pressed against
the material and pulling the switch trigger.
If the head of the nail remains above the workpiece sur-
face,drivethenailwhileholdingthenailerheadrmly
against the workpiece.
NOTE: If the head of the nail still remains above the
workpiece even you hold the nail head, the material
may not be suitable for the nailer. Continuing to use
the nailer on such material may result in a damage to
thedriverofthenailerand/ornailerjamming.
Anti dry re mechanism
WARNING: Always make sure that your
ngers are not placed on the switch trigger or
the contact element and the battery cartridge is
removed before loading the nailer.
When the number of remaining nail strips in the maga-
zine is empty, the switch trigger can no longer be pulled.
At this time, insert a new nail strip in the magazine. The
switch trigger can be pulled again.
Checking remaining nails
You can check the amount of remaining nails through
the sight window.
Theredindicatormovestowardringopeningasthe
amount of remaining nails becomes smaller.
1
2
►1. Sight window 2. Indicator
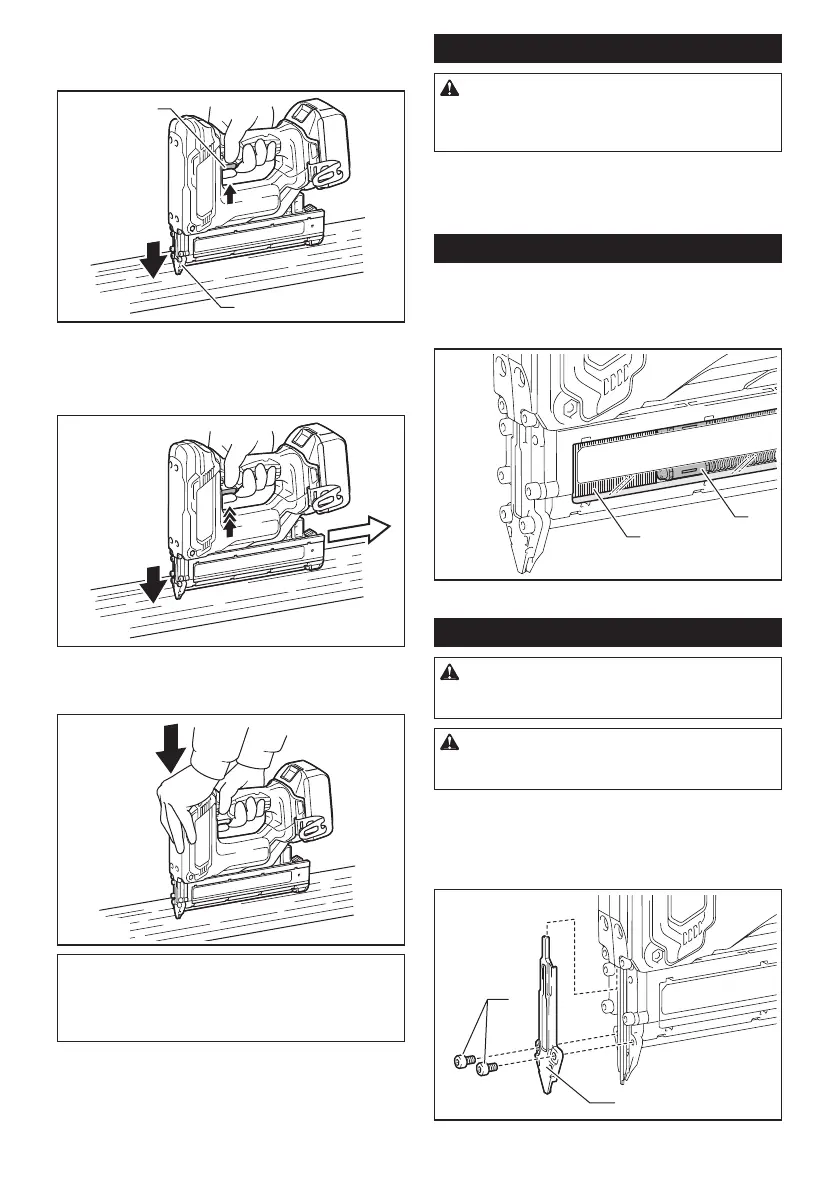
Removing jammed nails
WARNING: Always make sure that the trigger
is released, and the battery cartridge and nails are
removed before removing jammed nails.
CAUTION:Donotremovethejammednailswith
barehands.Thenailmayjumpoutofthemagazine
andcauseaninjury.
Remove hex bolts on the driver guide cover using the
hex wrench.
Takethejammednailsfromthenailguidegroovewitha
slotted screwdriver.
Secure the driver guide cover with hex bolts.
2
1
►1. Driver guide cover 2. Hex bolt
 Loading...