10 ENGLISH
1
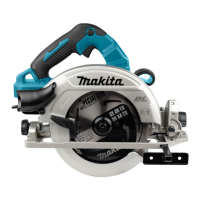
►1. Mode indicator
The mode indicator lights up in green when the tool is
runningin"hightorquemode".
If the tool is operated with excessive load, the mode
indicator will blink in green. The mode indicator stops
blinkingandthenlightsuporturnsoffifyoureducethe
load on the tool.
Mode indicator status Operation
mode
On Off Blinking
High speed
mode
Hightorque
mode
Overload
alert
Adjusting depth of cut
CAUTION: After adjusting the depth of cut,
always tighten the lever securely.
Loosen the lever and move the base up or down to align the
pointerwithyourdesireddepthonthedepthguide.Atthe
desireddepthofcut,securethebasebytighteningthelever.
For cleaner, safer cuts, set cut depth so that no more
thanonebladetoothprojectsbelowworkpiece.Using
proper cut depth helps to reduce potential for danger-
ousKICKBACKSwhichcancausepersonalinjury.
1
2
►1. Pointer 2. Lever
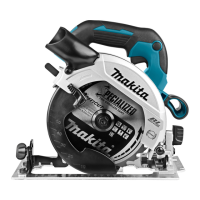
You can read the cut depth with the scale on the lower guard.
3
2
1
►1. Lower guard 2. Bottom of the tool base 3. Scale
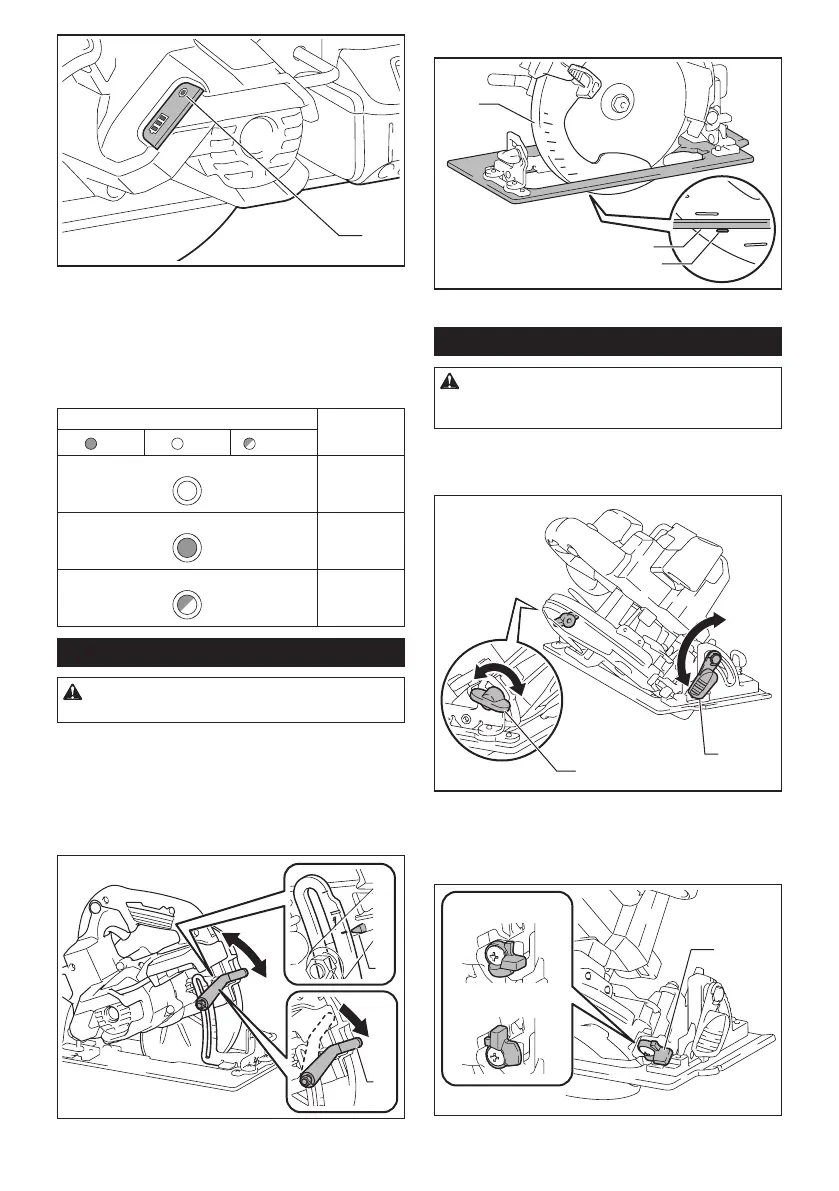
Bevel cutting
CAUTION: After adjusting the bevel angle,
always tighten the lever and clamping screw
securely.
Loosen the lever and clamping screw. Set for the
desiredanglebytiltingaccordingly,thentightenthe
leverandclampingscrewsecurely.
1
2
►1. Lever 2. Clamping screw
Usethestopperwhenyoudoprecise45°anglecutting.
Fullyturnthestopperasillustrateddependingon0°-
45° bevel cut or 0° - 50° bevel cut.
1
0° - 45°
0° - 50°
►1. Stopper
 Loading...