Do you have a question about the Makita DUH483 and is the answer not in the manual?
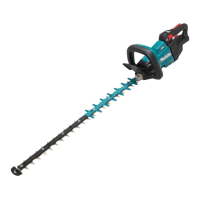
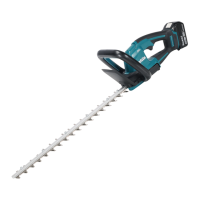
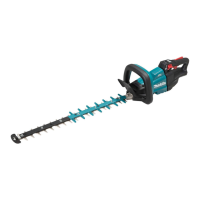
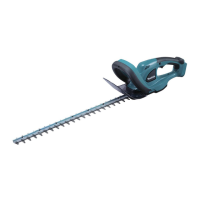
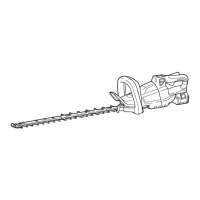
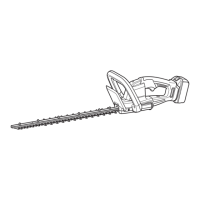
This document is an instruction manual for the Makita Cordless Hedge Trimmer, models DUH483 and DUH523. It provides comprehensive information on the safe and effective use, maintenance, and storage of the tool.
The primary function of this tool is for trimming hedges. It is designed for operation at ground level and should not be used on ladders or other unstable supports. The tool is equipped with a dual switching system for safety, requiring both switch triggers (A and B) and the lock-off button to be pressed to turn it on. Releasing either of the two pressed triggers will turn the tool off. This design ensures that the tool only starts when both switches are activated, preventing unintentional starting.
For optimal use, the manual advises holding the trimmer firmly with both hands and moving it calmly and slowly in front of the body, tilting the blades towards the trimming direction at a speed of 3-4 seconds per meter. When cutting a hedge top evenly, it is recommended to tie a string at the desired height and use it as a reference line. For hedge sides, cutting from the bottom upwards helps achieve an even finish. For boxwood or rhododendron, trimming from the base towards the top is suggested for a good appearance.
The tool features a battery protection system for Lithium-ion batteries with a star marking. This system automatically cuts off power to extend battery life under specific conditions:
The battery cartridge also has indicator lamps to show the remaining capacity. These lamps light up for a few seconds when the CHECK button is pressed. The indication may vary slightly depending on use conditions and ambient temperature. The indication lamp on the tool itself also shows the battery cartridge capacity status during operation. If the tool is overloaded and stops, the lamp lights up in red, indicating an autostop due to overload, and the tool should be turned off. If the lamp blinks red, it indicates low battery power, and the battery cartridge should be recharged as soon as possible. If the lamp lights up red (without blinking), it means the battery power is almost used up, and the tool stops immediately, requiring a recharge.
Safety is a critical aspect emphasized throughout the manual. Users are warned to keep all body parts away from the blade, especially when it is moving, as blades continue to move after the switch is turned off. The hedge trimmer should always be carried by the handle with the blade stopped and the blade cover fitted during transport or storage to prevent accidental injury. When clearing jammed material or servicing, all power switches must be off, and the battery pack removed. The tool should be held by insulated gripping surfaces to avoid electric shock if the blade contacts hidden wiring. All power cords and cables should be kept away from the cutting area. The tool should not be used in bad weather, especially with a risk of lightning.
Before operation, it is crucial to check hedges and bushes for foreign objects like wire fences or hidden wiring. The tool is not intended for cutting branches thicker than 10 mm in diameter; such branches should be cut with branch cutters beforehand. Users are advised not to cut dead trees or similar hard objects, as this may damage the tool.
Maintenance instructions include cleaning the tool by wiping off dust with a dry or soap-dipped rag. Gasoline, benzine, thinner, or alcohol should never be used for cleaning, as they can cause discoloration, deformation, or cracks. Blade maintenance involves smearing the blade with machine oil before and once per hour during operation. After use, dust should be removed from both sides of the blade with a wired brush, wiped off with a rag, and then a low-viscosity oil or spray-type lubricating oil applied. Blades should not be washed in water to prevent rust or damage.
The manual also provides detailed instructions for removing and installing the shear blade. Before any such operation, the tool must be switched off, and the battery cartridge removed. When replacing the shear blade, gloves should be worn to avoid direct contact with the blade. The process involves reversing the tool, loosening four screws to remove the under cover, then loosening four more screws to remove the blades, washer, and sponge. The removed sponge, sleeves, and washer must be kept aside for later installation in the same position. When installing new shear blades, grease provided with the new blades should be applied as illustrated in the manual. The blade cover from the old blades should be fitted onto the new ones to avoid contact.
The chip receiver, an optional accessory, can be attached to the tool to collect cut-off leaves, preventing them from being thrown away. It can be installed on either side of the tool. To install, the chip receiver is pressed onto the shear blades so its slits overlap with the nuts. To remove, levers on both sides are pressed to unlock the hooks. It is important to note that the standard blade cover cannot be installed when the chip receiver is in place.
For storage, the tool can be hung from a nail or screw on the wall using the hook hole at the bottom. The battery cartridge should be removed, and the blade cover fitted onto the shear blades to prevent exposure. The tool should be stored in a dry room, out of reach of children, and never outdoors.
The manual also lists optional accessories such as a blade cover, shear blade assembly, Makita genuine battery and charger, and a chip receiver. It advises users to contact their local Makita Service Center for assistance with accessories and to ensure that only accessories specified in the manual are used to avoid injury.
| Type | Hedge Trimmer |
|---|---|
| Battery Voltage | 18V |
| Power source | Battery |
| Battery type | Li-Ion |
| Blade Type | Double-Edged |
| Weight | 3.3 kg |
| No Load Speed | 0 - 3000 min⁻¹ |
| Strokes per Minute (SPM) | 0 - 4, 000 SPM |