12 ENGLISH
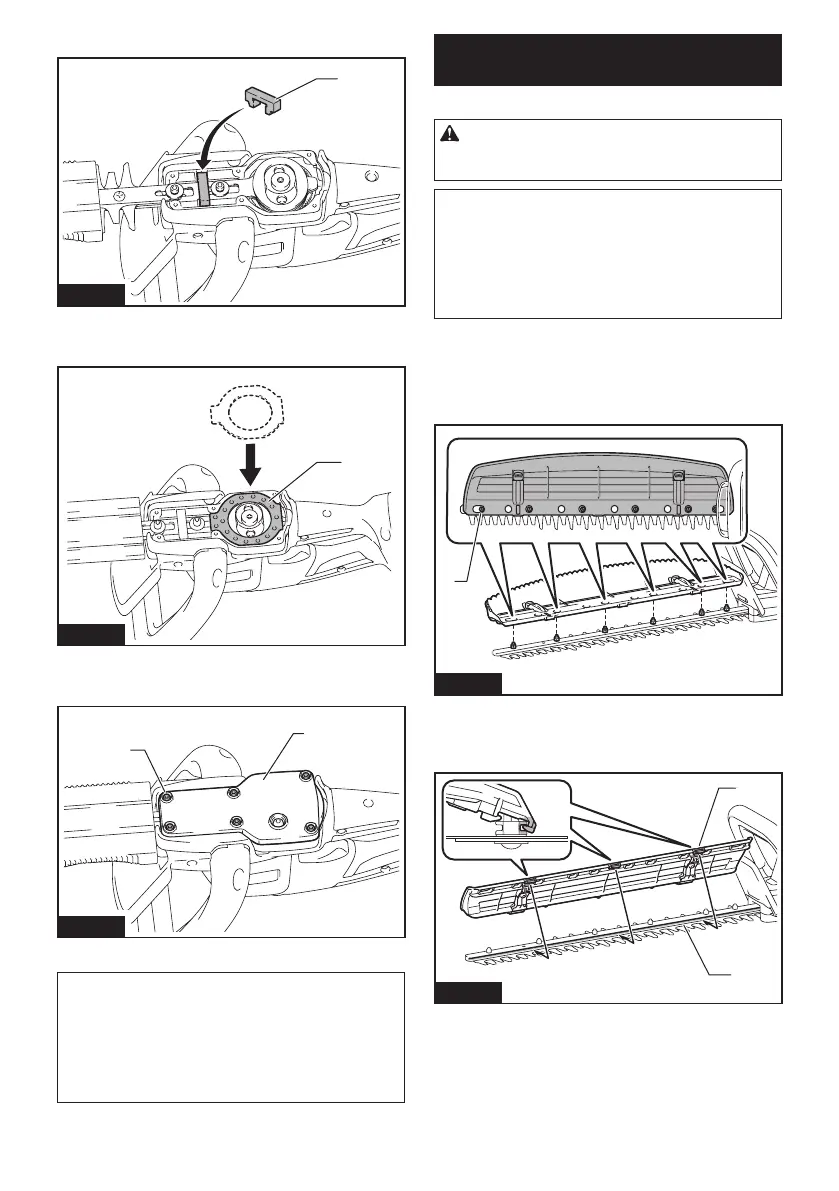
11. Attach the felt pad to the shear blades.
1
Fig.15
►1. Felt pad
12. Attach the plate.
1
Fig.16
►1. Plate
13. Attach the cover, and then tighten 6 bolts.
1
2
Fig.17
►1. Bolt 2. Cover
NOTICE: If the shear blades do not move
smoothly, the shear blades are not engaged with
the crank properly. Install the shear blades again.
NOTICE: If the parts other than the shear
blades such as the crank is worn out, ask Makita
Authorized Service Centers for parts replacement
or repairs.
Installing or removing the chip
receiver
Optional accessory
CAUTION: When installing or removing the
chip receiver, always wear gloves so that your
hands do not directly contact the shear blades.
NOTICE: The blade cover cannot be installed if
the chip receiver is installed on the tool. Before
carrying or storing the tool, uninstall the chip
receiver, and then install the blade cover to avoid
blade exposure.
NOTICE: Be sure to remove the blade cover
before installing the chip receiver.
The chip receiver gathers discarded leaves and makes
clean-up afterward much easier. It can be installed on
either side of the tool.
1. Align the holes on the chip receiver with the
screws on the shear blades.
1
Fig.18
►1. Screw
2. Hook the claws of the chip receiver to the groove
on the shear blades.
1
2
Fig.19
►1. Claw 2. Groove
 Loading...