20 ENGLISH
2. Lift the lock tab slightly outwards and open the
ltercoverofthedustcase.
1
2
Fig.44
►1. Filter cover 2. Lock tab
3. Removethelterfromtheltercase.
1
2
Fig.45
►1. Filter 2. Filter case
4. Attachanewltertotheltercase,andthen
attachtheltercover.
5. Close the cover of the dust case, and then attach
the dust case to the dust collection system.
Replacing sealing cap
Adamagedorworn-outsealingcapmayaectthedust
collecting performance. Replace the sealing cap with
newoneasappropriate,aligningitsguideprojection
with guide notch on the nozzle head.
1
2
3
4
Fig.46
►1. Sealing cap 2.Guideprojection3. Nozzle head
4. Guide notch
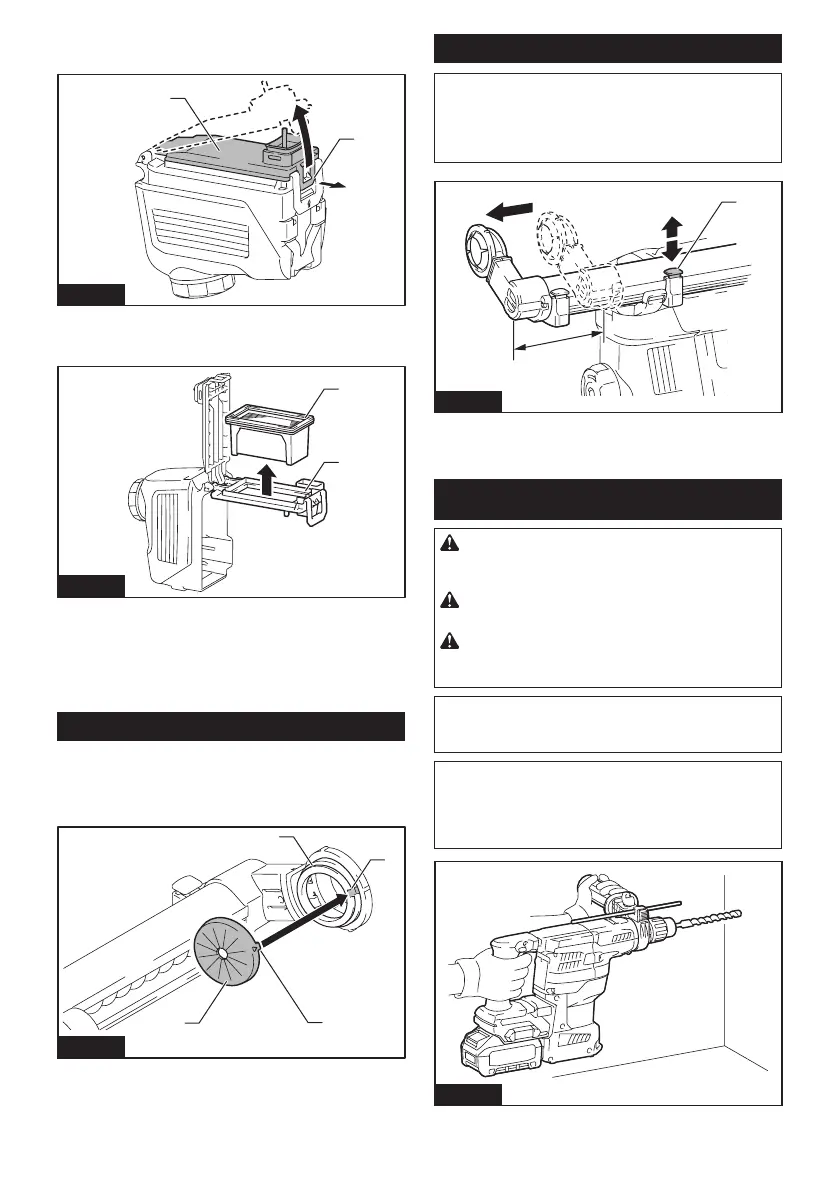
Storage
NOTICE: When not in use for a certain period of
time, the nozzle guide needs to be extended to
approximately 100 mm from its fully shortened
position. Failing to do so may damage the duct hose
pre-installed in the nozzle guide.
1
2
Fig.47
►1.Guideadjustmentbutton2. Approx. 100 mm
OPERATION
CAUTION: Always use the side grip (auxiliary
handle) and rmly hold the tool by both side grip
and switch handle during operations.
CAUTION: Always make sure that the work-
piece is secured before operation.
CAUTION: Do not pull the tool out forcibly
even the bit gets stuck. Loss of control may
cause injury.
NOTICE: Before using the dust collection sys-
tem with the tool, read the section about the dust
collection system.
NOTE: If the battery cartridge is in low temperature,
the tool’s capability may not be fully obtained. In this
case, warm up the battery cartridge by using the
tool with no load for a while to fully obtain the tool’s
capability.
Fig.48
 Loading...