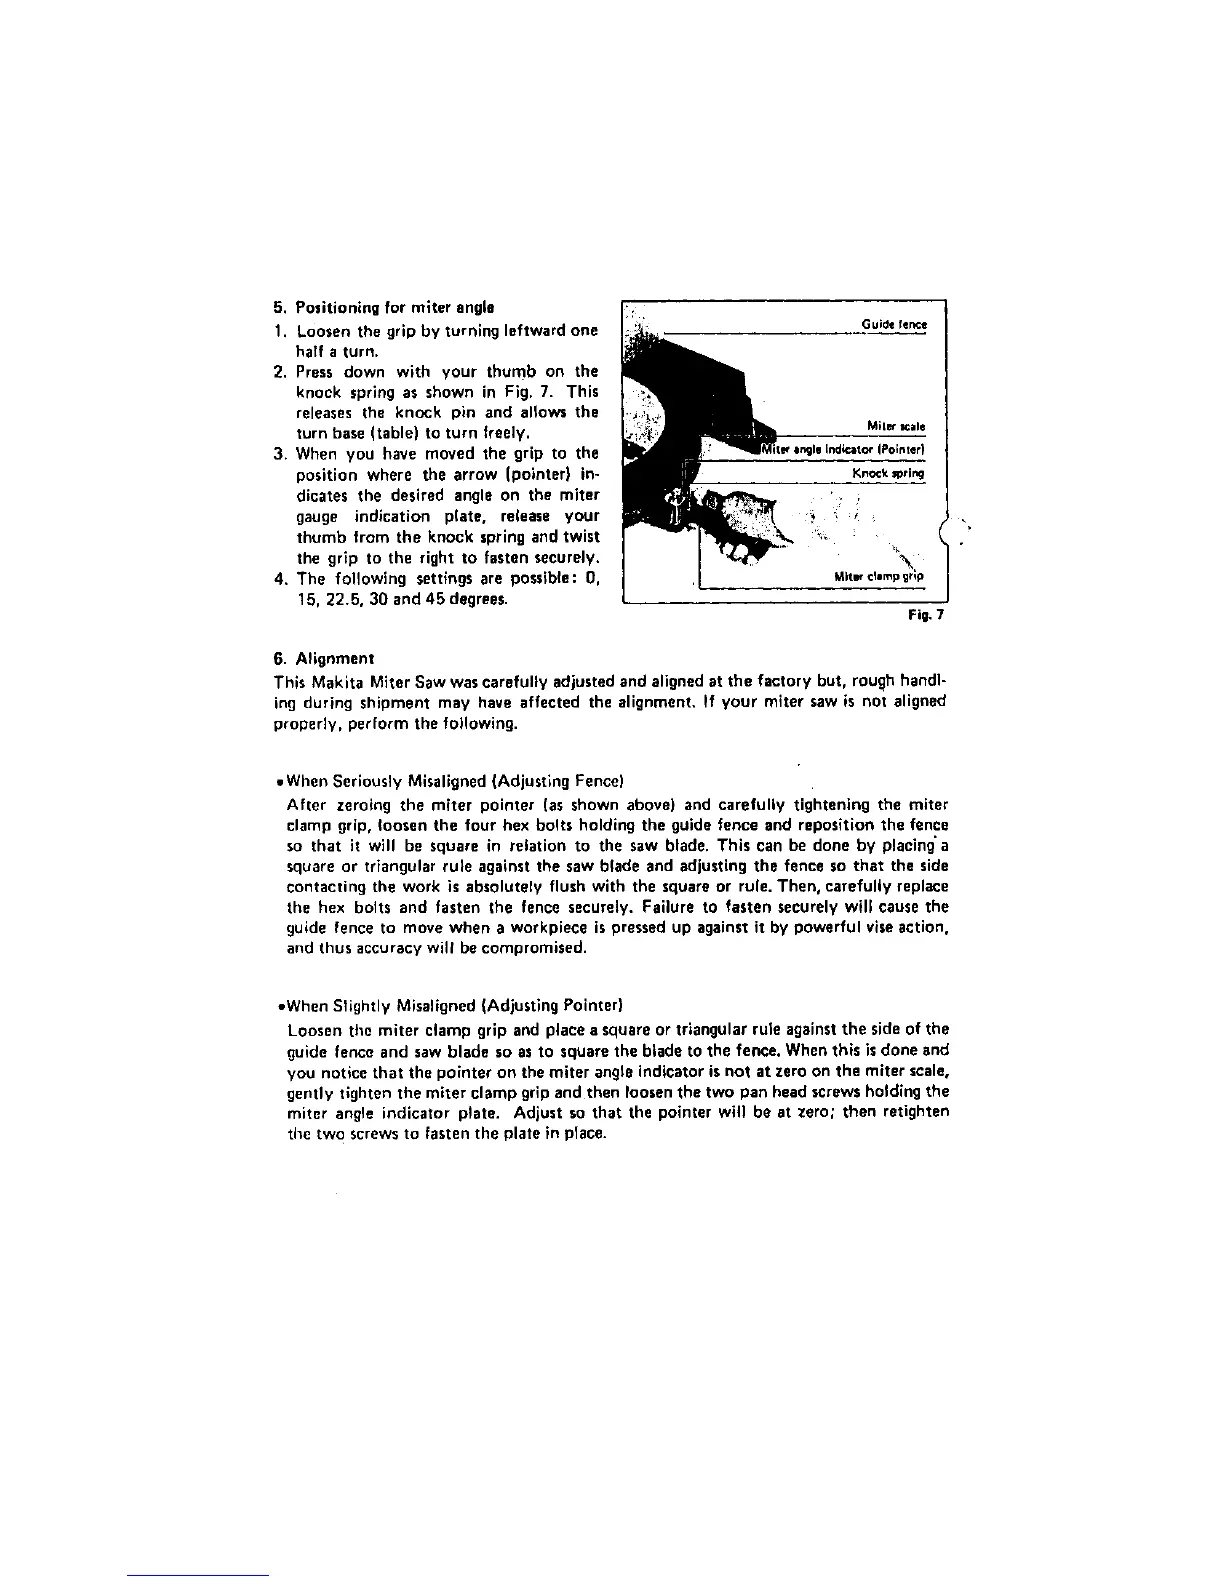
5.Positioningformiterangle
1.Loosenthegripbyturningleftwardone
haTfaturn.
2.Pressdownwithyourthumbonthe
knockspring as shown in Fig. 7. This
releases the knock pin and allows the
turn base (table) to turn freely.
3. When you have moved the grip to the
position where the arrow (pointer) in-
dicates the desired angle on the miter
gauge indication plate, releasc your
thumb from the knock spring and twist
the grip to the right to fasten securely.
4, The following settings are possible: 0,
15, 22.5, 30 and 45 degrees.
6. Alignment
This Makita Miter Saw was carefully adjusted and aligned at the factory but, rough handl-
ing during shipment may have affected the alignment. If your miter saw is not aligned
properly, perform the following.
• When Seriously Misaligned (Adjusting Fence)
After zeroing the miter pointer (as shown above) and carefully tightening the miter
clamp grip, loosen the four hex bolts holding the guide fence and reposition the fence
so that it will be square in relation to the saw blade. This can be done by placing'a
square or triangular rule against the saw blade and adjusting the fence so that the side
contacting the work is absolutely flush with the square or rule. Then, carefully replace
the hex bolts and fasten the fence securely. Failure to fasten securely will cause the
guide fence to move when a workpiece is pressed up against it by powerful vise action,
and thus accuracy will be compromised.
• When Slightly Misaligned (Adjusting Pointer)
Loosen the miter clamp grip and place a square or triangular rule against the side of the
guide fence and saw blade so as to square the blade to the fence. When this is done and
you notice that the pointer on the miter angle indicator is not at zero on the miter scale,
gently tighten the miter clamp grip and then loosen the two pan head screws holding the
miter angle indicator plate. Adjust so that the pointer will be at zero; then retighten
timetwo screws to fasten the plate in place.
 Loading...