6 ENGLISH
ASSEMBLY
WARNING: Always be sure that the lock key
and battery cartridge are removed before carrying
out any work on the mower. Failure to remove the
lock key and the battery cartridge may result in seri-
ous personal injury from accidental start-up.
WARNING: Never start the mower unless it is
completely assembled. Operation of the machine
in a partially assembled state may result in serious
personal injury from accidental start-up.
Installing the handle
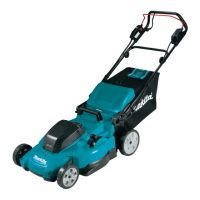
NOTICE: When installing the handles, be careful
not to pinch the cord between the handles. If the
cord is damaged, the mower switch may not work.
1. Align the hole in the lower handle with the hole
in the upper handle, then insert the bolt from outside,
and then tighten the thumb nut from inside. Perform the
same procedure on the other side.
For XML11
1 32
4
Fig.1
► 1. Bolt 2. Thumb nut 3. Lower handle 4. Upper
handle
For XML10
1 32
4
Fig.2
► 1. Bolt 2. Thumb nut 3. Lower handle 4. Upper
handle
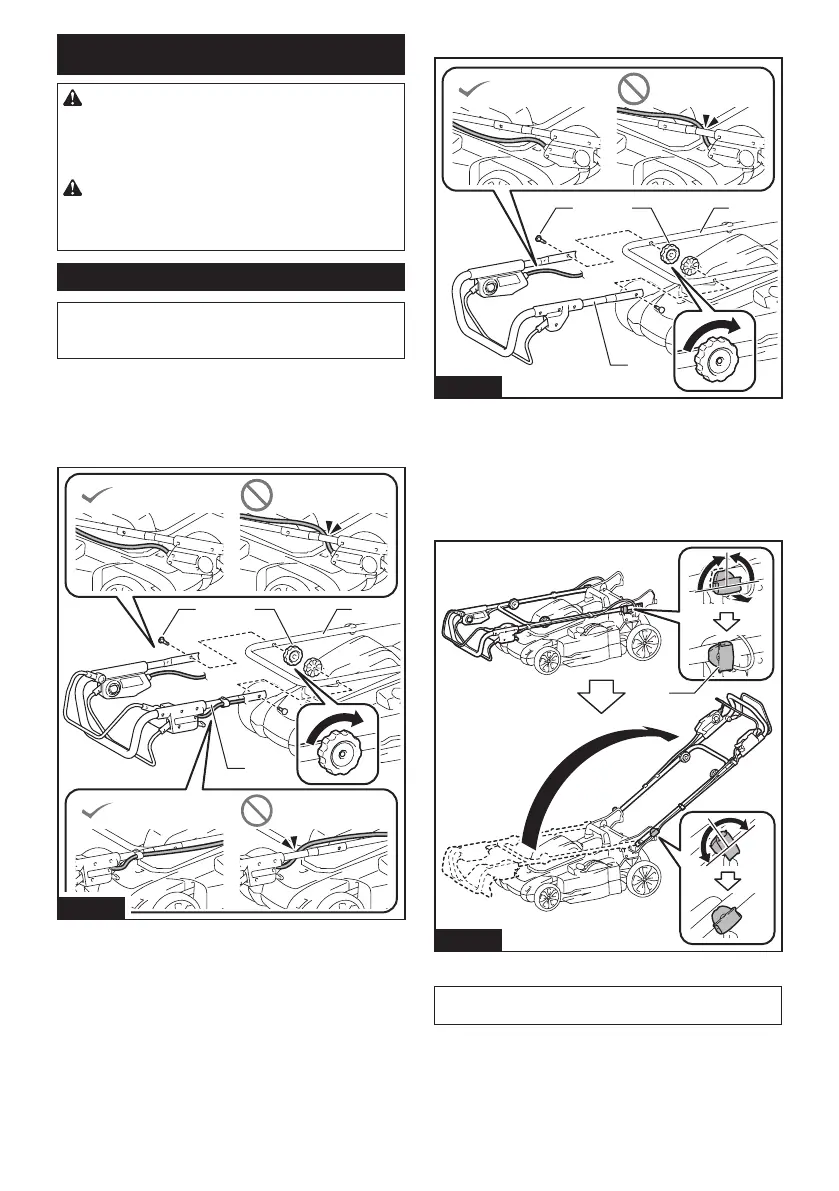
2. Turn the knob 90° while pulling the knob on the
lower handle to release the locking pin. Perform the
same procedure on the other side. Raise the handle,
and then turn the knob on both sides 90°. Make sure
that the knobs are securely xed.
1
Fig.3
► 1. Knob
NOTE: Supporting the handle makes it easier to
release the locking pin when pulling the knob.

 Loading...