21 22
4.11 Measuring AC Voltage
Beware of Electrocution.
Pay special attention to avoid electric shock
when measuring high voltage.
Do not input the voltage which more than
600V rms AC.
WARNING
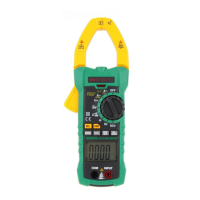
4.11.1 Plug the black test lead into the COM jack
and the red test lead into the INPUT jack.
4.11.2 Set the rotary selector to position to make the
meter get into AC V range.
4.11.3 Connect the test leads to the voltage source or
load terminals for measurement.
4.11.5 Take the reading on the LCD.
NOTE:
1) “ ” means the maximum input voltage is 600V
rms AC.
2) If the test result is more than 600V rms AC, symbol
“OL” will be displayed on LCD and the build-up
buzzer will sound.
4.12 Measuring DC Voltage
Beware of Electrocution.
Pay special attention to avoid electric shock
when measuring high voltage.
Do not input the voltage which more than
600V DC.
WARNING
4.12.1 Plug the black test lead into the COM jack and the
red test lead into the INPUT jack.
4.12.2 Set the rotary selector to at the V range position.
4.12.3 Connect the test leads to the voltage source or
load terminals for measurement.
4.12.4 Take the reading on the LCD. The polarity symbol
denotes the polarity of the end connected by the
red test lead.
1) At small voltage range, unsteady readings will appear
before the test leads contact the circuit. This is normal
because the meter is highly sensitive. When the test
leads contact the circuit, the true reading will be shown.
2) “ ” means the maximum input voltage is 600V DC.
3) If the test result is more than 600V DC, symbol “OL”
will be displayed on LCD and the build-up buzzer will
sound.
NOTE:
4.13 Measuring Frequency
4.13.1 By A range (from current clamp):
Beware of Electrocution.
Ensure that the test leads are disconnected
from the meter before making current clamp
measurements.
WARNING
4.13.1.1 Set the rotary selector to the A range ( )
position.
4.13.1.2 Press the trigger to open jaw. Fully enclose
only one conductor.
4.13.1.3 Press the "Hz/%" to switch to the frequency
measurement.
4.13.1.4 Take the reading on the LCD.
A
V
 Loading...