ASSEMBLY INSTRUCTIONS
7
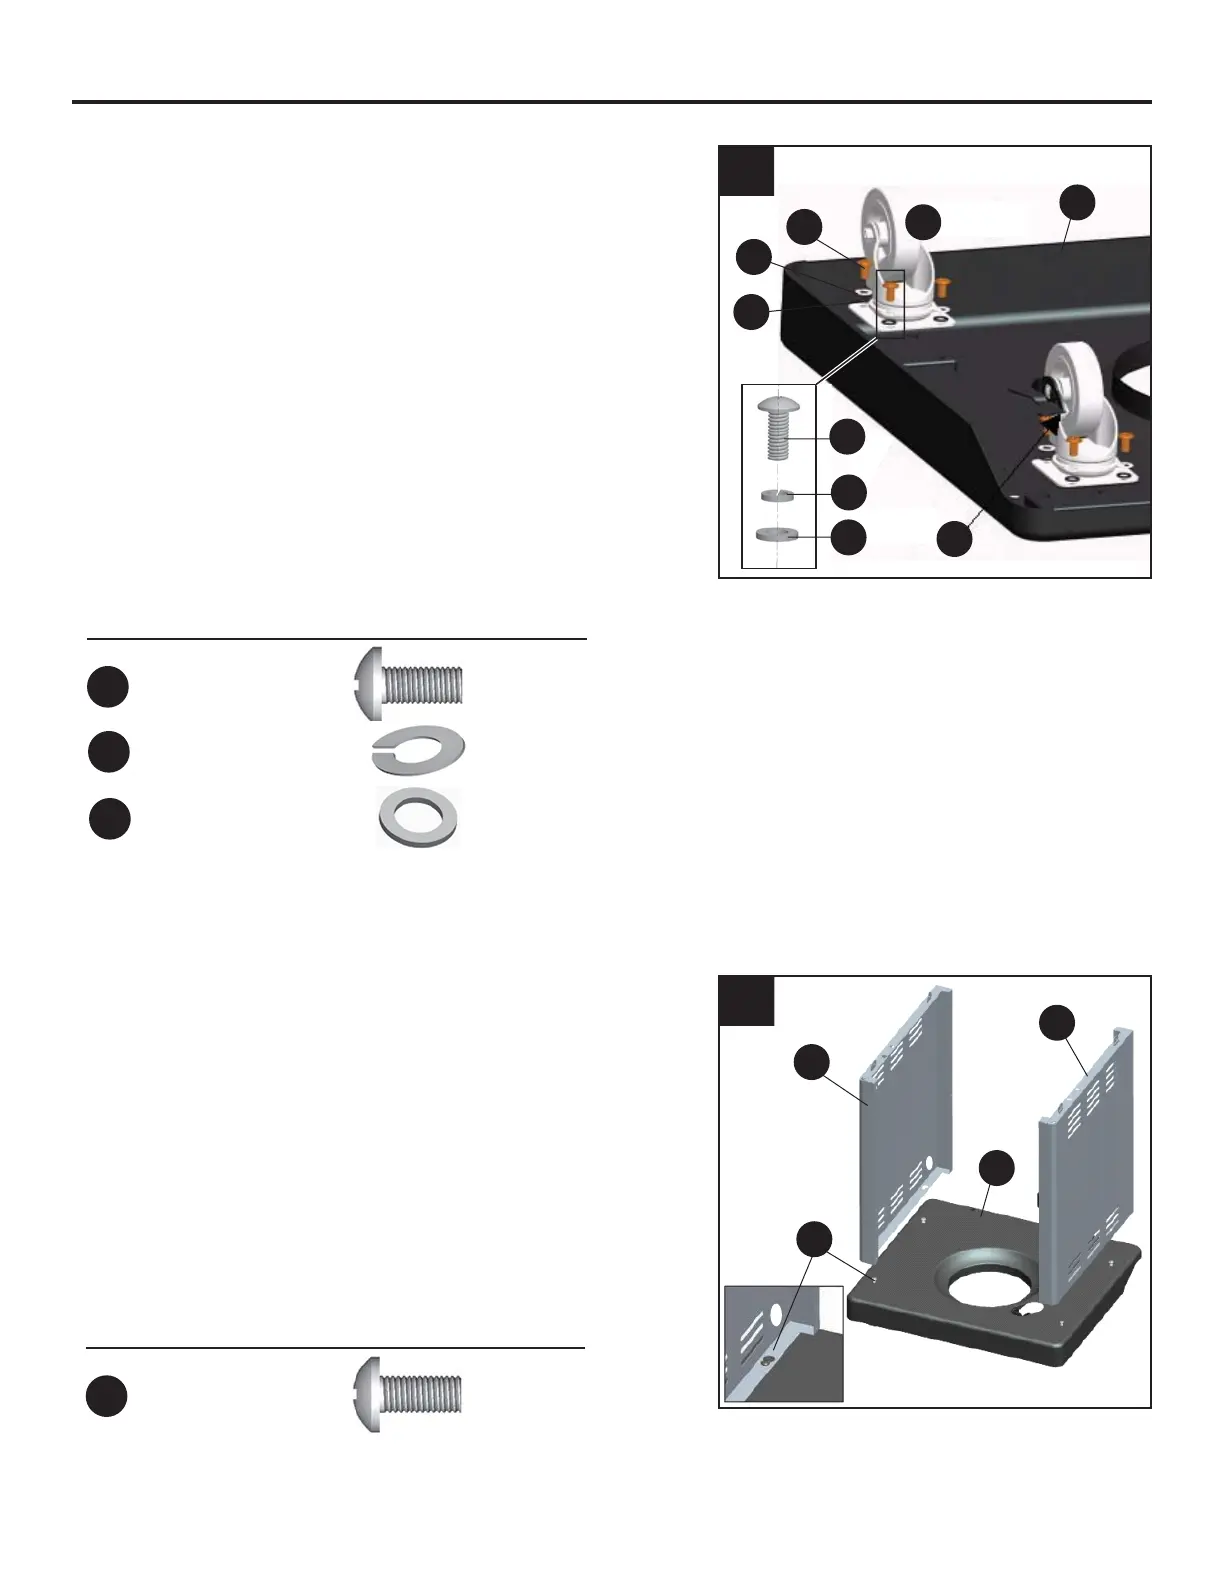
1. Locate the two locking casters (B) and the
two non-locking casters (C). Secure the two
locking casters (B) to the rear (area of bottom
shelf with cut away) of the bottom shelf (A)
using four screws (AA) inserted through four
spring washers (EE), then through four plain
washers (HH) and into the threaded holes on
the bottom shelf (A). Secure the two non-
locking casters (C) to the front of the bottom
shelf (A) using four screws (AA) inserted
through four spring washers (EE), then through
four plain washers (HH) and into the threaded
holes on the bottom shelf (A). Tighten all
screws.
Hardware Used
AA
[
0[6FUHZ
2. Insert 4 screws (AA) halfway into threaded
holes in bottom shelf (A). Attach the cart left
side panel (D) by placing the panel keyholes
over the screw heads (AA) on left side of
bottom shelf (A). Slide the cart left side panel
(D) so that the screw head is over the smaller
part of the keyhole. Thread the screw (AA)
down snug but do not tighten as a little wiggle
room will be necessary in following assembly
steps. Repeat with cart right side panel (E).
B
E
A
AA
HH
C
1
2
EE
EE
[
Spring
Washer
HH
[
Plain
Washer
Hardware Used
AA
[
0[6FUHZ
AA
D
A
AA
HH
EE
 Loading...