21 22
7 1/4" CIRCULAR SAW - 054-8357-67 1/4" CIRCULAR SAW - 054-8357-6
MAINTENANCE
MAINTENANCE
General maintenance
WARNING!
To ensure safety and reliability, all repairs should be performed by a qualified service
technician.
WARNING!
When servicing, use only identical replacement parts. The use of any other parts may create a
hazard or cause damage to the product.
WARNING!
Unplug the saw from the power source before cleaning or performing any maintenance.
Using compressed air may be the most effective cleaning method. Always wear safety goggles when
cleaning tools using compressed air.
If the supply cord is damaged, it must be replaced by a specially prepared cord available through the
service organization.
WARNING!
Do not allow brake fluids, gasoline, petroleum-based products, penetrating oil, etc. to come
into contact with plastic parts. These substances contain chemicals that can damage,
weaken, or destroy plastic.
Beforeeachuse:
•
Inspect the saw, the switch, and the cord for damage.
•
Check for damaged, missing, or worn parts.
•
Check for loose screws, misalignment or binding of moving parts, or any other condition that may affect
the operation.
•
If abnormal vibration or noise occurs, turn the saw off immediately, and have the problem
corrected before further use.
Lubrication
All of the bearings in this tool are lubricated with a sufcient amount of high-grade lubricant for the life of
the tool under normal operating conditions. Therefore, no further lubrication is required.
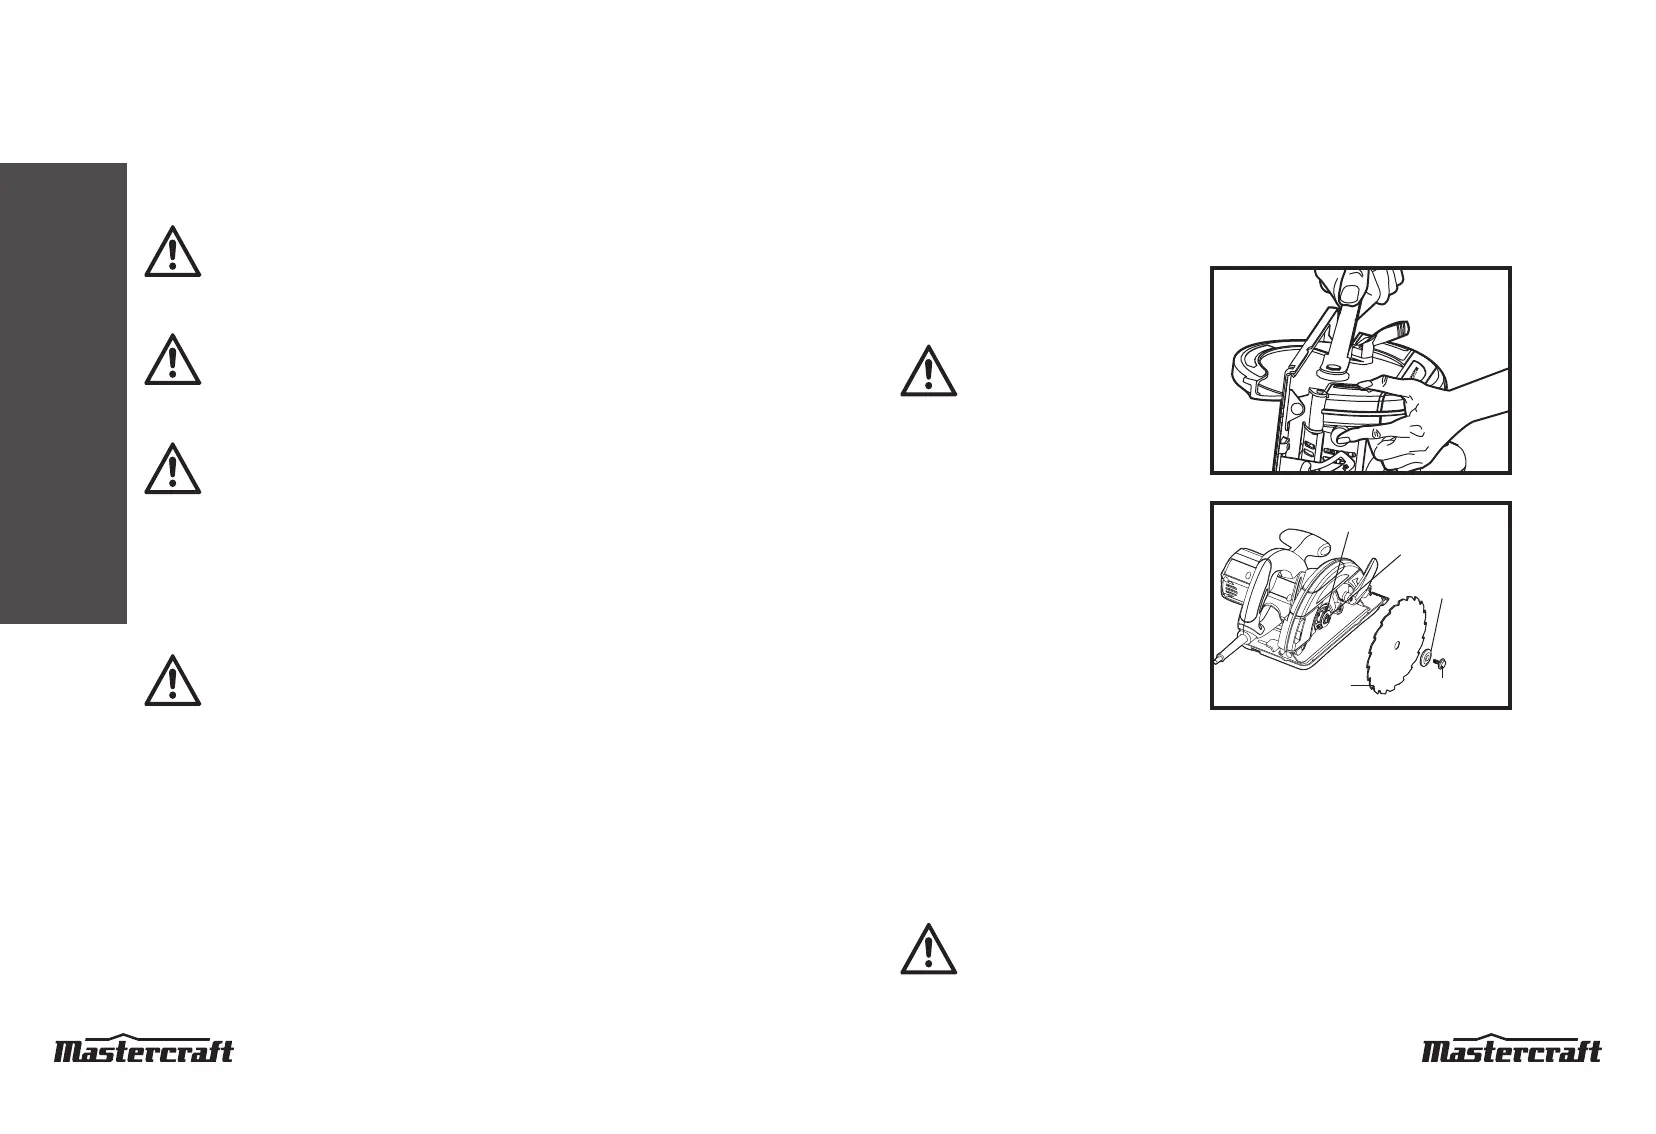
Changing the saw blade
(g 16,17)
WARNING!
To prevent personal injury, always
disconnect the plug from the power
source before installing or removing
the saw blade!
TO REMOVE THE SAW BLADE
1. Unplug the saw.
2. Depress and hold the spindle-lock button, and
use the blade wrench to loosen the blade screw
by turning it counter-clockwise.
3. Remove the blade screw and the outer blade
ange.
4. Lift the lower blade guard and remove the blade.
TO INSTALL THE SAW BLADE
1. Unplug the saw.
2. Loosen the depth-adjustment lever, fully raise the saw, and lock the saw in the raised position. Place the
saw on its side on a at surface.
3. Depress and hold the spindle-lock button.
4. Remove the blade screw by turning it counter-clockwise with the wrench (included) while keeping the
spindle-lock button depressed.
5. Remove the outer blade ange.
WARNING!
If the inner bushing has been removed, replace it before placing the blade on the spindle.
Failure to do so will prevent the blade from tightening properly, and could result in serious
personal injury.
fig 16
fig 17
Inner bushing
Spindle
Outer blade
ange
Blade
Blade screw
 Loading...