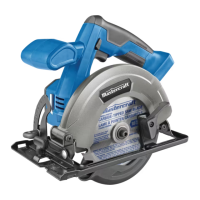
7 1/4" CIRCULAR SAW - 054-8357-67 1/4" CIRCULAR SAW - 054-8357-6
1211
DESCRIPTION
Saw blades
The best of saw blades will not cut efciently if they are not kept clean, sharp, and properly set. Using a dull
blade will place a heavy load on the saw and will increase the danger of kickback. Keep extra blades on
hand so that sharp blades are always available.
Gum and wood pitch hardened on blades will slow the saw down. Remove the saw blade from the saw, and
use gum and pitch remover, hot water, or kerosene to remove these accumulations. DO NOT USE GASOLINE.
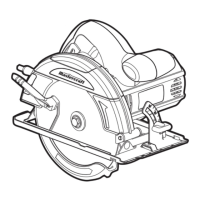
Blade-guard system
(g 1)
The lower blade guard on the circular saw is there
for the operator’s protection and safety. Do not
alter it for any reason. If it becomes damaged or
begins to run slowly or sluggishly, DO NOT operate
the saw until the damaged part has been repaired
or replaced. ALWAYS leave the guard in its correct
operating position when using the saw.
DANGER!
When sawing through a workpiece,
the lower blade guard does not cover the blade on the underside of the workpiece. Since the
blade is exposed on the underside of the workpiece, ALWAYS keep hands and fingers away
from the cutting area. Serious injury will result if any part of the body comes into contact with
the moving blade.
CAUTION!
To avoid possible serious injury, never use the saw when the guard is not operating correctly.
Check the guard for correct operation before each use. The guard is operating correctly when
it moves freely and instantly returns to the closed position. If the saw is dropped, check the
lower blade guard and bumper for damage at all depth settings before using it.
If, at any time, the lower blade guard does not snap closed, unplug the saw from the power supply. Exercise
the lower guard by moving it rapidly back and forth from the full open position to the closed position several
times. This will often restore the guard to its normal operating condition. If this does not correct a slow or
sluggishly closing lower guard, do not use the saw. Take it to a qualied service technician for repair.
DESCRIPTION
Line guide
(g 2)
For a straight 90° cut, use the right side of the
notch in the foot. For 45° bevel cuts, use the left
side of the notch. The cutting guide notch will give
an approximate line of cut. Make sample cuts in
scrap lumber to verify actual line of cut. This will
be helpful because of the number of different
blade types and thicknesses available. To ensure
minimum splintering on the good side of the
material to be cut, face the good side down.
Unpacking
WARNING!
Remove the circular saw from the package and examine it carefully. Do not discard the carton
or any packaging material until all parts have been examined.
WARNING!
If any part of the circular saw is missing or damaged, do not plug the tool in or use it until the
part has been repaired or replaced. Failure to heed this warning could result in serious injury.
fig 2
45° Bevel cuts 90° Bevel cuts
fig 1
The lower blade guard is in the up
position when making a cut.
 Loading...