173
172
10.7 NETPULSE & AM SETTING UP SOP
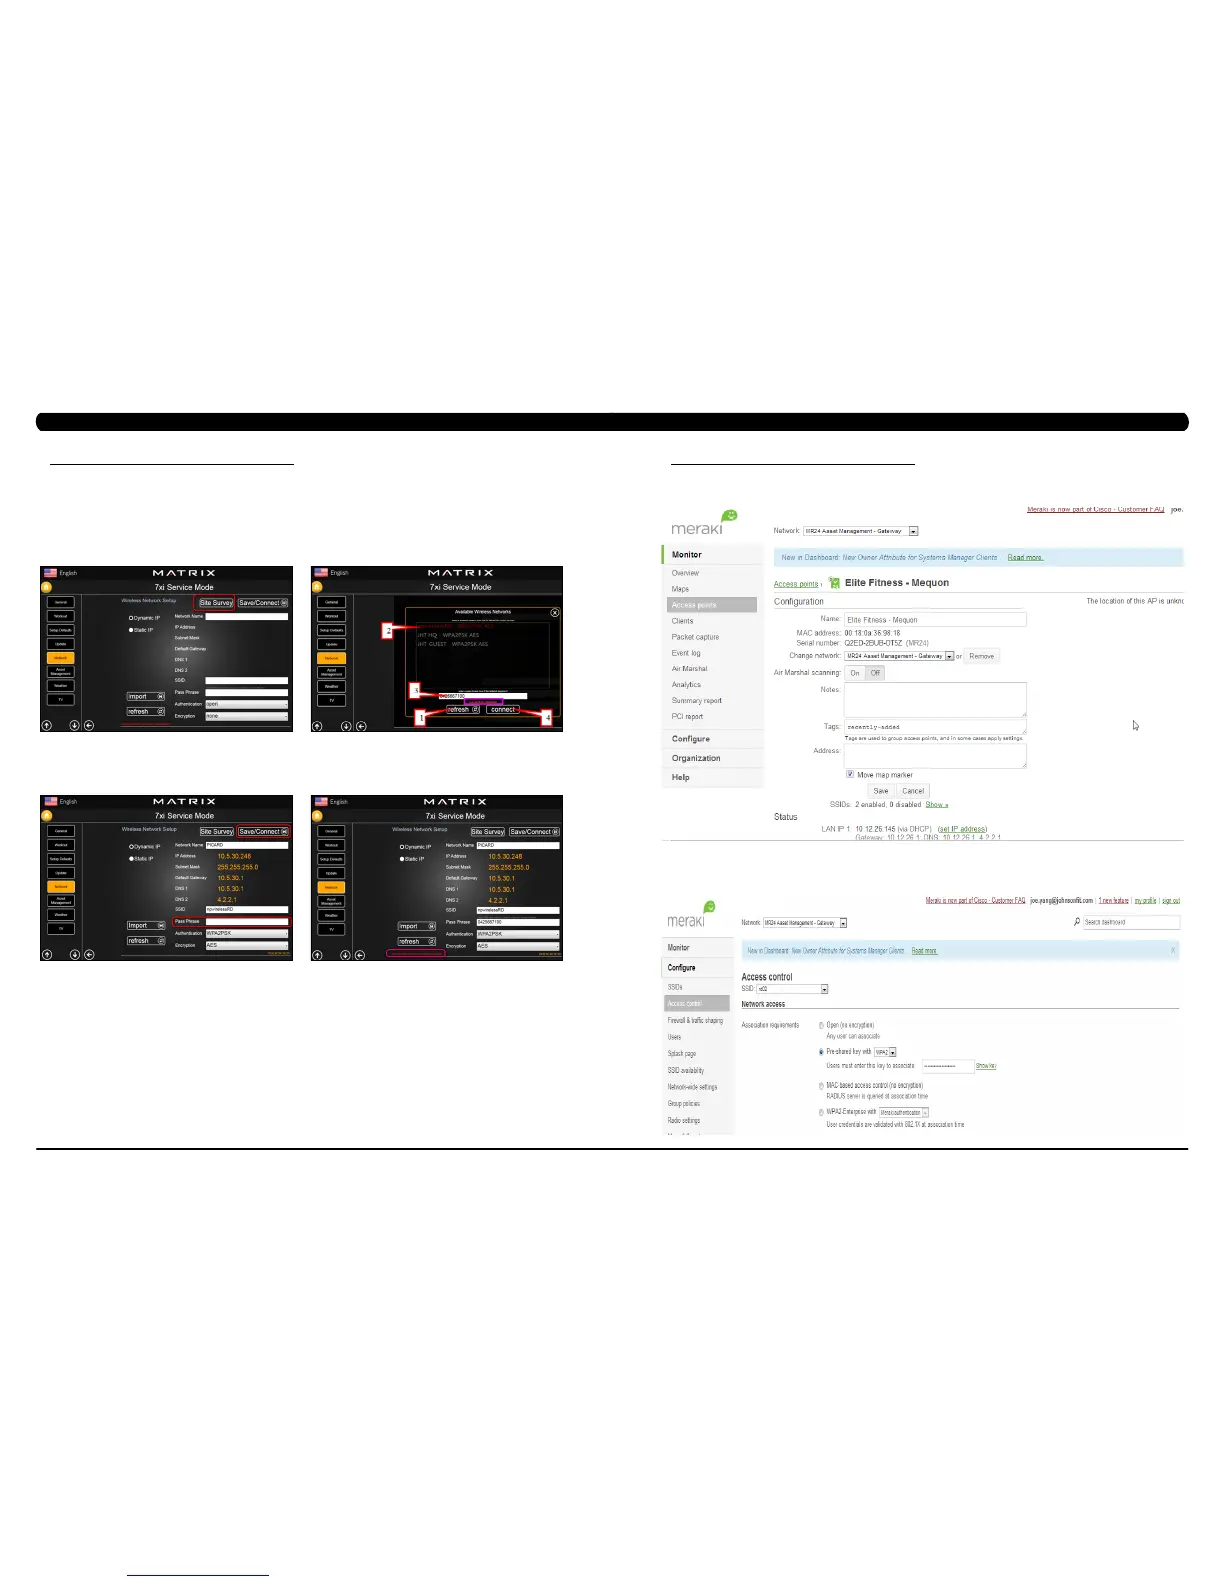
c. Wireless Solutions (With general AP setting & without Meraki AP - MR12 or MR24)
i. The console must be connected to the network via the wireless module built into the console.
ii. Select the Network to obtain the network setting screen, press the right/left arrow to switch the screen to wireless network setup screen
(Figure A).
iii. Select ‘Site Survey” and press refresh to see all available wireless networks, select the correct wireless networks (SSID) from the list,
key in pass phase and press the connect (Figure B). After a few moments, ensure that the message “successfully connected" is displayed.
NOTE:IftheSSIDofaccesspointisnotvisible,pleasekeyinthecorrectSSIDbymanual.IfthefacilityisusingadifferentSSID,
selectthecorrectSSID.
iv. Touch the window provided for entering the pass phrase, Enter the password for the SSID and press Connect (Figure C).
v. The wireless network screen will show the network connect successful or fail to connect (Figure D).
FIGURE B
FIGURE DFIGURE C
FIGURE A
CHAPTER 10: BIKE SPECIFICATIONS AND ASSEMBLY GUIDE
10.7 NETPULSE & AM SETTING UP SOP
3. Access Point setting
a. Use your web browser to open www.meraki.com and login, in the access point screen you can modify the AP name and verify the MAC
address.
CHAPTER 10: CLIMB MILL SPECIFICATIONS AND ASSEMBLY GUIDE
b. In the configure -> SSID screen, you need to enable the “rd02” to enable the Asset Management access, and enable the “npwireless” to
enable the Netpulse access.
c. In the configure -> Access control screen, you can setup the wireless connection.
i. Rd02 setting for Asset Management, select the rd02 SSID.
Set the pre-shared key with WPA2