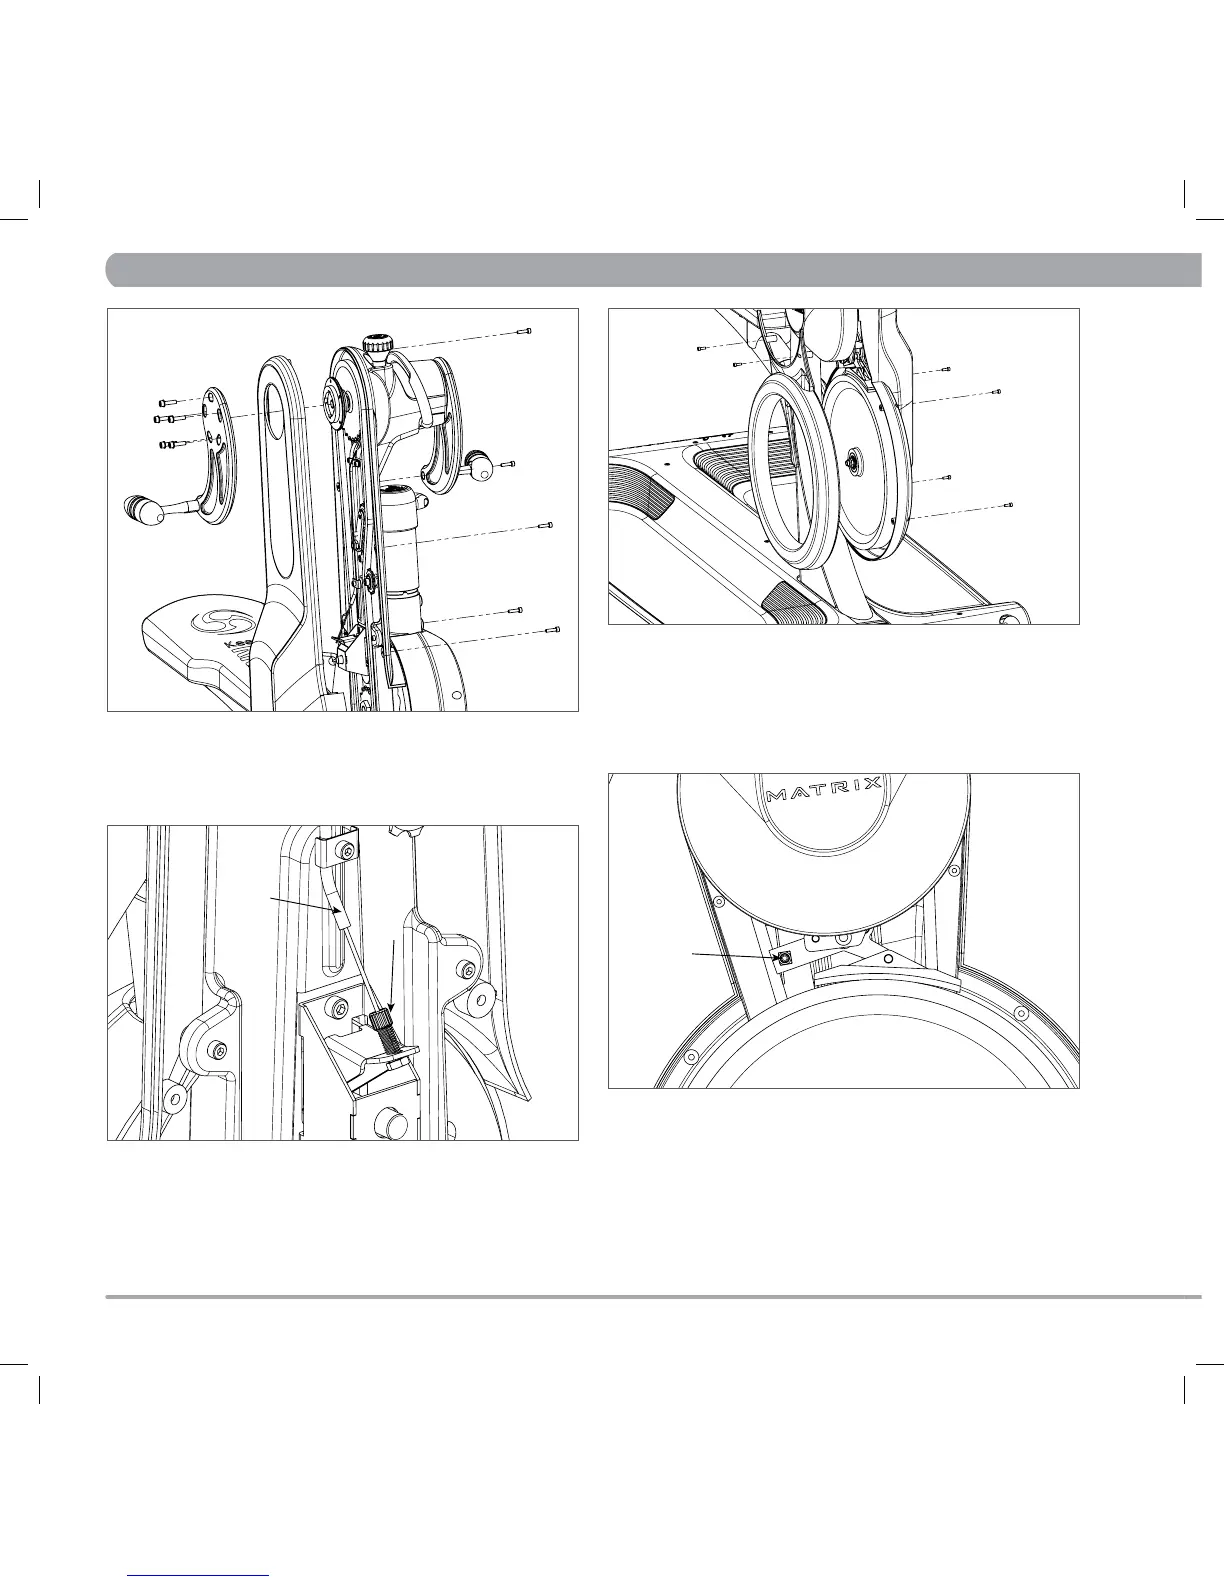
Check cable and cable sheath (A) for excessive wear (replace if necessary).
If the lever still exhibits excessive play, tighten the adjustment screw (B)
clockwise until play is removed. Be careful not to over tighten the adjust-
ment screw as the pivoting mechanism may not fully engage and could lead
to machine failure or injury.
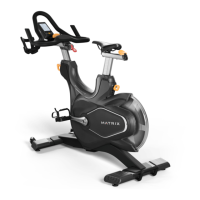
Replace upper outside plastic cover and RIGHT crank arm
FLYWHEEL RESISTANCE TOO HARD EVEN WHEN REDUCED TO THE
MINIMUM, OR RESISTANCE KNOB REQUIRES TOO MANY TURNS
BEFORE BECOMING HARDER
To adjust the brake pad setting, first remove the lower inside plastic cover
by removing 6 socket head cap screws with a 3mm ALLEN KEY WRENCH.
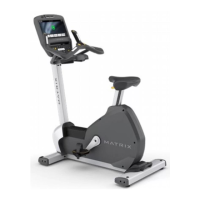
Loosen (do not remove) the brake cable screw (C) and turn the resistance
knob toward the “-“ sign as far as it will go (minimum braking effect). Then
turn the knob toward the “+” sign 1 full revolution. Make sure the brake
pad is pressed against the flywheel, and then secure the brake cable under
the brake cable screw (C). Turn the resistance knob toward the “-“ sign
as far as it will go, the brake pad should have approximately a credit card
thickness between it and the flywheel.
Replace lower inside plastic cover.
A
B
C
Krankcycle_091021.indd 15 10/22/09 8:32 AM

 Loading...