7
866.4.Maxtec www.maxtec.com
CAL Err Bat: Battery voltage too low to recalibrate.
Replace batteries.
5.0 CHANGING THE BATTERIES
Batteries should be changed by service personnel.
» Use only brand name batteries.
» Replace with two AA batteries and insert per orientation marked on the device.
Should the batteries require changing, the device will indicate this in one of
two ways:
»
The battery icon on the bottom of the display will begin to flash. This icon will
continue to flash until the batteries are changed. The unit will continue to function
normally for approx. 200 hours.
»
If the device detects a very low battery level, an error code of “E04” will be present on
the display, and the unit will not function until the batteries are changed.
To change the batteries, begin by removing
the three screws from the back of the device.
A #1 Phillips screwdriver is required to
remove these screws.
Once the screws are removed, gently
separate the two halves of the device.
The batteries can now be replaced from the
back half of the case. Be sure to orient the new
batteries as indicated in the embossed polarity on
the back case.
NOTE: If the batteries are installed incorrectly the
batteries will not make contact and the device will
not operate.
Carefully, bring the two halves of the case together
while positioning the wires so they are not pinched
between the two case halves. The gasket separating the halves will be
captured on the back case half.
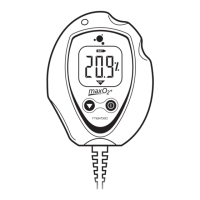
Reinsert the three screws and tighten until the screws are snug. (FIGURE 3)
The device will automatically perform a calibration and begin displaying % of oxygen.
HELPFUL HINT: If unit does not function, verify that the screws are tight to allow
proper electrical connection.
HELPFUL HINT: Before closing the two case halves together, verify that the keyed slot
on top of the coiled cable assembly is engaged on the small tab located on the back
case.This is designed to position the assembly in the correct orientation and prevent
it from rotating. Improper positioning could hinder the case halves from closing and
prevent operation when tightening the screws.
 Loading...