Assemble steering link rod to steering cable with two flat washers and
self‑locking nylon insert locknut. Tighten locknut until it seats, then back nut off
1/4 turn.
Assemble steering link rod to engine with special washer head bolt and
self‑locking nylon insert locknut. First torque bolt, then torque locknut to
specifications.
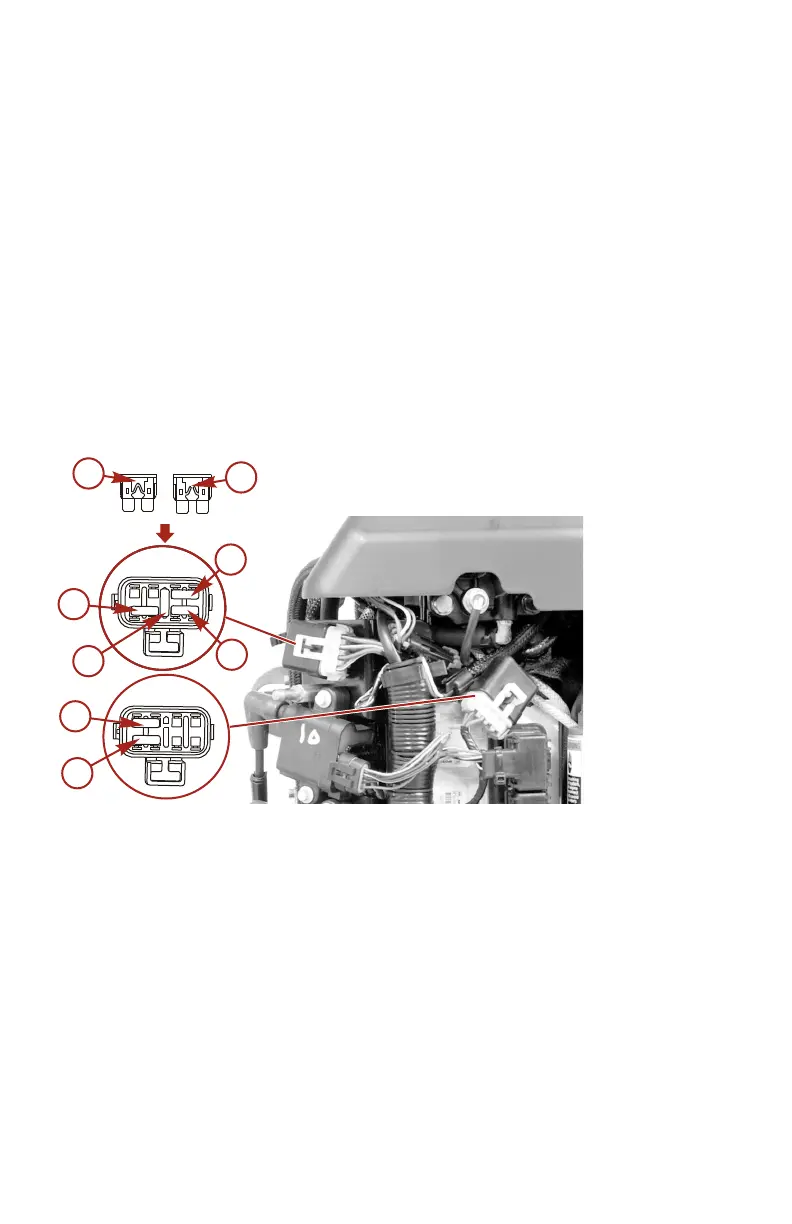
Fuse Replacement
IMPORTANT: Always carry spare 5 and 20‑amp fuses.
The electrical wiring circuits on the outboard are protected from overload by
fuses in the wiring. If a fuse is blown, try to locate and correct the cause of the
overload. If the cause is not found, the fuse may blow again.
Open the fuse holder and look at the silver colored band inside the fuse. If the
band is broken, replace the fuse. Replace fuse with a new fuse with the same
rating.
a - Good fuse
b - Blown fuse
c - 14 pin remote control harness/cowl trim switch/main power relay ‑
15‑amp fuse
d - Ignition coil circuit ‑ 20‑amp fuse
e - SmartCraft data bus circuit ‑ 5‑amp fuse
f - Diagnostics terminal ‑ 2‑amp fuse
g - Spare fuse ‑ 20‑amp fuse
h - Fuel injectors/direct injectors/oil pump/PCM ‑ 20‑amp fuse
MAINTENANCE
86 eng
 Loading...